Lexmark X734de User's Guide - Page 265
<color> photoconductor nearly low, 88 Replace <color> cartridge, 88 <color> cartridge nearly low
 |
View all Lexmark X734de manuals
Add to My Manuals
Save this manual to your list of manuals |
Page 265 highlights
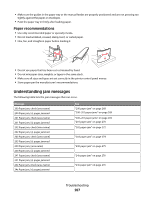
84 photoconductor nearly low 1 Order a replacement photoconductor. 2 When print quality is reduced, install the new photoconductor using the instruction sheet that came with the replacement part. 3 Touch Continue to clear the message and continue printing. 88 Replace cartridge The specified toner cartridge is exhausted. 1 Replace the specified toner cartridge. 2 Touch Continue to clear the message and continue printing. 88 cartridge nearly low 1 Order a replacement toner cartridge. 2 Remove the specified cartridge. 3 Firmly shake the cartridge side-to-side and front-to-back several times to redistribute toner. 4 Reinsert the cartridge, and then touch Continue to clear the message and continue printing. Note: Repeat this procedure multiple times until the print remains faded, and then replace the cartridge. 88 cartridge low 1 Order a replacement toner cartridge immediately. 2 Remove the specified cartridge. 3 Firmly shake the cartridge side-to-side and front-to-back several times to redistribute toner. 4 Reinsert the cartridge, and then touch Continue to clear the message and continue printing. Note: Repeat this procedure multiple times until the print remains faded, and then replace the cartridge. 840.01 Scanner Disabled This message indicates that the scanner has been disabled by the system support person. 840.02 Scanner Auto Disabled The printer identified a problem with the scanner and automatically disabled it. 1 Remove all pages from the ADF. 2 Turn the printer off. Troubleshooting 265
-
 1
1 -
2
-
3
-
4
-
5
-
6
-
7
-
8
-
9
-
10
-
11
-
12
-
13
-
14
-
15
-
16
-
17
-
18
-
19
-
20
-
21
-
22
-
23
-
24
-
25
-
26
-
27
-
28
-
29
-
30
-
31
-
32
-
33
-
34
-
35
-
36
-
37
-
38
-
39
-
40
-
41
-
42
-
43
-
44
-
45
-
46
-
47
-
48
-
49
-
50
-
51
-
52
-
53
-
54
-
55
-
56
-
57
-
58
-
59
-
60
-
61
-
62
-
63
-
64
-
65
-
66
-
67
-
68
-
69
-
70
-
71
-
72
-
73
-
74
-
75
-
76
-
77
-
78
-
79
-
80
-
81
-
82
-
83
-
84
-
85
-
86
-
87
-
88
-
89
-
90
-
91
-
92
-
93
-
94
-
95
-
96
-
97
-
98
-
99
-
100
-
101
-
102
-
103
-
104
-
105
-
106
-
107
-
108
-
109
-
110
-
111
-
112
-
113
-
114
-
115
-
116
-
117
-
118
-
119
-
120
-
121
-
122
-
123
-
124
-
125
-
126
-
127
-
128
-
129
-
130
-
131
-
132
-
133
-
134
-
135
-
136
-
137
-
138
-
139
-
140
-
141
-
142
-
143
-
144
-
145
-
146
-
147
-
148
-
149
-
150
-
151
-
152
-
153
-
154
-
155
-
156
-
157
-
158
-
159
-
160
-
161
-
162
-
163
-
164
-
165
-
166
-
167
-
168
-
169
-
170
-
171
-
172
-
173
-
174
-
175
-
176
-
177
-
178
-
179
-
180
-
181
-
182
-
183
-
184
-
185
-
186
-
187
-
188
-
189
-
190
-
191
-
192
-
193
-
194
-
195
-
196
-
197
-
198
-
199
-
200
-
201
-
202
-
203
-
204
-
205
-
206
-
207
-
208
-
209
-
210
-
211
-
212
-
213
-
214
-
215
-
216
-
217
-
218
-
219
-
220
-
221
-
222
-
223
-
224
-
225
-
226
-
227
-
228
-
229
-
230
-
231
-
232
-
233
-
234
-
235
-
236
-
237
-
238
-
239
-
240
-
241
-
242
-
243
-
244
-
245
-
246
-
247
-
248
-
249
-
250
-
251
-
252
-
253
-
254
-
255
-
256
-
257
-
258
-
259
-
 260
260 -
 261
261 -
 262
262 -
 263
263 -
 264
264 -
 265
265 -
 266
266 -
 267
267 -
 268
268 -
 269
269 -
 270
270 -
271
-
272
-
273
-
274
-
275
-
276
-
277
-
278
-
279
-
280
-
281
-
282
-
283
-
284
-
285
-
286
-
287
-
288
-
289
-
290
-
291
-
292
-
293
-
294
-
295
-
296
-
297
-
298
-
299
-
300
-
301
-
302
-
303
-
304
-
305
-
306
-
307
-
308
-
309
-
310
-
311
-
312
-
313
-
314
-
315
-
316
-
317
-
318
-
319
-
320
-
321
-
322
-
323
-
324
-
325
-
326
-
327
-
328
-
329
-
330
-
331
-
332
-
333
-
334
-
335
-
336
-
337
-
338
 |
 |