Lexmark X782 User's Guide - Page 99
Troubleshooting, Understanding MFP messages, Online technical support, Checking an unresponsive MFP
 |
View all Lexmark X782 manuals
Add to My Manuals
Save this manual to your list of manuals |
Page 99 highlights
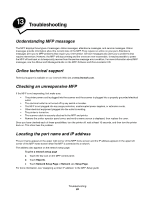
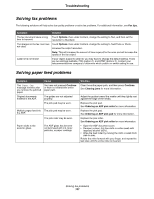
13 Troubleshooting Understanding MFP messages The MFP displays three types of messages: status messages, attendance messages, and service messages. Status messages provide information about the current state of the MFP. They require no action on your part. Attendance messages alert you to MFP problems that require your intervention. Service messages also alert you to problems that require intervention. However, the MFP will stop printing and the errors are non-recoverable. It may be possible to power the MFP off and back on to temporarily recover from the service message error condition. For more information about MFP messages, see the Menus and Messages Guide on the MFP Software and Documentation CD. Online technical support Technical support is available on our Lexmark Web site at www.lexmark.com. Checking an unresponsive MFP If the MFP is not responding, first make sure: • The printer power cord is plugged into the scanner and the scanner is plugged into a properly grounded electrical outlet. • The electrical outlet is not turned off by any switch or breaker. • The MFP is not plugged into any surge protectors, uninterrupted power supplies, or extension cords. • Other electrical equipment plugged into the outlet is working. • The printer is turned on. • The scanner cable is securely attached to the MFP and printer. • Remove the printer operator panel cover, and verify a menu screen is displayed, then replace the cover. Once you have checked each of these possibilities, turn the printer off, wait at least 10 seconds, and then turn the printer back on. This often fixes the problem. Locating the port name and IP address The port name appears in the upper right corner of the MFP home screen and the IP address appears in the upper left corner of the MFP home screen when the MFP is connected to a network. The address also appears on the network setup page. To print a network setup page a Touch the key icon on the MFP control panel. b Touch Reports. c Touch Network Setup Page or Network Setup Page. For more information, see "Assigning a printer IP address" in the MFP Setup guide. Troubleshooting 99
-
 1
1 -
2
-
3
-
4
-
5
-
6
-
7
-
8
-
9
-
10
-
11
-
12
-
13
-
14
-
15
-
16
-
17
-
18
-
19
-
20
-
21
-
22
-
23
-
24
-
25
-
26
-
27
-
28
-
29
-
30
-
31
-
32
-
33
-
34
-
35
-
36
-
37
-
38
-
39
-
40
-
41
-
42
-
43
-
44
-
45
-
46
-
47
-
48
-
49
-
50
-
51
-
52
-
53
-
54
-
55
-
56
-
57
-
58
-
59
-
60
-
61
-
62
-
63
-
64
-
65
-
66
-
67
-
68
-
69
-
70
-
71
-
72
-
73
-
74
-
75
-
76
-
77
-
78
-
79
-
80
-
81
-
82
-
83
-
84
-
85
-
86
-
87
-
88
-
89
-
90
-
91
-
92
-
93
-
 94
94 -
 95
95 -
 96
96 -
 97
97 -
 98
98 -
 99
99 -
 100
100 -
 101
101 -
 102
102 -
 103
103 -
 104
104 -
105
-
106
-
107
-
108
-
109
-
110
-
111
-
112
-
113
-
114
 |
 |