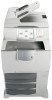
Lexmark X782 PKI-Enabled MFP Installation and Configuration Guide
Lexmark X782 Manual
 |
View all Lexmark X782 manuals
Add to My Manuals
Save this manual to your list of manuals |
Lexmark X782 manual content summary:
- Lexmark X782 | PKI-Enabled MFP Installation and Configuration Guide - Page 1
PKI-Enabled MFP Installation and Configuration Guide Version 2.0.0 www.lexmark.com - Lexmark X782 | PKI-Enabled MFP Installation and Configuration Guide - Page 2
of operation in conjunction with other products, programs, or services, except those expressly designated by the manufacturer, are the user's responsibility. ImageQuick, Optra, Lexmark, and Lexmark with diamond design are trademarks of Lexmark International, Inc. registered in the United States and - Lexmark X782 | PKI-Enabled MFP Installation and Configuration Guide - Page 3
of any Software Program installed on or provided by Lexmark for use in connection with your Lexmark product. The term "Software Program" includes machine-readable instructions, audio/visual content (such as images and recordings), and associated media, printed materials and electronic documentation - Lexmark X782 | PKI-Enabled MFP Installation and Configuration Guide - Page 4
PKI Installation and Configuration Guide correction, and security testing. If you have such statutory rights, you will notify Lexmark in writing DAMAGES (INCLUDING, BUT NOT LIMITED TO, PROCUREMENT OF SUBSTITUTE GOODS OR SERVICES; LOSS OF USE, DATA, OR PROFITS; OR BUSINESS INTERRUPTION) HOWEVER - Lexmark X782 | PKI-Enabled MFP Installation and Configuration Guide - Page 5
PKI Installation and Configuration Guide Table of Contents Lexmark Software License Agreement ii Other Notices ...iii 1 Background Information...1 2 Installing the Firmware and Applications 2 2.1 Firmware Update ...2 2.2 Smartcard Driver...3 2.3 PKI Applications...6 3 Configuring the Basic MFP - Lexmark X782 | PKI-Enabled MFP Installation and Configuration Guide - Page 6
PKI Installation and Configuration Guide Version 2.0.0 Page v - Lexmark X782 | PKI-Enabled MFP Installation and Configuration Guide - Page 7
Pre-Installation Guide for the Lexmark PKI-Enabled MFP. If not, please consult that guide before continuing with the installation. Numerous with the install, make sure the following has taken place: 1. The MFP has been unboxed and setup as according to the end-user manual. 2. The MFP has been - Lexmark X782 | PKI-Enabled MFP Installation and Configuration Guide - Page 8
comes in three parts: • PKI/AD Firmware • Smartcard Driver • PKI Applications All three need to be installed in order to activate PKI support. The SmartCard Reader cannot be installed on the MFP prior to completing all the steps in this section. 2.1 Firmware Update NOTE: Installing the PKI/AD - Lexmark X782 | PKI-Enabled MFP Installation and Configuration Guide - Page 9
to your MFP model. MFP Model X644 and X646 X85x X782 X94x T64x + X4600 Firmware File LC2_MC_P254PAh1_full. Driver After the firmware has been updated, the Smartcard Driver compatible with the type of cards being used must be installed. 1. Bring up the MFP's web page and click Configuration - Lexmark X782 | PKI-Enabled MFP Installation and Configuration Guide - Page 10
2. One Embedded Solution (PKI/Active Directory Application) is automatically installed when the PKI/AD firmware is installed. Click the Install button. Version 2.0.0 Page 4 - Lexmark X782 | PKI-Enabled MFP Installation and Configuration Guide - Page 11
3. Browse to the Smartcard Driver solution file and click Start Install. See the table below for filename that corresponds to supported card types. Card Type CAC / DOD Solution File scif-cac-2_0_0.fls 4. Wait for the install to complete and then click Return. Version 2.0.0 Page 5 - Lexmark X782 | PKI-Enabled MFP Installation and Configuration Guide - Page 12
should now be two embedded solutions installed on the MFP. Note: The Name and Version of the Smartcard Driver Application displayed here may differ from what is displayed on your MFP. 2.3 PKI Applications Once the firmware and Smartcard Driver have been installed, the application files can then be - Lexmark X782 | PKI-Enabled MFP Installation and Configuration Guide - Page 13
2. Browse to the PKI Authentication Application solution file, pkiad-2_0_0.fls, and click Start Install. 3. Wait for the install to complete and then click Return. Version 2.0.0 Page 7 - Lexmark X782 | PKI-Enabled MFP Installation and Configuration Guide - Page 14
each of the following PKI applications. If a particular function will not be used, it does not need to be installed. PKI Function User Authorization for Copy, Fax, and/or FTP Scan to Email Scan to Network Solution File pkistdapps-2_0_0.fls pkiemail-2_0_0.fls pkinetworkscan-2_0_0.fls 5. The - Lexmark X782 | PKI-Enabled MFP Installation and Configuration Guide - Page 15
using the information obtained in the Pre-Installation Guide to configure the basic MFP Settings. Even if this device has been date and time of the Domain Controller. The time can be set manually on the device or it can be acquired from a time server. 1. Click Configuration and then click Set Date - Lexmark X782 | PKI-Enabled MFP Installation and Configuration Guide - Page 16
Pre-Installation 2. The Date and Time screen is displayed. Section 2.3 If setting the time manually: • Set the Time Zone • Set TCP/IP Settings While not explicitly part of the PKI Application Setup, it is a good idea to verify all necessary TCP/IP Settings are configured. Version 2.0.0 Page 10 - Lexmark X782 | PKI-Enabled MFP Installation and Configuration Guide - Page 17
1. Click Configuration and then click Network/Ports. 2. Click TCP/IP. Pre-Installation Section 2.4 3. Check the value in the Domain Name field. Set it to the value listed in Pre-Installation Section 2.4, Item 1. If there are any other values given in Items 2 to 4, add them to the Domain Search - Lexmark X782 | PKI-Enabled MFP Installation and Configuration Guide - Page 18
Pre-Installation Section 2.2 4. If using a Static IP Address, also check the WINS and DNS Server Address and make sure there is Setup If Scan to Email is to be allowed on this device, the Email Server settings must be configured; otherwise, this section can be skipped. Version 2.0.0 Page 12 - Lexmark X782 | PKI-Enabled MFP Installation and Configuration Guide - Page 19
1. Click Configuration and then click Network/Ports. 2. Click Email Server Setup. Version 2.0.0 Page 13 - Lexmark X782 | PKI-Enabled MFP Installation and Configuration Guide - Page 20
not necessary since it will be set to the logged in user's email address. 4. Review any of the other settings and then click Submit. 3.4 Address Book Setup The Address Book Setup serves as the default LDAP setup for the MFP. Configuring this allows for searching the global address book when sending - Lexmark X782 | PKI-Enabled MFP Installation and Configuration Guide - Page 21
1. Click Configuration and then click Network/Ports. 2. Click Address Book Setup. Version 2.0.0 Page 15 - Lexmark X782 | PKI-Enabled MFP Installation and Configuration Guide - Page 22
3. The Address Book Setup page is displayed. Section 2.5, items 1 - 7 The following fields need to be filled in: Field Corresponding Pre-Installation Guide Section 4.2 Item Server Address Item 1 (Use the hostname rather than the IP address) Server Port Item 2 Use SSL/TLS Item 3 LDAP - Lexmark X782 | PKI-Enabled MFP Installation and Configuration Guide - Page 23
Pre-Installation Section 2.5, item 8 5. If using the user's credentials to connect to the LDAP server, no other changes are necessary. If connecting anonymously or using a service account, then return to the Address Book Setup Screen and click MFP Credentials. Version 2.0.0 Page 17 - Lexmark X782 | PKI-Enabled MFP Installation and Configuration Guide - Page 24
the Anonymous LDAP Bind. If connecting using a service account, uncheck the Anonymous LDAP Bind option and provide the MFP's Distinguished Name and Password. The Kerberos settings are not used. Click Submit. 3.5 Auto-Logout 1. Click Configuration and then click Security. Version 2.0.0 Page 18 - Lexmark X782 | PKI-Enabled MFP Installation and Configuration Guide - Page 25
Auto "Log out" delay value. Section 3.4.1 3. Click Submit. 3.6 Pre-Installation Certificate Management Sections 2.5 item 3, Certificates are needed for SSL support in LDAP lookups and for Domain Controller 3.2.2.1.1, 8.1, 8.2, & 8.3 verification. All certificates needed by the device must be - Lexmark X782 | PKI-Enabled MFP Installation and Configuration Guide - Page 26
1. Click Configuration and then click Security. 2. Click Certificate Management. Version 2.0.0 Page 20 - Lexmark X782 | PKI-Enabled MFP Installation and Configuration Guide - Page 27
3. Click Install a New Certificate Authority Certificate. 4. Browse to the file containing the certificates and then click Submit. Version 2.0.0 Page 21 - Lexmark X782 | PKI-Enabled MFP Installation and Configuration Guide - Page 28
4 Configuring PKI/AD Authentication This application is required for the PKI-enabled MFP. This section details the configuration steps. 1. Click Configuration and then click Embedded Solutions. Version 2.0.0 Page 22 - Lexmark X782 | PKI-Enabled MFP Installation and Configuration Guide - Page 29
2. Select the PKI/AD Authentication solution by clicking its name. 4.1 General Settings After selecting PKI/AD Authentication from the Embedded Solutions list, click the Configure tab. Version 2.0.0 Page 23 - Lexmark X782 | PKI-Enabled MFP Installation and Configuration Guide - Page 30
lists each setting and the corresponding Pre-Installation Section/Item that contains the value needed for that field. Setting User Validation Mode DC Validation Mode OCSP Responder URL OCSP Proxy URL OCSP Responder Certificate OCSP Responder Timeout Use MFP Kerberos Setup Kerberos Realm Kerbeos KDC - Lexmark X782 | PKI-Enabled MFP Installation and Configuration Guide - Page 31
Allow Fax Without Card Logon Type Manual Login Default Domain Manual Login Search Attribute Manual Login Code Page Display MFP Info Display Printer Status MFP Default Card Lookup Field MFP Default Search Attribute Enable User Authorization User Authorization Lookup Device Authorization Authorization - Lexmark X782 | PKI-Enabled MFP Installation and Configuration Guide - Page 32
Settings If you have defined a custom LDAP configuration that differs from the MFP's Default LDAP Configuration, continue with this section; otherwise, it can be skipped. After selecting PKI/AD Authentication from the Embedded Solutions list, click the LDAP Configuration tab. Version 2.0.0 Page 26 - Lexmark X782 | PKI-Enabled MFP Installation and Configuration Guide - Page 33
4.2.1 Adding a New Configuration 1. Click New to create a new LDAP Configuration. Version 2.0.0 Page 27 - Lexmark X782 | PKI-Enabled MFP Installation and Configuration Guide - Page 34
Referring to section 7 of the Pre-Installation Guide, use the following table to configure the settings. 3. Setting Corresponding Pre-Installation Guide Section/Item Configuration Configuration 1 uses Section 8.1; Configuration 2 uses Section 8.2; Configuration 3 uses Section 8.3 Use KDC for - Lexmark X782 | PKI-Enabled MFP Installation and Configuration Guide - Page 35
Item 8 Item 9 Item 9 Only Used if Authentication is set to MFP User ID. Item 9 Only Used if Authentication is set to MFP User ID. 4. Click Apply. 5. Repeat for each custom configuration that needs to be created. A maximum of three configurations can be created; and each must be named a different - Lexmark X782 | PKI-Enabled MFP Installation and Configuration Guide - Page 36
4.2.3 Removing an Existing Configuration 1. Check the box next to the configuration to be removed. 2. Click the Remove button. Version 2.0.0 Page 30 - Lexmark X782 | PKI-Enabled MFP Installation and Configuration Guide - Page 37
5 Configuring PKI/AD Standard Applications This application is only used if User Authorization is enabled for Copy, Fax, or FTP. You can skip this section if this application has not been installed. 1. Click Configuration and then click Embedded Solutions. Version 2.0.0 Page 31 - Lexmark X782 | PKI-Enabled MFP Installation and Configuration Guide - Page 38
2. Select the PKI/AD Standard Apps solution by clicking its name. Version 2.0.0 Page 32 - Lexmark X782 | PKI-Enabled MFP Installation and Configuration Guide - Page 39
3. Click the Configure Tab. 4. The following table lists each setting and the corresponding Pre-Installation Section/Item that contains the value needed for that field. Setting Copy Authorization Copy Authorization List Fax Authorization Fax Authorization List FTP Authorization FTP Authorization - Lexmark X782 | PKI-Enabled MFP Installation and Configuration Guide - Page 40
6 Configuring PKI/AD Email This application is only used if Scan to Email is enabled. You can skip this section if this application has not been installed. 1. Click Configuration and then click Embedded Solutions. Version 2.0.0 Page 34 - Lexmark X782 | PKI-Enabled MFP Installation and Configuration Guide - Page 41
2. Select the PKI/AD Email solution by clicking its name. Version 2.0.0 Page 35 - Lexmark X782 | PKI-Enabled MFP Installation and Configuration Guide - Page 42
3. Click the Configure Tab. 4. The following table lists each setting and the corresponding Pre-Installation Section/Item that contains the value needed for that field. Setting Email Authorization Email Authorization List SMTP Server Authentication Device Userid Device Password User Can Change - Lexmark X782 | PKI-Enabled MFP Installation and Configuration Guide - Page 43
Section 5.6.1 Item 1 Section 5.6.2 Item 1 Section 5.6.3 (after table) Section 5.6.1 Item 2 SHA1 - only algorithm currently supported Section 5.6.1 Item 3 Section 5.6.2 Item 2 Triple DES - only algorithm currently supported Section 5.6.2 Item 3 Section 5.6.2 Item 3 Version 2.0.0 Page 37 - Lexmark X782 | PKI-Enabled MFP Installation and Configuration Guide - Page 44
7 Configuring PKI/AD Scan to Network This application is only used if Scan to Network is enabled. You can skip this section if this application has not been installed. 1. Click Configuration and then click Embedded Solutions. Version 2.0.0 Page 38 - Lexmark X782 | PKI-Enabled MFP Installation and Configuration Guide - Page 45
2. Select the PKI/AD Scan To Network solution by clicking its name. 7.1 General Settings After selecting PKI/AD Scan To Network from the Embedded Solutions list, click the Configure tab. Version 2.0.0 Page 39 - Lexmark X782 | PKI-Enabled MFP Installation and Configuration Guide - Page 46
for that field. Setting Button Text Up Icon Down Icon Scan To Network Authorization Authorization List Corresponding Pre-Installation Guide Section/Item Section 6.1 Item 1 To use a different icon, contact Lexmark to get a "blank" button to be used as the base. To use a different icon, contact - Lexmark X782 | PKI-Enabled MFP Installation and Configuration Guide - Page 47
After selecting PKI/AD Scan To Network from the Embedded Solutions list, click the File Shares tab to define one or more fileshares that users can access. At least one fileshare must be defined or the user will see an error that this feature has not yet been configured. Version 2.0.0 Page 41 - Lexmark X782 | PKI-Enabled MFP Installation and Configuration Guide - Page 48
7.2.1 Adding a New Fileshare 1. Click New to create a new Fileshare. Version 2.0.0 Page 42 - Lexmark X782 | PKI-Enabled MFP Installation and Configuration Guide - Page 49
3. Use the following table to configure the settings. Setting Corresponding Pre-Installation Guide Section/Item File Share Authorization Section 6.2 Item 1 Authorization list Section 6.2 Item 2 Display Name Section 6.2 Item 3 UNC Path Section 6.2 Item 4 Replacement Value If the UNC Path - Lexmark X782 | PKI-Enabled MFP Installation and Configuration Guide - Page 50
limit to the number of fileshares that can be created. 7.2.2 Editing an Existing Fileshare 1. Click the name of the Fileshare to be edited. 2. The Fileshare Configuration page for that configuration will be displayed. 3. Make any changes and then click Apply. Version 2.0.0 Page 44 - Lexmark X782 | PKI-Enabled MFP Installation and Configuration Guide - Page 51
7.2.3 Removing an Existing Fileshare 1. Check the box next to the fileshare to be removed. 2. Click the Remove button. Version 2.0.0 Page 45 - Lexmark X782 | PKI-Enabled MFP Installation and Configuration Guide - Page 52
the PKI-enabled MFP. Please review these and possible causes/resolutions prior to contacting the Lexmark Solutions HelpDesk. 8.1 Login Issues Error Message/Symptom Unsupported USB Device Possible Cause/Resolution Cause: A supported SmartCard reader has been installed prior to the PKI firmware and - Lexmark X782 | PKI-Enabled MFP Installation and Configuration Guide - Page 53
check the MFP's date and time. Kerberos configuration file has not been uploaded. The Domain Controller Issuing Certificate has not been installed. The Domain Controller Issuing Certificate ("name of certificate") has not been installed. The KDC did not respond within the required time. User's Realm - Lexmark X782 | PKI-Enabled MFP Installation and Configuration Guide - Page 54
long time to complete. Resolution: See the LDAP Troubleshooting section below. Cause: The "Auto Log-Out" timeout is set too short. Resolution: See section 3.5 to configure this setting. 8.2 LDAP Issues Error Message/Symptom LDAP lookups (at "Getting User Info" during login or searching the address - Lexmark X782 | PKI-Enabled MFP Installation and Configuration Guide - Page 55
LDAP lookups (searching address book, getting user's email address, getting user's home directory) fail almost immediately blocked by a firewall. Resolution: These ports are used by the MFP to communicate with the LDAP Server and must be open in order for LDAP lookups to work. Cause: Reverse DNS - Lexmark X782 | PKI-Enabled MFP Installation and Configuration Guide - Page 56
error occurred trying to get your email address. Possible Cause/Resolution Cause: Using manual login and the From Email Address is configured to come from the card. Resolution: If manual solution settings to Disabled or Prompt User; instruct users that perform a manual login to not choose the - Lexmark X782 | PKI-Enabled MFP Installation and Configuration Guide - Page 57
25 is required in order for the MFP to communicate with the SMTP Server. 8.4 Scan To Network Issues Error Message/Symptom You are not authorized to use this feature. This feature is not available because no fileshares have been configured by the system administrator. This feature is not available - Lexmark X782 | PKI-Enabled MFP Installation and Configuration Guide - Page 58
user. Cause: The LDAP lookup failed. Resolution: See section 8.2 above. Cause: The LDAP lookup succeeded but the attribute chosen for the replacement included as part of the filename provided by the user. An error occurred connecting or writing to the File Share. Resolution: The user cannot include - Lexmark X782 | PKI-Enabled MFP Installation and Configuration Guide - Page 59
. This port must be open in order to use Scan to Network. Cause: The MFP connected to the file server but the share name does not exist. Resolution: Verify the share name is correct and that the user has read/write access to that share. Cause: The share name is correct but - Lexmark X782 | PKI-Enabled MFP Installation and Configuration Guide - Page 60
- Lexmark and Lexmark with diamond design are trademarks of Lexmark International, Inc., registered in the United States and/or other countries. © 2007 - 2008 Lexmark International, Inc. 740 West New Circle Road Lexington, KY 40550 Version 2.0.0 www.lexmark.com Page 54
-
 1
1 -
 2
2 -
 3
3 -
 4
4 -
 5
5 -
 6
6 -
 7
7 -
8
-
9
-
10
-
11
-
12
-
13
-
14
-
15
-
16
-
17
-
18
-
19
-
20
-
21
-
22
-
23
-
24
-
25
-
26
-
27
-
28
-
29
-
30
-
31
-
32
-
33
-
34
-
35
-
36
-
37
-
38
-
39
-
40
-
41
-
42
-
43
-
44
-
45
-
46
-
47
-
48
-
49
-
50
-
51
-
52
-
53
-
54
-
55
-
56
-
57
-
58
-
59
-
60
 |
 |

PKI-Enabled MFP
Installation and Configuration Guide
Version 2.0.0
www.lexmark.com