Lexmark X792 Scan to Network and Scan to Network Premium Administrator's Guide - Page 14
Scan Adjustments, Custom Prompts, Enable Custom Prompts
 |
View all Lexmark X792 manuals
Add to My Manuals
Save this manual to your list of manuals |
Page 14 highlights
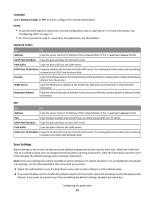
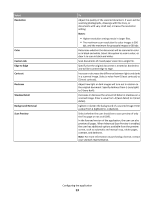
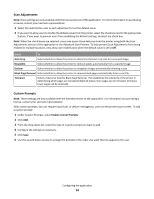
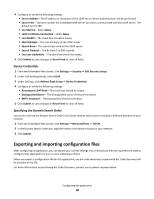
Scan Adjustments Note: These settings are only available with the licensed version of the application. For more information on purchasing a license, contact your Lexmark representative. 1 Select the radio button next to each adjustment to set the default value. 2 If you want to allow users to modify the default values from the printer, select the check box next to the appropriate feature. If you want to prevent users from modifying the default settings, deselect the check box. Note: When the check boxes are selected, users may access these features from the printer using both the Scan Adjustments section of the application or the Advanced Scan Preview. To help prevent Scan Adjustments from being enabled in multiple locations, only allow user modification when the default value is set to Off. Select To Auto Crop Select whether to allow the printer to determine the best crop area for a scanned image. Despeckle Select whether to allow the printer to remove specks automatically from a scanned image. Deskew Select whether to allow the printer to straighten images automatically following a scan. Blank Page Removal Select whether to allow the printer to remove blank pages automatically from a scan file. Tolerance Select a Tolerance level for Blank Page Removal. This establishes the sensitivity of the printer in determining which pages are considered blank (0 means more pages can be removed; 10 means fewer pages can be removed). Custom Prompts Note: These settings are only available with the licensed version of the application. For information on purchasing a license, contact your Lexmark representative. With custom prompts, you can require input from, or deliver messages to, users via the printer touch screen. To add a custom prompt: 1 Under Custom Prompts, select Enable Custom Prompts. 2 Click Add. 3 From the drop-down list, select the type of custom prompt you want to add. 4 Configure the settings as necessary. 5 Click Save. 6 Use the up and down arrows to arrange the prompts in the order you want them to appear to the user. Configuring the application 14
-
 1
1 -
2
-
3
-
4
-
5
-
6
-
7
-
8
-
 9
9 -
 10
10 -
 11
11 -
 12
12 -
 13
13 -
 14
14 -
 15
15 -
 16
16 -
 17
17 -
 18
18 -
 19
19 -
20
-
21
-
22
-
23
-
24
-
25
-
26
-
27
-
28
-
29
-
30
-
31
-
32
-
33
-
34
-
35
-
36
-
37
 |
 |
