Lexmark X85 Setup Sheet (953 KB) - Page 2
Select, Install and Agree, Install Now - windows 7
 |
View all Lexmark X85 manuals
Add to My Manuals
Save this manual to your list of manuals |
Page 2 highlights
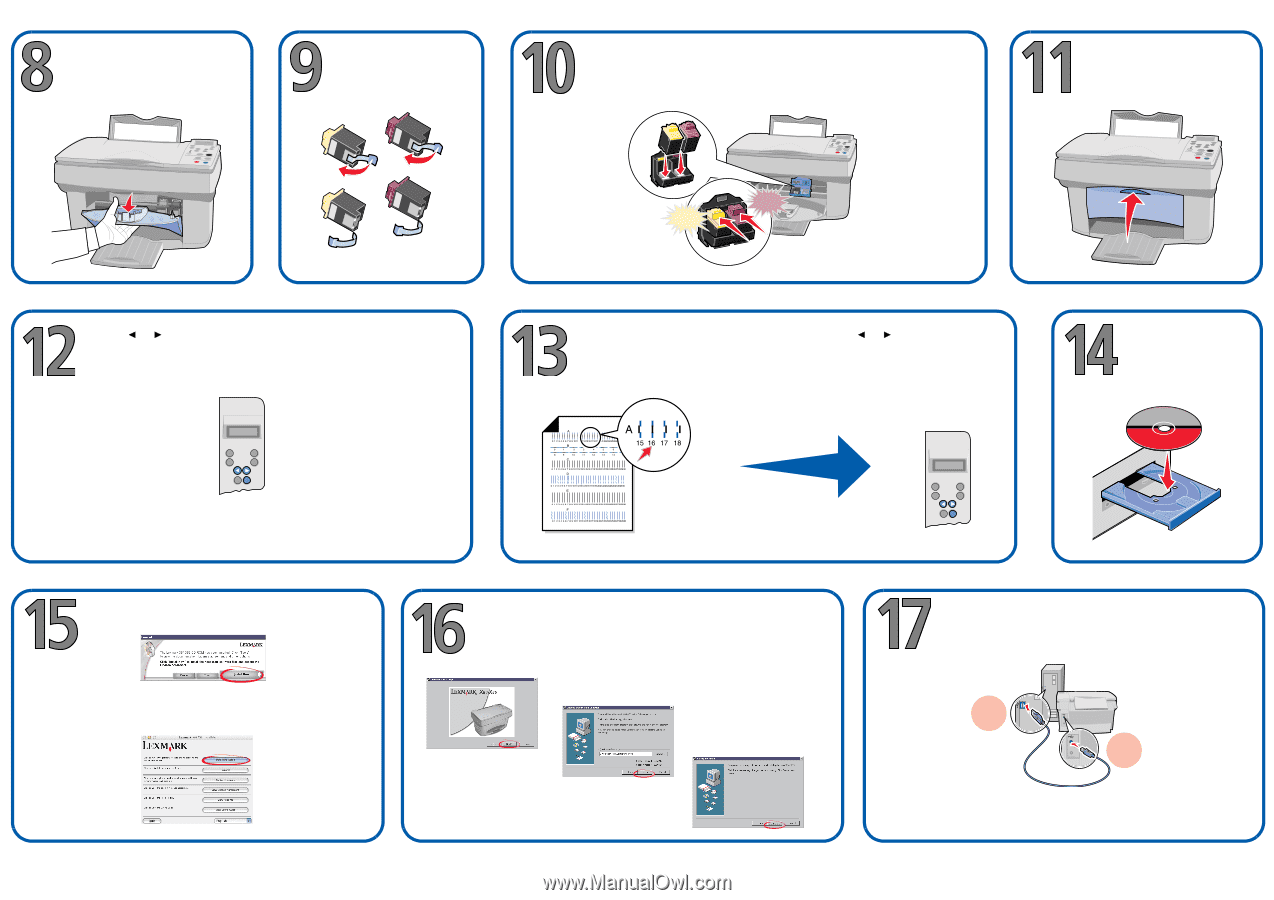
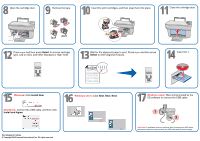
Open the cartridge door. Remove the tape. Insert the print cartridges, and then snap them into place. Close the cartridge door. Press or and then press Select to choose cartridge type, (old or new), and either Standard or High Yield. Snap Snap Wait for the alignment page to print. Press or and then press Select to enter alignment values. Insert CD 1. Windows: Click Install Now. Macintosh: Connect the USB cable, and then click Install and Agree. Windows users: Click Next, Next, Next. P/N 10K0620 EC 10K034 © Copyright 2002 Lexmark International, Inc. All rights reserved. Windows users: Wait until prompted by the CD software to connect the USB cable. 1 2 Important: If installation does not continue after connecting the USB cable, disconnect, and then reconnect both the USB cable and the power supply.
-
 1
1 -
 2
2
 |
 |