Lexmark X945e Troubleshooting Guide - Page 8
Solving print quality problems - photoconductor
 |
View all Lexmark X945e manuals
Add to My Manuals
Save this manual to your list of manuals |
Page 8 highlights
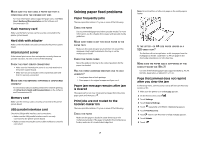
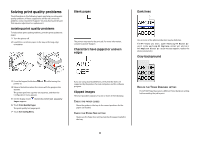
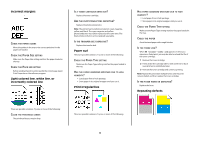
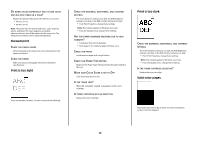
Solving print quality problems The information in the following topics may help you solve print quality problems. If these suggestions still do not correct the problem, contact Customer Support. You may have a printer part that requires adjustment or replacement. Isolating print quality problems To help isolate print quality problems, print the print quality test pages: 1 Turn the printer off. 2 Load letter- or A4-size paper in the tray in the long-edge orientation. Blank pages The printer may need to be serviced. For more information, contact Customer Support. Characters have jagged or uneven edges Dark lines One or more of the photoconductors may be defective. If an 84 Color pc unit life warning, 84 Black pc unit life warning, 84 Replace color pc units, or 84 Replace black pc unit message appears, replace the photoconductor(s). Gray background 3 From the keypad, hold down and while turning the printer on. 4 Release the buttons when the screen with the progress bar appears. The printer performs a power-on sequence, and then the Configuration menu appears. 5 On the display, touch repeatedly until Print Quality Pages appears. 6 Touch Print Quality Pages. The print quality test pages print. 7 Touch Exit Config Menu. If you are using downloaded fonts, verify that the fonts are supported by the printer, the host computer, and the software program. Clipped images These are possible solutions. Try one or more of the following: CHECK THE PAPER GUIDES Move the guides in the tray to the correct positions for the paper size loaded. CHECK THE PAPER SIZE SETTING Make sure the Paper Size setting matches the paper loaded in the tray. REDUCE THE TONER DARKNESS SETTING From Print Properties, select a different Toner Darkness setting before sending the job to print. 8
-
 1
1 -
2
-
 3
3 -
 4
4 -
 5
5 -
 6
6 -
 7
7 -
 8
8 -
 9
9 -
 10
10 -
 11
11 -
 12
12 -
 13
13
 |
 |
