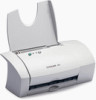
Lexmark Z12 Color Jetprinter User's Guide for Macintosh (2.5 MB) - Page 57
Installing printer software, Installing printer, software
 |
View all Lexmark Z12 Color Jetprinter manuals
Add to My Manuals
Save this manual to your list of manuals |
Page 57 highlights
Steps to basic printing Maintaining your printer Troubleshooting Appendix Appendix This section contains information about: • Installing printer software • Uninstalling printer software • Power supply • Safety Installing printer software You can obtain the printer software using the: • Compact disc (CD) that came with your printer • World Wide Web If your printer software does not install properly, a communications error message appears when you try to print. You may need to uninstall and then reinstall the printer software. For help, see page 58. Using the CD 1 Start Mac OS. 2 When the desktop appears, insert the software CD. The Lexmark Z12 software installation screen appears. 3 Click Install and Agree. 4 Click Install. 5 Select the Lexmark Z12 printer in the Chooser by following the steps on the dialog box. Note: If your Macintosh computer locks up while printing, you may need to turn off the printer and the computer, and then turn them back on. When you turn them back on, the printer driver's spooler may attempt to start printing the job that was in the queue before the computer locked up. This could cause your system to lock up again. To recover from this problem: 1 Turn off the printer and the computer. 2 Hold down the Shift key and turn the computer on. 3 Continue to hold the Shift key until you see the Mac OS screen and the words Extensions Off. 4 Release the Shift key. 5 Locate the Lexmark Z12 printer icon on your desktop. The inactive printer spooler has an X over it. 6 Double-click the icon to open the Lexmark Z12 dialog box. 7 Drag your print jobs to the trash can. 8 Restart the computer to enable the extensions. 57 Index
-
 1
1 -
2
-
3
-
4
-
5
-
6
-
7
-
8
-
9
-
10
-
11
-
12
-
13
-
14
-
15
-
16
-
17
-
18
-
19
-
20
-
21
-
22
-
23
-
24
-
25
-
26
-
27
-
28
-
29
-
30
-
31
-
32
-
33
-
34
-
35
-
36
-
37
-
38
-
39
-
40
-
41
-
42
-
43
-
44
-
45
-
46
-
47
-
48
-
49
-
50
-
51
-
 52
52 -
 53
53 -
 54
54 -
 55
55 -
 56
56 -
 57
57 -
 58
58 -
 59
59 -
 60
60 -
 61
61 -
 62
62
 |
 |
