Lexmark Z1420 User's Guide - Page 11
Setting up the printer, Checking the box contents - power supply
 |
UPC - 734646022750
View all Lexmark Z1420 manuals
Add to My Manuals
Save this manual to your list of manuals |
Page 11 highlights
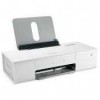
Setting up the printer To set up the printer, follow the instructions on the 1-2-3 sheet that came with the product. Checking the box contents 8 1 7 2 3 6 5 1 2 4 3 Name Description 1 Power supply cord Fits into the power supply attached to the back of the printer. 2 Power supply Fits into the hollow area at the back of the printer. 3 Installation software CD • Installation software for the printer • Help • User's Guide in electronic format (printed User's Guide only available in certain geographies) 4 Installation cable Connects the printer to the computer. 5 Getting Started Printed booklet that serves as a guide. Note: Complete user information (User's Guide or Mac Help) can be found on the installation software CDs. 6 Quick Setup sheet Initial setup directions. 7 Color print cartridge Cartridge to be installed in the right cartridge carrier. For more information, see "Installing print cartridges" on page 33. 8 Black print cartridge Cartridge to be installed in the left cartridge carrier. For more information, see "Installing print cartridges" on page 33. 11
-
 1
1 -
2
-
3
-
4
-
5
-
 6
6 -
 7
7 -
 8
8 -
 9
9 -
 10
10 -
 11
11 -
 12
12 -
 13
13 -
 14
14 -
 15
15 -
 16
16 -
17
-
18
-
19
-
20
-
21
-
22
-
23
-
24
-
25
-
26
-
27
-
28
-
29
-
30
-
31
-
32
-
33
-
34
-
35
-
36
-
37
-
38
-
39
-
40
-
41
-
42
-
43
-
44
-
45
-
46
-
47
-
48
-
49
-
50
-
51
-
52
-
53
 |
 |
