Lexmark Z738 User's Guide for Mac OS 9 - Page 39
Step 3: Print your iron-on transfers, Printing transparencies, Step 1: Load the transparencies
 |
View all Lexmark Z738 manuals
Add to My Manuals
Save this manual to your list of manuals |
Page 39 highlights
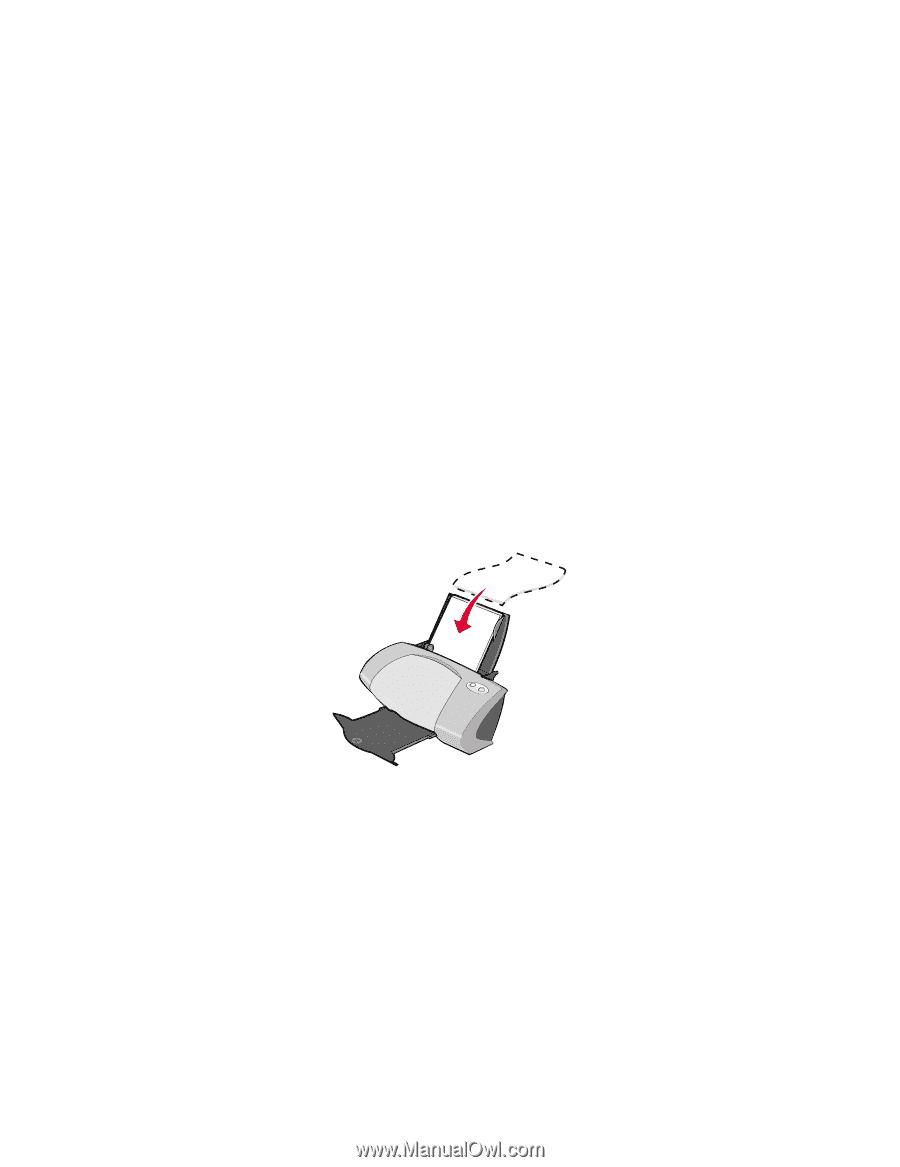
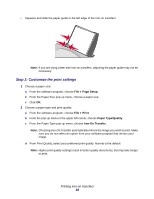
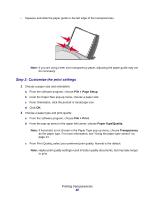
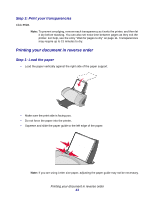
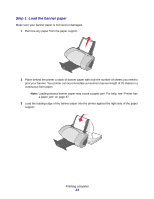
Step 3: Print your iron-on transfers Click Print. Note: To prevent smudging, remove each iron-on transfer as it exits the printer, and then let it dry before stacking. You can also set extra time between pages as they exit the printer. For help, see the entry on "Wait for pages to dry" on page 11. Printing transparencies You can load up to 50 transparencies, depending on the thickness of the transparencies. Step 1: Load the transparencies • Use transparencies designed for inkjet printers. • If the transparencies have paper backing sheets, make sure you separate the paper from the transparencies before you load them. • If your transparencies include instructions, read them carefully. • Load the transparencies vertically against the right side of the paper support. • Make sure your transparencies are not used or damaged. • Make sure the rough (print) side of the transparencies is facing you. If the transparencies have a removable strip, make sure each strip is facing away and down toward the printer. • Do not force the transparencies into the printer. Printing transparencies 39
-
 1
1 -
2
-
3
-
4
-
5
-
6
-
7
-
8
-
9
-
10
-
11
-
12
-
13
-
14
-
15
-
16
-
17
-
18
-
19
-
20
-
21
-
22
-
23
-
24
-
25
-
26
-
27
-
28
-
29
-
30
-
31
-
32
-
33
-
 34
34 -
 35
35 -
 36
36 -
 37
37 -
 38
38 -
 39
39 -
 40
40 -
 41
41 -
 42
42 -
 43
43 -
 44
44 -
45
-
46
-
47
-
48
-
49
-
50
-
51
-
52
-
53
-
54
-
55
-
56
-
57
-
58
-
59
-
60
-
61
-
62
-
63
-
64
-
65
-
66
-
67
-
68
-
69
-
70
-
71
-
72
-
73
-
74
-
75
-
76
-
77
-
78
-
79
-
80
-
81
 |
 |