Linksys NSS6100 Cisco NSS4000 and NSS6000 Series Network Storage System Gettin - Page 21
Step 4: Create a RAID Array
 |
UPC - 745883578863
View all Linksys NSS6100 manuals
Add to My Manuals
Save this manual to your list of manuals |
Page 21 highlights
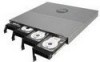
To configure the time settings for the NSS: 1. From the Manager Menu, click Admin The NTP Configuration page appears. Time. Chapter Getting Started Guide 3 2. To use an NTP server to maintain the NSS time, click Automatically (via NTP). To assign the time manually, skip to step 4. 3. If your DHCP server is configured to provide NTP settings, select "Assign automatically via DHCP". If not, manually configure the NTP settings. In the NTP Server fields, enter the IP address or hostname for the NTP servers you wish to synchronize. Note that the settings in these fields are also used as a fallback if you chose to get NTP settings from your DHCP server. The NTP servers can be located on your network or can be public NTP servers located on the Internet. Skip to step 6. 4. Click Manually. 5. Enter the date and time in the Date and Time fields. 6. Select your time zone from the Time Zone drop-down menu. 7. Click Update. Step 4: Create a RAID Array After you install the physical disks, you can create the RAID arrays. Before you create a RAID array, either for the first time, or when you are rebuilding it as a result of failed disks in the array, it is a good idea to set the Rebuild Priority to determine how you want to allocate the system resources for the rebuild. Chapter 3: Configuring the Network Storage System 19 (NSS)
-
 1
1 -
2
-
3
-
4
-
5
-
6
-
7
-
8
-
9
-
10
-
11
-
12
-
13
-
14
-
15
-
 16
16 -
 17
17 -
 18
18 -
 19
19 -
 20
20 -
 21
21 -
 22
22 -
 23
23 -
 24
24 -
 25
25 -
 26
26 -
27
-
28
-
29
-
30
-
31
-
32
-
33
-
34
-
35
-
36
-
37
-
38
-
39
-
40
-
41
-
42
-
43
-
44
-
45
-
46
-
47
-
48
-
49
-
50
-
51
-
52
-
53
-
54
-
55
 |
 |
