Linksys SRW224P Cisco WAP54GP Wireless-G Exterior Access Point User Guide - Page 20
Ground the Access Point, Attach the Mounting Plate
 |
UPC - 745883566068
View all Linksys SRW224P manuals
Add to My Manuals
Save this manual to your list of manuals |
Page 20 highlights
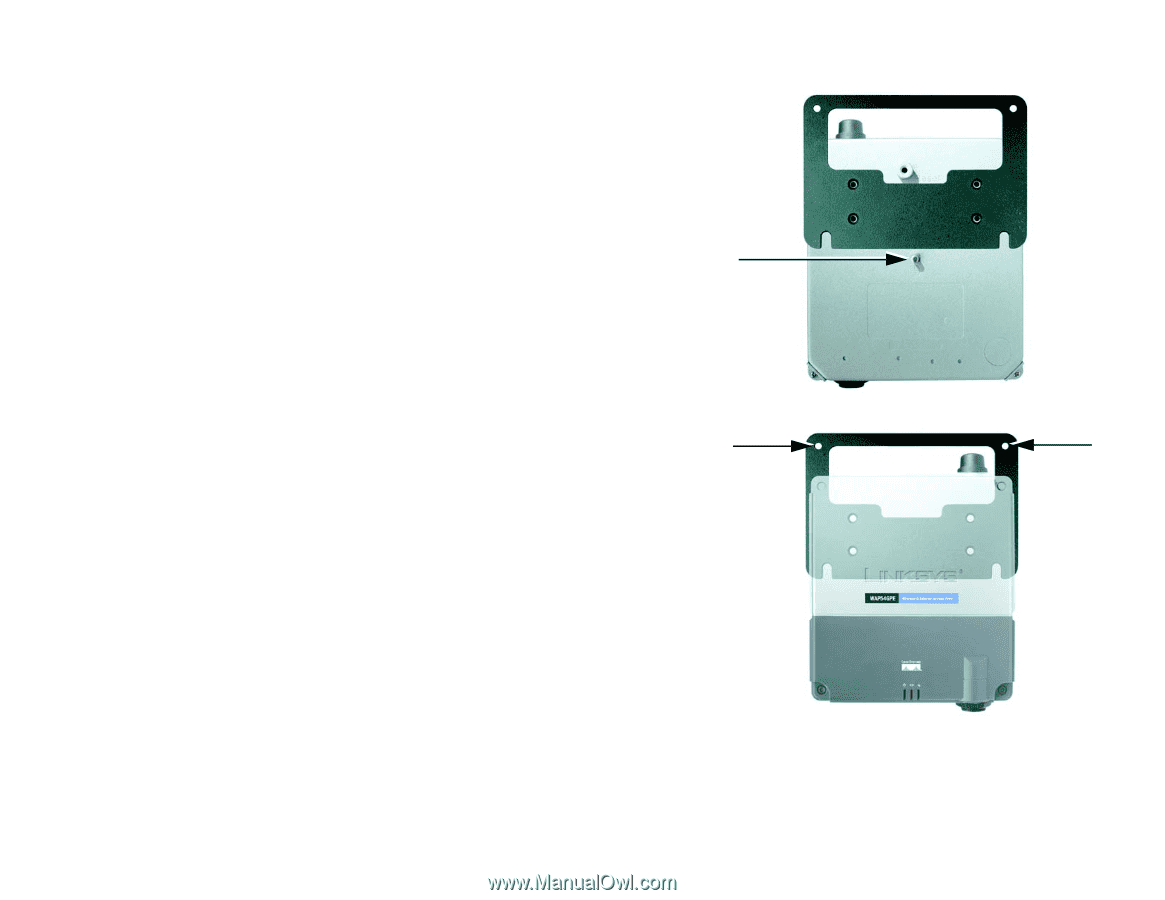
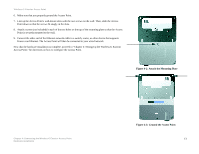
Wireless-G Exterior Access Point 6. Make sure that you properly ground the Access Point. 7. Line up the Access Point's wall-mount slots with the two screws on the wall. Then, slide the Access Point down so that the screws fit snugly in the slots. 8. Attach a screw (not included) in each of the two holes on the top of the mounting plate so that the Access Point is securely mounted to the wall. 9. Connect the other end of the Ethernet network cable to a switch, router, or other device that supports Power over Ethernet. The Access Point will then be connected to your wired network. Now that the hardware installation is complete, proceed to "Chapter 5: Setting Up the Wireless-G Exterior Access Point," for directions on how to configure the Access Point. Figure 4-2: Attach the Mounting Plate Chapter 4: Connecting the Wireless-G Exterior Access Point Hardware Installation Figure 4-3: Ground the Access Point 13
-
 1
1 -
2
-
3
-
4
-
5
-
6
-
7
-
8
-
9
-
10
-
11
-
12
-
13
-
14
-
 15
15 -
 16
16 -
 17
17 -
 18
18 -
 19
19 -
 20
20 -
 21
21 -
 22
22 -
 23
23 -
 24
24 -
 25
25 -
26
-
27
-
28
-
29
-
30
-
31
-
32
-
33
-
34
-
35
-
36
-
37
-
38
-
39
-
40
-
41
-
42
-
43
-
44
-
45
-
46
-
47
-
48
-
49
-
50
-
51
-
52
-
53
-
54
-
55
-
56
-
57
-
58
-
59
-
60
-
61
-
62
-
63
-
64
-
65
-
66
-
67
-
68
-
69
-
70
-
71
-
72
-
73
-
74
-
75
-
76
 |
 |