Linksys WAP54A User Guide - Page 5
Getting to Know the, Wireless Access Point
 |
UPC - 745883552337
View all Linksys WAP54A manuals
Add to My Manuals
Save this manual to your list of manuals |
Page 5 highlights
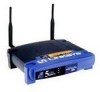
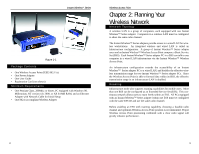
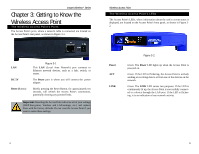
Instant WirelessTM Series Chapter 3: Getting to Know the Wireless Access Point The Wireless Access Point's Ports The Access Point's ports, where a network cable is connected, are located on the Access Point's rear panel, as shown in Figure 3-1. Wireless Access Point The Wireless Access Point's LEDs The Access Point's LEDs, where information about the unit's current status is displayed, are located on the Access Point's front panel, as shown in Figure 32. LAN DC 5V Reset (Button) Figure 3-1 This LAN (Local Area Network) port connects to Ethernet network devices, such as a hub, switch, or router. The Power port is where you will connect the power adapter. Briefly pressing the Reset Button, for approximately ten seconds, will refresh the Access Point's connections, potentially clearing any jammed links. Important: Resetting the Access Point will erase all of your settings (WEP Encryption, Wireless and LAN settings, etc.) and replace them with the factory defaults. Do not reset the Access Point if you want to retain these settings. Power ACT LINK Figure 3-2 Green. The Power LED lights up when the Access Point is powered on. Green. If the LED is flickering, the Access Point is actively sending or receiving data to or from one of the devices on the network. Green. The LINK LED serves two purposes. If the LED is continuously lit up, the Access Point is successfully connected to a device through the LAN port. If the LED is flickering, it is an indication of any network activity. 4 5
-
 1
1 -
 2
2 -
 3
3 -
 4
4 -
 5
5 -
 6
6 -
 7
7 -
 8
8 -
 9
9 -
 10
10 -
 11
11 -
12
-
13
-
14
-
15
-
16
-
17
-
18
-
19
-
20
-
21
 |
 |
