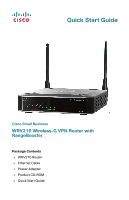
Linksys WAP54GPE Cisco Small Business WRV210 Quick Start Guide - Page 4
Default Settings, Installing the WRV210, Placement Options - range
 |
UPC - 745883560387
View all Linksys WAP54GPE manuals
Add to My Manuals
Save this manual to your list of manuals |
Page 4 highlights
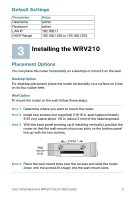
Default Settings Parameter Username Password LAN IP DHCP Range Value admin admin 192.168.1.1 192.168.1.100 to 192.168.1.253 3 Installing the WRV210 Placement Options You can place the router horizontally on a desktop or mount it on the wall. Desktop Option For desktop placement, place the router horizontally on a surface so it sits on its four rubber feet. Wall Option To mount the router on the wall, follow these steps. STEP 1 Determine where you want to mount the router. STEP 2 Install two screws (not supplied) 2-9/16 in. apart (approximately 6.45 cm.) Leave about 1/8 in. (about 3 mm) of the head exposed. STEP 3 With the back panel pointing up (if installing vertically), position the router so that the wall-mount crisscross slots on the bottom panel line up with the two screws. Wall mount slots 2-9/16 193817 STEP 4 Place the wall-mount slots over the screws and slide the router down until the screws fit snugly into the wall-mount slots. Cisco Small Business WRV210 Quick Start Guide 3
-
 1
1 -
 2
2 -
 3
3 -
 4
4 -
 5
5 -
 6
6 -
 7
7 -
 8
8 -
 9
9 -
 10
10 -
11
-
12
-
13
-
14
-
15
-
16
 |
 |
