Linksys WRT54GX4 User Guide - Page 5
List of s - srx400
 |
UPC - 814227018928
View all Linksys WRT54GX4 manuals
Add to My Manuals
Save this manual to your list of manuals |
Page 5 highlights
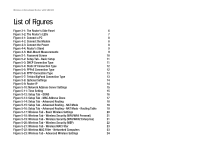
Wireless-G Broadband Router with SRX400 List of Figures Figure 3-1: The Router's Side Panel 6 Figure 3-2: The Router's LEDs 7 Figure 4-1: Connect a PC 8 Figure 4-2: Connect the Modem 8 Figure 4-3: Connect the Power 8 Figure 4-4: Router's Stand 9 Figure 4-5: Wall-Mount Measurements 9 Figure 5-1: Password Screen 10 Figure 5-2: Setup Tab - Basic Setup 11 Figure 5-3: DHCP Connection Type 11 Figure 5-4: Static IP Connection Type 12 Figure 5-5: PPPoE Connection Type 12 Figure 5-6: PPTP Connection Type 13 Figure 5-7: Telstra BigPond Connection Type 13 Figure 5-8: Optional Settings 14 Figure 5-9: Router IP 14 Figure 5-10: Network Address Server Settings 15 Figure 5-11: Time Setting 15 Figure 5-12: Setup Tab - DDNS 16 Figure 5-13: Setup Tab - MAC Address Clone 17 Figure 5-14: Setup Tab - Advanced Routing 18 Figure 5-15: Setup Tab - Advanced Routing - NAT Mode 18 Figure 5-16: Setup Tab - Advanced Routing - NAT Mode - Routing Table 19 Figure 5-17: Wireless Tab - Basic Wireless Settings 20 Figure 5-18: Wireless Tab - Wireless Security (WPA/WPA Personal) 21 Figure 5-19: Wireless Tab - Wireless Security (WPA/WPA2 Enterprise) 21 Figure 5-20: Wireless Tab - Wireless Security (WEP) 22 Figure 5-21: Wireless Tab - Wireless MAC Filter 23 Figure 5-22: Wireless MAC Filter - Networked Computers 23 Figure 5-23: Wireless Tab - Advanced Wireless Settings 24
-
 1
1 -
 2
2 -
 3
3 -
 4
4 -
 5
5 -
 6
6 -
 7
7 -
 8
8 -
 9
9 -
 10
10 -
 11
11 -
12
-
13
-
14
-
15
-
16
-
17
-
18
-
19
-
20
-
21
-
22
-
23
-
24
-
25
-
26
-
27
-
28
-
29
-
30
-
31
-
32
-
33
-
34
-
35
-
36
-
37
-
38
-
39
-
40
-
41
-
42
-
43
-
44
-
45
-
46
-
47
-
48
-
49
-
50
-
51
-
52
-
53
-
54
-
55
-
56
-
57
-
58
-
59
-
60
-
61
-
62
-
63
-
64
-
65
-
66
-
67
-
68
-
69
-
70
-
71
-
72
-
73
-
74
-
75
-
76
-
77
-
78
-
79
-
80
-
81
-
82
-
83
-
84
-
85
-
86
-
87
 |
 |
