Logitech 966196-0403 User Manual - Page 18
Customizing Your Harmony Remote, Changing the Behavior of Buttons within an Activity, To change
 |
UPC - 097855036933
View all Logitech 966196-0403 manuals
Add to My Manuals
Save this manual to your list of manuals |
Page 18 highlights
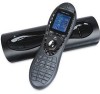
User Manual Harmony 890 Pro Customizing Your Harmony Remote This section provides information that will help you to customize the commands and options listed on the Harmony remote's display. Changing the Behavior of Buttons within an Activity When you select an Activity, the Harmony remote will: • Turn on all the correct entertainment devices • Set the device inputs correctly • Set up the remote's buttons to control the Activity Based on our knowledge of how each of your devices is controlled, the Harmony remote will make its best effort to match all the buttons you need to control an Activity. However, there may be some commands you want to add to buttons or list on the display. Commands can be added to buttons quickly and easily by customizing any Activity to change the behavior of buttons. To change the behavior of buttons: 1. Connect your Harmony remote to your computer to start the Harmony remote software. 2. Click View Activities. 3. Click an Activity. 4. Click Change the Behavior of Buttons to view the: ƒ Buttons that have a command associated with them ƒ Device being controlled ƒ Command being sent to the device To set a button to send a command to more than one device at a time: 1. Connect your Harmony remote to your computer to start the Harmony remote software. 2. Click View Activities. 3. Click an Activity. 4. Click Change the Behavior of Buttons. 5. Select a command from the list in each of the required device columns, next to the name of the button for which you want to set a command. Adding Custom-Labeled Buttons You can also add any number of custom-labeled buttons to an Activity. To add a custom-labeled button for an Activity: 1. Connect your Harmony remote to your computer to start the Harmony remote software. 2. Click View Activities. 3. Click an Activity. 4. Click Change the Behavior of Buttons. 5. Under the Custom Button Label column, type the name for the button label you would like to appear on the display. v. 1.0 page 16
-
 1
1 -
2
-
3
-
4
-
5
-
6
-
7
-
8
-
9
-
10
-
11
-
12
-
 13
13 -
 14
14 -
 15
15 -
 16
16 -
 17
17 -
 18
18 -
 19
19 -
 20
20 -
 21
21
 |
 |
