Logitech Squeezebox Boom User Guide - Page 8
Set Up Squeezebox Boom And Connect It, To Your Network - radio
 |
View all Logitech Squeezebox Boom manuals
Add to My Manuals
Save this manual to your list of manuals |
Page 8 highlights
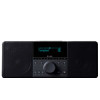
12 Logitech® Optional: Download And Install SqueezeCenter After you complete the SqueezeNetwork sign-up process, you are asked to download SqueezeCenter. SqueezeCenter is only required if you intend to listen to your personal music collection stored on a computer on your local network. If you will only be listening to Internet radio stations or online music services, you may skip this step. We offer versions of SqueezeCenter for Windows®, Mac® OS X, and Linux. After selecting the appropriate version, save it to your hard drive and then doubleclick on the downloaded file. When you are finished, SqueezeCenter is ready to deliver music to your Squeezebox Boom. Set Up Squeezebox Boom And Connect It To Your Network 1. Select a suitable location for your Squeezebox Boom. It should be in a location that is protected from moisture, extreme temperatures, and away from direct sunlight. If you'll be connecting to your wireless network, you should choose a location that is in range of the nearest router or access point, and if you intend to connect via ethernet, it should be near an ethernet connection. 2. To prepare the infrared remote control for operation, open the battery compartment, peel the protective tab from the battery, and then close the compartment. 3. Optional: if you're connecting to your network using an ethernet cable, connect the cable now. 4. The power supply uses a plug adapter system for worldwide compatibility. Slide the plug adapter into the power supply and make sure it snaps into place. Plug the barrel connector into the AC input on Squeezebox Boom's rear panel. 5. Plug the power supply into an electrical outlet. Squeezebox Boom will automatically power on, display a welcome message, and then display the setup menu. TIP: as covered earlier in this guide, the up and down buttons on the remote perform the same function as turning the navigation wheel left or right. Pressing right on the remote performs the same function as pressing the wheel. For the rest of this section, we'll refer to using the various buttons on the remote, but you can use the navigation wheel, as well. Squeezebox™ Boom User Guide 13 6. You'll see a menu giving you the choice of connecting via a wired or wireless network. Use the up and down buttons to make your selection, and press right. 7. If you're connecting to your wireless network, you will see a menu for selecting your region, and then a menu for choosing your wireless network by name. If you are using a security-enabled wireless network, you'll need to enter the security key you wrote down previously in Make A Note Of Your Network Settings. When Squeezebox Boom informs you that it has connected to your wireless network, press right to continue. 8. If the display informs you that Squeezebox Boom was unable to connect to your network, press left on the remote (or the back button on the front panel) to return to the network setup menu. Confirm that you've entered your security key correctly and that you're connecting to the correct network. If it still can't connect, see the troubleshooting appendix for advice. 9. The next menu will ask you if you would like to obtain an IP address automatically via DHCP, or if you'd like to manually assign an IP address to your Squeezebox Boom. The majority of home networks use DHCP, so if you're in doubt, select the automatic option. When it confirms that it has obtained an IP address, press right to advance to the next menu.
-
 1
1 -
2
-
 3
3 -
 4
4 -
 5
5 -
 6
6 -
 7
7 -
 8
8 -
 9
9 -
 10
10 -
 11
11 -
 12
12 -
 13
13 -
14
-
15
-
16
-
17
-
18
-
19
-
20
-
21
-
22
 |
 |
