Logitech X620 Installation Guide - Page 3
Setup, Setup - Operation, Notch - surround sound speakers
 |
UPC - 097855018311
View all Logitech X620 manuals
Add to My Manuals
Save this manual to your list of manuals |
Page 3 highlights
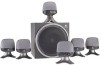
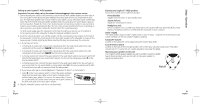
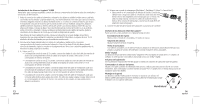
Setup Setting up your Logitech® X-620 speakers Important: For your safety, set up the system before plugging it into a power source. 1. Before attaching the cables to the subwoofer, position the two front satellite speakers on either side of your computer monitor about the same distance from each other as from you. Angle them to face you. The right front speaker is the control center for your system, so you will want to place it within easy reach. Place the rear left and right satellite speakers behind you and about the same distance apart as the front speakers. Position the front center channel speaker on top of your monitor or on your desk in between your monitor and keyboard. Place the rear center speaker directly behind you. Depending on where you place your speakers, adjust the stand to direct the sound toward you. For best sound quality, place the subwoofer on the floor beneath your desk. Be sure to maintain 6 inches spacing around the subwoofer to allow for adequate ventilation around it. 2. Insert the colored plug from each satellite speaker into the corresponding colored jacks on the back of the subwoofer. Connect the d-sub plug from the front right speaker to the subwoofer as shown on the previous page. Carefully align the pins before inserting the plug, and screw down the connector. 3. A. If you have a PC and a: • 7-channel (6.1) sound card: Connect all 3 colored plugs from the audio input cable to the colorcoded jacks on the sound card. Select 6.1 on the source selector switch. • 6-channel (5.1) sound card: Connect all 3 colored plugs from the audio input cable to the colorcoded jacks on the sound card. Select 5.1 on the source selector switch. • 4-channel sound card: Connect the green plug from the audio input cable to your sound card's front jack and the black plug to your sound card's rear jack. Do not use the orange plug. Select 4 on the source selector switch. • 2-channel sound card: Connect the green plug from the audio input cable to the "line out" jack on your sound card. Do not use the black or orange plugs. Select 4 on the source selector switch. With 2-channel sound you will not hear sound from the rear speakers. B. If you have a video game console (PlayStation®, PlayStation®2, Xbox™, or GameCube®): • Select 4 on the source selector switch. Connect the green and black plugs from the audio input cable to the 2 stereo mini jacks on the included video game adapter. Do not use the orange plug. Connect the red and white RCA audio cables from your video game console to the RCA audio jacks to the video game adapter. 4. Plug the subwoofer's power cord into an electrical outlet. 3 English Enjoying your Logitech® X-620 speakers Access these controls on the right front speaker: Power/Standby Toggles between power on and standby mode. System Volume Adjusts the overall system volume. Headphone Jack When headphones are used with your X-620 system, the speakers will mute automatically for private listening. Headphone volume is controlled by the soundcard on your computer. Dolby® Digital The X-620 speakers support Dolby® Digital sound on your PC if your 7-channel or 6-channel sound card or DVD software can decode a Dolby® Digital soundtrack. Subwoofer Volume Located on the subwoofer. Use to adjust subwoofer volume (bass level). Source Selector Switch Located on the back of the front right speaker. Use to select your surround sound source. This switch converts a 4 or 5.1 source into a 6.1 audio experience. See setup for details. Mounting your speakers to the wall Your Logitech X-620 speaker satellites are wall mountable. Swivel the satellite base to desired position, and use the notch to hang your speaker on appropriate wall anchors. Notch 4 English Setup - Operation
-
 1
1 -
 2
2 -
 3
3 -
 4
4 -
 5
5 -
 6
6 -
 7
7 -
 8
8 -
 9
9 -
10
 |
 |