MSI H81M User Guide
MSI H81M Manual
 |
View all MSI H81M manuals
Add to My Manuals
Save this manual to your list of manuals |
MSI H81M manual content summary:
- MSI H81M | User Guide - Page 1
material in this document is the intellectual property of MICRO-STAR INTERNATIONAL. We take every care in the preparation of this without notice. Trademarks All trademarks in this manual are properties of their respective owners. ■ MSI® is registered trademark of Micro-Star Int'l Co.,Ltd. ■ NVIDIA® - MSI H81M | User Guide - Page 2
■ Always read the safety instructions carefully. ■ Keep this User's Manual for future reference. ■ Keep this equipment electrical shock. ■ If any of the following situations arises, get the equipment checked by service personnel: ◯ The power cord or plug is damaged. ◯ Liquid has penetrated into - MSI H81M | User Guide - Page 3
if not installed and used in accordance with the instructions, may cause harmful interference to radio communications. However, emission limits. VOIR LA NOTICE D'INSTALLATION AVANT DE RACCORDER AU RESEAU. Micro-Star International MS-7817 This device complies with Part 15 of the FCC Rules. Operation - MSI H81M | User Guide - Page 4
Information In compliance with chemical substances regulations, such as the EU REACH Regulation (Regulation EC No. 1907/2006 of the European Parliament and the Council), MSI provides the information of chemical substances in products at: http://www - MSI H81M | User Guide - Page 5
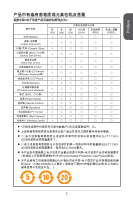
Preface 部件名称 电池 (Battery Cable/ Connector Chassis/ Other CD, DVD等) (Optical Disk Driver Hard Disk Driver PCAs I/O Device) (如Mouse, Keyboard LCD Panel Memory Processor and Heatsink CD、DVD Power Supply Remote Control Speakers TV Tunner Web Camera Wireless Cards) 铅 汞 镉 ( - MSI H81M | User Guide - Page 6
äte nicht mehr als kommunale Abfälle entsorgt werden. MSI hat europaweit verschiedene Sammel- und Recyclingunternehmen beauftragt, die in ces équipements seront obligés de récupérer certains produits en fin de vie. MSI prendra en compte cette exigence relative au retour des produits en fin de vie au - MSI H81M | User Guide - Page 7
a hacerse cargo de dichos productos al termino de su período de vida. MSI estará comprometido con los términos de recogida de sus productos vendidos en la Uni recogida de estos residuos. NEDERLANDS Om het milieu te beschermen, wil MSI u eraan herinneren dat.... De richtlijn van de Europese Unie (EU - MSI H81M | User Guide - Page 8
Annak érdekében, hogy környezetünket megvédjük, illetve környezetvédőként fellépve az MSI emlékezteti Önt, hogy ... Az Európai Unió („EU") 2005. augusztus 13-án fine del suo ciclo di vita. MSI si adeguerà a tale Direttiva ritirando tutti i prodotti marchiati MSI che sono stati venduti all'interno - MSI H81M | User Guide - Page 9
Preface Contents English 11 Motherboard Specifications 12 Optional Specifications 14 Back Panel 15 CPU & Heatsink Installation 16 Memory Installation 18 Internal Connectors 19 BIOS Setup 26 33 34 36 37 CPU 38 40 41 BIOS 48 Français 55 Spécifications 56 Spécifications en option - MSI H81M | User Guide - Page 10
Preface 99 100 102 103 104 106 107 BIOS 114 121 122 124 125 CPU 126 128 129 BIOS Setup(BIOS 136 143 144 146 147 安裝 CPU 148 150 151 BIOS 158 165 166 168 I/O 169 CPU 170 172 173 BIOS 180 10 - MSI H81M | User Guide - Page 11
v1.X) Micro-ATX motherboard. The H81M-P33/ H81M-E33/ H87M-P33/ H87M-E33/ B85M-P33/ B85M-E33 Series motherboards are based on Intel H81/ H87/ B85 chipset for optimal system efficiency. Designed to fit the advanced Intel LGA1150 processor, the H81M-P33/ H81M-E33/ H87M-P33/ H87M-E33/ B85M-P33/ B85M-E33 - MSI H81M | User Guide - Page 12
English Motherboard Specifications CPU Support Chipset Memory Support Expansion Slots Onboard Graphics Storage USB Audio LAN Back Panel Connectors ■ 4th Generation Intel® Core™ i7 / Core™ i5 / Core™ i3 / Pentium® / Celeron® processors for LGA 1150 socket ■ Intel® H81/ H87/ B85 Express Chipset ■ - MSI H81M | User Guide - Page 13
Internal Connectors ■ 1x 24-pin ATX main power connector ■ 1x 4-pin ATX 12V power connector ■ 4x SATA connectors ■ 2x USB 2.0 connectors (supports Micro-ATX Form Factor ■ 8.9 in. x 6.8 in. (22.6 cm x 17.3 cm) For the latest information about CPU, please visit http://www.msi.com/service/cpu-support - MSI H81M | User Guide - Page 14
Intel Rapid Start Intel Smart Response Intel Smart Connect H81M-P33 Gen2 DVI-D SATA 6Gb/s SATA 3Gb/s 64Mb Not supported Not supported Not supported Not supported Supported H81M-E33 Gen2 HDMI SATA 6Gb/s SATA 3Gb/s 64Mb Not supported Not supported Not supported Not supported Supported H87M-P33 - MSI H81M | User Guide - Page 15
English Back Panel H81M-E33/ H87M-E33/ B85M-E33 PS/2 Mouse USB 2.0 PS/2 Keyboard USB 3.0 HDMI VGA LAN Line-In Line-Out Mic USB 2.0 H81M-P33/ H87M-P33/ B85M-P33 PS/2 Mouse USB 2.0 DVI-D VGA LAN Line-In Line-Out PS/2 Keyboard USB 3.0 Mic USB 2.0 LAN LED Indicator LINK/ACT LED SPEED - MSI H81M | User Guide - Page 16
maintain system stability. Follow the steps below to ensure correct CPU and heatsink installation. Wrong installation can damage both the CPU and the motherboard. Video Demonstration Watch the video to learn how to install CPU & heatsink. at the address below. http://youtu.be/bf5La099urI 1. Push the - MSI H81M | User Guide - Page 17
ensure that the fastener-ends have been properly locked in place. 11. Finally, attach the CPU fan cable to the CPU fan connector on the motherboard. Important • Confirm that the CPU heatsink has formed a tight seal with the CPU before booting your system. • Whenever the CPU is not installed, always - MSI H81M | User Guide - Page 18
English Memory Installation Video Demonstration Watch the video to learn how to install memories at the address below. http://youtu.be/76yLtJaKlCQ 1 2 3 Important • DDR3 memory modules are not interchangeable with DDR2, and the DDR3 standard is not backward compatible. Always install DDR3 memory - MSI H81M | User Guide - Page 19
English Internal Connectors JPWR1~2: ATX Power Connectors These connectors allow you to connect an ATX power supply. To connect the ATX power cables are securely connected to a proper ATX power supply to ensure stable operation of the motherboard. JCOM1: Serial Port Connector This connector - MSI H81M | User Guide - Page 20
SATA devices, such as HDDs, SSDs, and optical drives, be screwed down into the case. Refer to the manual that came with your computer case or your SATA device for further installation instructions. • Please do not fold the SATA cable at a 90-degree angle. Data loss may result during transmission - MSI H81M | User Guide - Page 21
English CPUFAN,SYSFAN1~2: Fan Power Connectors The fan power connectors support system cooling fans with +12V. If the motherboard has a System Hardware Monitor chipset on-board, you must use a specially designed fan with a speed sensor to take advantage of the CPU fan control. Remember to connect - MSI H81M | User Guide - Page 22
with the Intel® Front Panel I/O Connectivity Design Guide. When installing the front panel connectors, please use the optional M-Connector to simplify installation. Plug all the wires from the computer case into the M-Connector and then plug the M-Connector into the motherboard - MSI H81M | User Guide - Page 23
Intel® Front Panel I/O Connectivity Design Guide . 2.G4r.oN6uC.Mn8d.1INC0o.DHPeeitnaedctPiohnone Detection 1.M3.IMC5.ILHC7e.RS9a.EdHNPeShaEodn_PeShERoNneDL JTPM1: TPM Module Connector This connector connects to a TPM (Trusted Platform Module). Please refer to the TPM security platform manual - MSI H81M | User Guide - Page 24
the jumper . Do not clear the CMOS RAM while the system is on because it will damage the motherboard. JUSB_PW1, JUSB_PW2: USB Power Jumper These jumpers are used to assign which USB and PS/2 ports could support "Wake Up Event Setup" field of BIOS. JUSB_PW1 (for back panel USB ports & PS/2 ports - MSI H81M | User Guide - Page 25
English PCI_E1~2: PCIe Expansion Slots The PCIe slot supports the PCIe interface expansion card. PCIe 3.0 x16 Slot PCIe 2.0 x1 Slot Important When adding or removing expansion cards, always turn off the power supply and - MSI H81M | User Guide - Page 26
screen or press the physical "GO2BIOS" button (optional) on the motherboard to enable the system going to BIOS setup directly at next boot. Click "GO2BIOS" tab on "MSI Fast Boot" utility screen. Important Please be sure to install the "MSI Fast Boot" utility before using it to enter the BIOS setup - MSI H81M | User Guide - Page 27
menu selection System information Boot device priority bar BIOS menu selection OC Menu Menu display Important • Overclocking your PC manually is only recommended for advanced users. • Overclocking is not guaranteed, and if done improperly, can void your warranty or severely damage your hardware - MSI H81M | User Guide - Page 28
disables the Enhanced Intel® SpeedStep Technology. ▶ Intel Turbo Boost [Enabled] Enables or disables the Intel® Turbo Boost. This item appears when the installed CPU supports this function. DRAM Frequency [Auto] Sets the DRAM frequency. Please note the overclocking behavior is not guaranteed. 28 - MSI H81M | User Guide - Page 29
set it manually. ▶ Spread Spectrum This function reduces the EMI (Electromagnetic Interference) generated by modulating clock generator pulses. [Enabled] Enables the spread spectrum function to reduce the EMI (Electromagnetic Interference) problem. [Disabled] Enhances the overclocking ability - MSI H81M | User Guide - Page 30
instructions simultaneously. In this way, the system performance is highly improved. [Enable] Enables Intel Hyper-Threading technology. [Disabled] Disables this item if the system does not support to circumvent boot problems with older operating system that do not support the processor with - MSI H81M | User Guide - Page 31
Enabled] Enables or disables the CPU AES (Advanced Encryption Standard-New Instructions) support. This item appears when a CPU supports this function. [Enabled] Enables Intel AES support. [Disabled] Disables Intel AES support. ▶ Intel Adaptive Thermal Monitor [Enabled] Enables or disables the - MSI H81M | User Guide - Page 32
English Note: The following items will appear when "Intel Turbo Boost " is enabled. ▶ Long Duration Power Limit (W) current. ▶ 1/2/3/4-Core Ratio Limit [Auto] These items only appear when a CPU that support this function is installed. These items allow you to set the CPU ratios for different number - MSI H81M | User Guide - Page 33
한국어 한국어 H81M-P33/ H81M-E33/ H87M-P33/ H87M-E33/ B85M-P33/ B85M-E33 시리즈 (MS-7817 v1.X) Micro-ATX H81M-P33/ H81M-E33/ H87M-P33/ H87M-E33/ B85M-P33/ B85M-E33 Intel H81/ H87/ B85 Intel LGA1150 H81M-P33/ H81M-E33/ H87M-P33/ H87ME33/ B85M-P33/ B85M-E33 레이아웃 Top : mouse Bottom: keyboard CPUFAN - MSI H81M | User Guide - Page 34
한국어 CPU 스토리지 USB 오디오 LAN ■ LGA 1150 4세대 Intel® Core™ i7 / Core™ i5 / Core™ i3 / Pentium® / Celeron ■ Intel® H81/ H87/ B85 Express 칩셋 ■ DDR3 2개, 최대 16GB 지원 ■ DDR3 1600/ 1333/ 1066 MHz non-ECC, un-buffered ■ PCIe x16 슬롯 1 PCIe 2.0 x1 슬롯 1개 ■ HDMI 포트 1 2560x1600@60Hz, 24bpp/ - MSI H81M | User Guide - Page 35
4개 ■ USB 2.0 커넥터 2개 (외 USB 2.0 4 4 핀 CPU 1개 ■ 4 1개 ■ 3 1 1 2 1개 ■ CMOS 1개 ■ USB 2개 ■ UEFI AMI BIOS ■ ACPI 5.0, PnP 1.0a, SM BIOS 2.7, DMI 2.0 ■ Micro-ATX 8.9 in. x 6.8 in. (22.6 cm x 17.3 cm) CPU http://www.msi.com/service/cpu-support http://www.msi.com/service/test-report 35 - MSI H81M | User Guide - Page 36
-D/ HDMI SATA1, SATA2 SATA3, SATA4 BIOS ROM RAID Small Business Advantage Intel Rapid Start Intel Smart Response Intel Smart Connect H81M-P33 Gen2 DVI-D SATA 6Gb/s SATA 3Gb/s 64Mb 지원함 H81M-E33 Gen2 HDMI SATA 6Gb/s SATA 3Gb/s 64Mb 지원함 H87M-P33 Gen3 DVI-D SATA 6Gb/s SATA 6Gb/s 128Mb - MSI H81M | User Guide - Page 37
한국어 H81M-E33/ H87M-E33/ B85M-E33 PS/2 마우스 USB 2.0 PS/2 키보드 USB 3.0 HDMI VGA LAN USB 2.0 H81M-P33/ H87M-P33/ B85M-P33 PS/2 마우스 USB 2.0 DVI-D VGA LAN PS/2 키보드 USB 3.0 마이크 USB 2.0 LAN LED 표시등 LINK/ACT LED SPEED LED LED Link/ Activity LED LED) Speed LED (속도 LED) LED 조건 - MSI H81M | User Guide - Page 38
한국어 CPU CPU CPU CPU CPU CPU CPU http://youtu.be/bf5La099urI 1 2 중요사항 CPU 3 CPU CPU 4 합니다. CPU 요철 정렬 키 38 - MSI H81M | User Guide - Page 39
한국어 5 PnP 캡이 CPU PnP CPU PnP 6. CPU CPU 7 CPU 8 9. 4 4개 10 11 CPU CPU 중요사항 CPU CPU CPU 소 CPU 39 - MSI H81M | User Guide - Page 40
한국어 http://youtu.be/76yLtJaKlCQ 1 2 3 중요사항 • DDR3 DDR2 DDR3 DDR3 DIMM 슬롯에 DDR3 40 - MSI H81M | User Guide - Page 41
.Wu51DnV0R1dY.S1+O1By.1+K2R211.V+32_13.V8+4.1333.-5V.1I13.42G6V1V.rP7o1.SuG81-n.rO9Gdo2.NurG0o2n#.ruR1do2n.eu+2ds2n5.+3dV2.5+4V5.GVround 2.G1.rGouronudnd JPWR2 4.+31.+21V2V 중요사항 ATX JCOM1 16550A 16 FIFO 2.S4I.ND6T.DR8S1.C0RT.NSo Pin 1.D3.CS5DO.G7Ur.RTo9uT.RnSdI 41 - MSI H81M | User Guide - Page 42
한국어 SATA1~4: SATA 커넥터 SATA SATA SATA HDD SSD CD/ DVD SATA HDD http://youtu.be/RZsMpqxythc 중요사항 HDD SSD CD / DVD SATA HDD, SSD SATA SATA • SATA 90 • SATA JCI1 BIOS 2.C1.IGNTroRuUnd 42 - MSI H81M | User Guide - Page 43
한국어 CPUFAN,SYSFAN1~2 12V CPU CPUFAN/ SYSFAN1 4.3S.pS2e.e+e1n1.dsG2CerVoounntrdol SYSFAN2 3.N2.o+1U1.G2srVeound 중요사항 CPU CPU Command Center 43 - MSI H81M | User Guide - Page 44
한국어 JFP1, JFP2 LED JFP1 Intel® Front Panel I/O Connectivity Design Guide M M M http://youtu.be/DPELIdVNZUI PowPoewr LeEr DSwi2tc.h+41.0-6..N+8o.-Pin JFP1 1.+3.-5.-7.H+9D.RDReLseEesDrevteSdwitch JFP2 1.S2p.V3eC.aS4kCp.eV5erCakCe5r 중요사항 M JFP1 JUSB1~2: USB 2.0 - MSI H81M | User Guide - Page 45
한국어 JAUD1 Intel® Front Panel I/O Connectivity Design Guide 2.G4r.oN6uC.Mn8d.1INC0o.DHPeeitnaedctPiohnone Detection 1.M3.IMC5.ILHC7e.RS9a.EdHNPeShaEodn_PeShERoNneDL JTPM1: TPM TPM (Trusted Platform Module TPM 2.34V.36S..3tS8aVe.n15Prd0iVaob1.NlwyP2I1o.eRopG4rwoPQ.rwGeionreurornudnd - MSI H81M | User Guide - Page 46
한국어 JBAT1: CMOS CMOS RAM CMOS RAM OS CMOS RAM 1 1 중요사항 CMOS RAM CMOS JUSB_PW1, JUSB_PW2: USB USB & PS/2 Wake Up Event Setup JUSB_PW1 USB 포트 및 PS/2 포 트용) 1 지원 JUSB_PW2 (온보드 USB 커 1 넥터용) 지원 1 1 46 - MSI H81M | User Guide - Page 47
한국어 PCI_E1~2: PCIe PCIe 슬롯은 PCIe PCIe 3.0 x16 슬롯 PCIe 2.0 x1 슬롯 중요사항 47 - MSI H81M | User Guide - Page 48
POST (Power On Self Test DEL Press DEL key to enter Setup Menu, F11 to enter Boot Menu (DEL F11 BIOS RESET Ctrl>, 및 - MSI H81M | User Guide - Page 49
개요 BIOS 모델 명 Virtual OC Genie 버튼 BIOS 언어 BIOS OC 메뉴 한국어 중요사항 OC Genie 49 - MSI H81M | User Guide - Page 50
비율은 CPU ▶ Adjust CPU Ratio [Auto] CPU CPU ▶ Adjusted CPU Frequency CPU ▶ EIST [Enabled] Enhanced Intel® SpeedStep Technology ▶ Intel Turbo Boost [Enabled] Intel® Turbo Boost CPU [Enabled] CPU [Disabled] ▶ Enhanced Turbo [Auto] 모든 CPU Enhanced Turbo CPU [Auto - MSI H81M | User Guide - Page 51
한국어 ▶ Adjusted DRAM Frequency DRAM ▶ DRAM Timing Mode [Auto] [Auto] DRAM SPD (Serial Presence Detect [Link] DRAM [UnLink] DRAM ▶ Advanced DRAM Configuration [Link] 또는 [Unlink CMOS CMOS CMOS BIOS ▶ Memory Fast Boot [Auto] [Auto] BIOS [Enabled] [ - MSI H81M | User Guide - Page 52
CPUID [Disabled] CPUID ▶ Execute Disable Bit [Enabled] [Enabled] NO-Execution [Disabled] ▶ Intel Virtualization Tech [Enabled] Intel Virtualization technology [Enabled] [Disabled] ▶ Hardware Prefetcher [Enabled] MLC Streamer prefetcher [Enabled] L2 - MSI H81M | User Guide - Page 53
Standard-New Instructions CPU [Enabled] Intel AES [Disabled] Intel AES ▶ Intel Adaptive Thermal Monitor [Enabled] CPU [Enabled] CPU CPU [Disabled] ▶ Intel C-State [Auto] C-state는 ACPI [Auto] BIOS [Enabled] CPU [Disabled] ▶ C1E Support [Disabled] C1E - MSI H81M | User Guide - Page 54
한국어 Intel Turbo Boost Long Duration Power Limit (W) [Auto Turbo Boost CPU TDP Long Duration Maintained (s) [Auto W Short Duration Power Limit (W) [Auto Turbo Boost CPU TDP CPU Current limit (A) [Auto CPU CPU 1/2/3/4-Core Ratio Limit [Auto CPU CPU 54 - MSI H81M | User Guide - Page 55
Micro-ATX de la série H81M-P33/ H81M-E33/ H87M-P33/ H87M-E33/ B85M-P33/ B85M-E33 (MS-7817 v1.X). La série H81M-P33/ H81M-E33/ H87M-P33/ H87M-E33/ B85M-P33/ B85M-E33 est basée sur le chipset Intel H81/ H87/ B85 pour une efficacité optimale. Conçue pour fonctionner avec les processeurs Intel LGA1150 - MSI H81M | User Guide - Page 56
Core™ i5 / Core™ i3 / Pentium® / Celeron® pour socket LGA 1150 ■ Chipset Intel® H81/ H87/ B85 Express ■ 2x emplacements de mémoire DDR3 supportant jusqu'à 16GB ■ Support DDR3 1600/ 1333/ 1066 MHz ■ Architecture mémoire double canal ■ Support non-ECC, mémoire un-buffered ■ 1x emplacement PCIe x16 (en - MSI H81M | User Guide - Page 57
BIOS ■ ACPI 5.0, PnP 1.0a, SM BIOS 2.7, DMI 2.0 ■ Multi-langue ■ Dimensions Micro-ATX ■ 8.9 in. x 6.8 in. (22.6 cm x 17.3 cm) Pour plus d'information sur le CPU, veuillez visiter http://www.msi.com/service/cpu-support/ Pour plus d'information sur les composants compatibles, veuillez visiter http - MSI H81M | User Guide - Page 58
Advantage Intel Rapid Start Intel Smart Response Intel Smart Connect H81M-P33 Gen2 DVI-D SATA 6Gb/s SATA 3Gb/s 64Mb Non supporté Non supporté Non supporté Non supporté Supporté H81M-E33 Gen2 HDMI SATA 6Gb/s SATA 3Gb/s 64Mb Non supporté Non supporté Non supporté Non supporté Supporté H87M-P33 Gen3 - MSI H81M | User Guide - Page 59
Français Panneau Arrière H81M-E33/ H87M-E33/ B85M-E33 Souris PS/2 USB 2.0 Clavier PS/2 USB 3.0 HDMI VGA LAN Ligne-In Ligne-Out Mic USB 2.0 H81M-P33/ H87M-P33/ B85M-P33 Souris PS/2 USB 2.0 DVI-D VGA LAN Ligne-In Ligne-Out Clavier PS/2 USB 3.0 Mic USB 2.0 Indicateur LED de LAN LINK/ - MSI H81M | User Guide - Page 60
toujours que le CPU soit équipé d'un ventilateur, qui est nécessaire pour éviter la surchauffe et maintenir la stabilité. Suivez les instruction suivantes pour installer le CPU et son ventilateur correctement. Une installation incorrecte peut endommager votre CPU et la carte mère. Démonstration de - MSI H81M | User Guide - Page 61
du CPU. Ne pas jeter le couvercle PnP. Toujours replacez le couvercle PnP si le CPU est enlevée de son emplacement. 6. Appliquez une couche de pâte broches de l'emplacement du CPU avec le couvercle recouvrant l'emplacement. • Si vous avez achetez un CPU avec son ventilateur séparé, veuillez vous - MSI H81M | User Guide - Page 62
Français Installation de mémoire Démonstration de vidéo Voir le vidéo sur l'installation des mémoires sur le site ci-dessous. http://youtu.be/76yLtJaKlCQ 1 2 3 Important • Les modules de mémoire DDR3 ne sont pas interchangeables avec les modules DDR2. Vous devez toujours installer les modules de mé - MSI H81M | User Guide - Page 63
Français Connecteurs d'alimentation JPWR1~2: Connecteur d'alimentation ATX Ce connecteur vous permet de relier une alimentation ATX. Pour cela, alignez le câble d'alimentation avec le connecteur et appuyez fermement le câble dans le connecteur. Si ceci est bien fait, la pince sur le câble d' - MSI H81M | User Guide - Page 64
au manuel de votre boîtier ou de votre périphérique SATA pour plus d'instructions d'installation. • Veuillez ne pas plier le câble de Sérial ATA à 90°. ssis Ce connecteur est relié à un câble d'interrupteur intrusion châssis. Si le châssis est ouvert, l'interrupteur en informera le système, qui - MSI H81M | User Guide - Page 65
Français CPUFAN,SYSFAN1~2 : Connecteur d'alimentation du ventilateur Les connecteurs d'alimentation du ventilateur supportent les ventilateurs de type +12V. Si la carte mère est équipée d'un moniteur du matériel système intégré, vous devrez utiliser un ventilateur spécial pourvu d'un capteur de - MSI H81M | User Guide - Page 66
système Ces connecteurs se connectent aux interrupteurs et LEDs du panneau avant. Le JFP1 est conforme au guide de conception de la connectivité Entrée/sortie du panneau avant Intel®. Lors de l'installation des connecteurs du panneau avant, veuillez utiliser le M-Connector en option afin de vous - MSI H81M | User Guide - Page 67
avant Ce connecteur vous permet de connecter le panneau audio avant. Il est conforme au guide de conception de la connectivité Entrée/sortie du panneau avant Intel®. 2.G4r.oN6uC.Mn8d.1INC0o.DHPeeitnaedctPiohnone Detection 1.M3.IMC5.ILHC7e.RS9a.EdHNPeShaEodn_PeShERoNneDL JTPM1 : Connecteur de Module - MSI H81M | User Guide - Page 68
peut lancer automatiquement le système d'exploitation chaque fois qu'il est allumé. Si vous souhaitez effacer la configuration du système, réglez le cavalier pour effacer és pour assigner lequel des périphérique USB et PS/2 supporte le mode « Wake Up Event Setup » du BIOS. JUSB_PW1 (pour ports USB - MSI H81M | User Guide - Page 69
Français PCI_E1~2 : Emplacements d'extension PCIe L'emplacement PCIe supporte l'interface de carte d'extension PCIe. Emplacement PCIe 3.0 x16 Emplacement PCIe 2.0 x1 Important Lorsque vous ajoutez ou retirez une carte d'extension, assurez-vous que le PC n' - MSI H81M | User Guide - Page 70
Appuyez sur la touche DEL pour entrer dans le BIOS, F11 dans Démarrage) Si le message disparaît avant que vous ne répondiez et que vous souhaitez encore d'utilitaire "MSI Fast Boot". Important Veuillez vous assurer d'avoir installé l'utilitaire "MSI Fast Boot" avant d'utiliser le service pour accé - MSI H81M | User Guide - Page 71
manuel du PC n'est recommandé que pour les utilisateurs avancés. • L'Overclocking n'est pas garanti, et une mauvaise manipulation peut invalider votre garantie et endommager sévèrement votre matériel. • Si vous n'êtes pas familier avec l'overclocking, nous recommandons d'utiliser OC Genie pour un - MSI H81M | User Guide - Page 72
] Active ou désactive Enhanced Intel® SpeedStep Technology. ▶ Intel Turbo Boost [Enabled] Active ou désactive Intel® Turbo Boost. Ce menu peut être modifié uniquement si le CPU installé prend cette finit la fréquence DRAM. Veuillez noter que le comportement d'overclocking n'est pas garanti. 72 - MSI H81M | User Guide - Page 73
] Active la fonction spread spectrum pour réduire le problème EMI (Electromagnetic Interference). [Disabled] Améliore la capabilité d'overclocking de le base clock CPU. Important • Si vous n'avez pas de problème d'EMI, laissez l'option sur [Disable], ceci vous permet d'avoir une stabilité du - MSI H81M | User Guide - Page 74
processeur comme des multi processeurs logiques qui exécutent les instructions simultanément. Dans ce cas-là, la performance du système est considérablement augmentée. [Enable] Active la technologie Intel Hyper-Threading. [Disabled] Désactive ce menu si le système ne prend pas la fontion HT en - MSI H81M | User Guide - Page 75
[Enabled] Active ou désactive le support CPU AES (Advanced Encryption Standard-New Instructions). Ce menu apparaît si le CPU prend cette fonction en charge. [Enabled] Active le support Intel AES. [Disabled] Désactive le support Intel AES. ▶ Intel Adaptive Thermal Monitor [Enabled] Active ou - MSI H81M | User Guide - Page 76
sactive cette fonction. Remarque : Les menus ci-dessous apparaissent lorsque "Intel Turbo Boost" est activé. ▶ Long Duration Power Limit (W) [ limite actuelle. ▶ 1/2/3/4-Core Ratio Limit [Auto] Ces menus apparaissent uniquement si le CPU installé prend cette fonction en charge. Ces menus permettent - MSI H81M | User Guide - Page 77
/ B85M-P33/ B85M-E33 (MS-7817 v1.X) Micro-ATX Motherboard gewählt haben. Diese H81MP33/ H81M-E33/ H87M-P33/ H87M-E33/ B85M-P33/ B85M-E33 Motherboard basiert auf dem Intel H81/ H87/ B85 cChipsatz und ermöglicht so ein optimales und effizientes System. Entworfen, um den hochentwickelten Intel LGA1150 - MSI H81M | User Guide - Page 78
Intel® Core™ i7 / Core™ i5 / Core™ i3 / Pentium® / Celeron® Prozessoren der 4. Generation für LGA 1150 Sockel ■ Intel® H81/ ■ 1x VGA Anschluss, unterstützt eine maximale Auflösung von 1920x1200 @ 60Hz, 24bpp ■ Intel H81/ H87/ B85 Express Chipsatz - 4x SATA Anschlüsse (optional) - Unterstützt RAID 0, - MSI H81M | User Guide - Page 79
BIOS ■ ACPI 5.0, PnP 1.0a, SM BIOS 2.7, DMI 2.0 ■ Mehrsprachenunterstützung ■ Micro-ATX Form Faktor ■ 8,9 in. x 6,8 in. (22,6 cm x 17,3 cm) Weitere CPU Informationen finden Sie unter http://www.msi.com/service/cpu-support/ Die neusten Informationen über kompatible Bauteile finden Sie unter http - MSI H81M | User Guide - Page 80
BIOS ROM RAID Small Business Advantage Intel Rapid Start Intel Smart Response Intel Smart Connect H81M-P33 2. Generation DVI-D SATA 6Gb/s SATA 3Gb/s 64Mb Keine Unterstützung Keine Unterstützung Keine Unterstützung Keine Unterstützung Unterstützung H81M-E33 2. Generation HDMI SATA 6Gb/s SATA 3Gb - MSI H81M | User Guide - Page 81
Deutsch Rücktafel-Übersicht H81M-E33/ H87M-E33/ B85M-E33 PS/2 Maus USB 2.0 PS/2 Tastatur USB 3.0 HDMI VGA LAN Line-In Line-Out Mic USB 2.0 H81M-P33/ H87M-P33/ B85M-P33 PS/2 Maus USB 2.0 DVI-D VGA LAN Line-In Line-Out PS/2 Tastatur USB 3.0 Mic USB 2.0 LAN LED Anzeige LINK/ACT LED - MSI H81M | User Guide - Page 82
die richtige CPU und CPU-Kühlkörper Installation zu gewährleisten. Ein fehlerhafter Einbau führt zu Schäden an der CPU und dem Motherboard. Video-Demonstration Anhand dieses Video an untenstehende Adresse lernen Sie, wie Sie CPU & Kühlkörper installieren. http://youtu.be/bf5La099urI 1. Drücken Sie - MSI H81M | User Guide - Page 83
die Arretierungsstifte mit leichtem Druck nach unten bis sie einrasten. Das Einrasten sollte mit einem klick hörbar sein. 10. Überprüfen Sie das Motherboard um sicherzustellen, dass das der Kühler korrekt installiert ist. 11. Schließlich verbinden Sie das Stromkabel des CPU Lüfters mit dem Anschluss - MSI H81M | User Guide - Page 84
Deutsch Speicher Video-Demonstration Anhand dieses Video an untenstehende Adresse lernen Sie, wie Sie die Speichermodule installieren. http://youtu.be/76yLtJaKlCQ 1 2 3 Wtichtig • DDR3 und DDR2 können nicht untereinander getauscht werden und der Standard DDR3 ist nicht abwärtskompatibel. - MSI H81M | User Guide - Page 85
Deutsch Interne Anschlüsse JPWR1~2: ATX Stromanschlüsse Mit diesem Anschluss verbinden Sie den ATX Stromanschlusse. Achten Sie bei dem Verbinden des ATX die Stromversorgungsstecker installieren. http://youtu.be/gkDYyR_83I4 1.+2J3.+3.P33.G4VW.3.r+5VoR.5uG6Vn1.r7+do.5uG8Vn.rP9do.Wu51nV0R1d.S1+O1B - MSI H81M | User Guide - Page 86
Datenverlust könnte die Folge sein. • SATA-Kabel haben identische Stecker an beiden Enden. Es wird empfohlen den flachen Stecker auf dem Motherboard einstecken. JCI1: Gehäusekontaktanschluss Dieser Anschluss wird mit einem Kontaktschalter verbunden. Wenn das PC-Gehäuse geöffnet wird, aktiviert dies - MSI H81M | User Guide - Page 87
in Abhängigkeit von der der Prozessor- und System-Temperatur zu steuern. • Für den Fall, dass nicht genügend Lüfteranschlüsse auf dem Motherboard zur Verfügung stehen, können weitere Lüfter mittels Adapter direkt am Netzteil angeschlossen werden. • Stellen Sie vor dem ersten Systemstart sicher, dass - MSI H81M | User Guide - Page 88
angelegt. Sie dienen zum Anschluss der Schalter und LEDs des Frontpanels. JFP1 erfüllt die Anforderungen des "Intel® Front Panel I/O Connectivity Design Guide". Bei der Installation des FrontpanelAnschlüsse, nutzen Sie bitte die beiliegenden mConnectors um die Installation zu vereinfachen. Schlie - MSI H81M | User Guide - Page 89
Anschluss von Audio Ein- und Ausgängen eines Frontpanels. Der Anschluss entspricht den Richtlinien des " Intel® Front Panel I/O Connectivity Design Guide". 2.G4r.oN6uC.Mn8d.1INC0o.DHPeeitnaedctPiohnone Detection 1.M3.IMC5.ILHC7e.RS9a.EdHNPeShaEodn_PeShERoNneDL JTPM1: TPM Anschluss Dieser Anschluss - MSI H81M | User Guide - Page 90
: Steckbrücke zur CMOS-Löschung Der Onboard CMOS Speicher (RAM) wird durch eine externe Spannungsversorgung durch eine Batterie auf dem Motherboard versorgt, um die Daten der Systemkonfiguration zu speichern. Er ermöglicht es dem Betriebssystem, mit jedem Einschalten automatisch hochzufahren. Wenn - MSI H81M | User Guide - Page 91
Deutsch PCI_E1~2: PCIe Erweiterungssteckplätze Der PCIe Steckplatz unterstützt PCIe-Erweiterungskarten. PCIe 3.0 x16-Steckplatz PCIe 2.0 x1-Steckplatz Wichtig Achten Sie darauf, dass Sie den Strom abschalten und das Netzkabel aus der Steckdose herausziehen, bevor Sie eine Erweiterungskarte - MSI H81M | User Guide - Page 92
zwei Methoden, um das BIOS-Setup zu gelangen. Klicken Sie auf das Auswahlfeld "GO2BIOS" des Bildschirms "MSI Fast Boot" oder drücken Sie die Taste "GO2BIOS" (optional) auf dem Motherboard, um beim nächsten Systemstart automatisch ins BIOS Menu zu wechseln. Klicken Sie auf das Auswahlfeld "GO2BIOS - MSI H81M | User Guide - Page 93
Überbilck Nach dem Aufrufen des BIOS, sehen Sie die folgende Anzeige. Temperatur-überwachung Sprache Modell Name Virtual OC Genie Taste BIOS-MenüAuswahl SystemInformation BootgerätePrioritätsleiste BIOS-MenüAuswahl OC-Menü Menüanzeige Deutsch Wichtig • Die Übertaktung ist nur für - MSI H81M | User Guide - Page 94
- Änderungen sind nicht möglich. ▶ EIST [Enabled] Aktivieren oder deaktivieren Sie die Enhanced Intel® SpeedStep Technologie. ▶ Intel Turbo Boost [Enabled] Aktivieren oder deaktivieren Sie Intel® Turbo Boost. Diese Option wird angezeigt, wenn die installierte CPU diese Einstellungen unterstützt - MSI H81M | User Guide - Page 95
Deutsch ▶ DRAM Frequency [Auto] Setzen Sie die DRAM Frequenz. Bitte beachten Sie, dass ein zuverlässiges Übertaktungsverhalten nicht garantiert werden kann. ▶ Adjusted DRAM Frequency Zeigt die Speicherfrequenz an. Nur Anzeige - keine Änderung möglich. ▶ DRAM Timing Mode [Auto] Wählt den Speicher - MSI H81M | User Guide - Page 96
um bestmögliche Systemstabilität und -leistung zu gewährleisten. Stellt für sie EMI ein Problem dar, wählen Sie die gewünschte Bandbreite zur Reduktion der EMI. • Je den maximalen CPUID Eingabewert. ▶ Execute Disable Bit [Enabled] Intel's Execute Disable Bit kann an den Rechner gerichtete "Buffer - MSI H81M | User Guide - Page 97
the CPU AES (Advanced Encryption Standard-New Instructions) support. This item appears when a CPU supports this function. [Enabled] Aktiviert die Intel AES Unterstützung. [Disabled] Deaktiviert die Intel AES Unterstützung. ▶ Intel Adaptive Thermal Monitor [Enabled] Aktiviert oder deaktiviert - MSI H81M | User Guide - Page 98
Deutsch ▶ C1E Support [Disabled] Aktiviert oder deaktiviert die C1E-Funktion für Stromersparnis im Leerlauf. Diese Option wird angezeigt, wenn "Intel C-State" aktiviert ist. [Enabled] Ermöglicht die C1E Funktion, um die CPU-Frequenz und Spannung zur Stromersparnis im Leerlauf zu reduzieren. [ - MSI H81M | User Guide - Page 99
H81M-P33/ H81M-E33/ H87MP33/ H87M-E33/ B85M-P33/ B85M-E33 (MS-7817 v1.X) Micro-ATX H81M-P33/ H81M-E33/ H87M-P33/ H87M-E33/ B85M-P33/ B85M-E33 Intel H81/ H87/ B85 H81M-P33/ H81M-E33/ H87M-P33/ H87M-E33/ B85M-P33/ B85M-E33 Intel LGA1150. Top : mouse Bottom: keyboard CPUFAN USB2.0 - MSI H81M | User Guide - Page 100
® Core™ i7 / Core™ i5 / Core™ i3 / Pentium® / Celeron® 4 LGA 1150 Чипсет ■ Intel® H81/ H87/ B85 Express Память ■ 2x DDR3 16 DDR3 1600/ 1333/ 1066 non-ECC Слоты ■ 1x слот PCIe x16 1x слот PCIe 2.0 x1 ■ 1x порт HDMI - MSI H81M | User Guide - Page 101
ATX 1x 4 ATX 12 4x SATA ■ 2x USB 2.0 4 USB 2.0) ■ 1x 4 1x 4 1x 3 1x 2x 1x 1x CMOS ■ 2x USB ■ UEFI AMI BIOS ■ ACPI 5.0, PnP 1.0a, SM BIOS 2.7, DMI 2.0 ■ Multi-язык ■ Micro-ATX 8.9 x 6.8 22.6 см x 17.3 см) http://www.msi.com/service/cpu-support/ http://www.msi.com/service - MSI H81M | User Guide - Page 102
x16 слот DVI-D/ HDMI SATA1, SATA2 SATA3, SATA4 BIOS ROM RAID Small Business Advantage Intel Rapid Start Intel Smart Response Intel Smart Connect H81M-P33 Gen2 DVI-D SATA 6Гб/с SATA 3Гб/с 64M H81M-E33 H87M-P33 Gen2 HDMI SATA 6Гб/с SATA 3Гб/с 64M Gen3 DVI-D SATA 6Гб/с SATA 6Гб/с 128M - MSI H81M | User Guide - Page 103
H81M-E33/ H87M-E33/ B85M-E33 PS/2 Мыши USB 2.0 PS/2 USB 3.0 HDMI VGA LAN USB 2.0 H81M-P33/ H87M-P33/ B85M-P33 PS/2 Мыши USB 2.0 DVI-D PS/2 USB 3.0 VGA LAN USB 2.0 LAN LINK/ACT LED SPEED LED Link/ Activity LED Speed LED 10 100 1 103 - MSI H81M | User Guide - Page 104
http://youtu.be/bf5La099urI 1 2 3 4 104 - MSI H81M | User Guide - Page 105
5 6 7 8 9 10 11 105 - MSI H81M | User Guide - Page 106
http://youtu.be/76yLtJaKlCQ 1 2 3 DDR3 DDR2 DDR3 DDR3 DDR3 DIMM. 106 - MSI H81M | User Guide - Page 107
JPWR1~2 ATX ATX ATX http://youtu.be/gkDYyR_83I4 1.+2J3.+3.P33.G4VW.3.r+5VoR.5uG6Vn1.r7+do.5uG8Vn.rP9do.Wu51nV0R1d.S1+O1B.1+K2211.V+3213.V+4.133.-5V.113.2G6V1V.rP7o1.SuG81-n.rO9Gdo2.NurG0o2n#.ruR1do2n.eu+2ds2n5.+3dV2.5+4V5. - MSI H81M | User Guide - Page 108
SATA1~4 SATA SATA SATA SATA SATA DVD Blu-Ray SATA http://youtu.be/RZsMpqxythc SATA DVD Blu-Ray SATA SATA. SATA SATA JCI1 BIOS. 2.C1.IGNTroRuUnd 108 - MSI H81M | User Guide - Page 109
CPUFAN,SYSFAN1~2 12 CPUFAN/ SYSFAN1 4.3S.pS2e.e+e1n1.dsG2CerVoounntrdol SYSFAN2 3.N2.o+1U1.G2srVeound Command Center 109 - MSI H81M | User Guide - Page 110
JFP1, JFP2 JFP1 Intel® Front Panel I/O Connectivity Design http://youtu.be/DPELIdVNZUI PowPoewr LeEr DSwi2tc.h+41.0-6..N+8o.-Pin JFP1 1.+3.-5.-7.H+9D.RDReLseEesDrevteSdwitch JFP2 1.S2p.V3eC.aS4kCp.eV5erCakCe5r JFP1. JUSB1~2 USB 2.0 - MSI H81M | User Guide - Page 111
JAUD1 Intel® Front Panel I/O Connectivity De2s.iGg4rn.oN6.uC.Mn8d.1INC0o.DHPeeitnaedctPiohnone Detection 1.M3.IMC5.ILHC7e.RS9a.EdHNPeShaEodn_PeShERoNneDL JTPM1 Trusted Platform Module 2.34V.36S..3tS8aVe.n15Prd0iVaob1.NlwyP2I1o. - MSI H81M | User Guide - Page 112
JBAT1 CMOS CMOS CMOS CMOS 1 1 CMOS CMOS JUSB_PW1, JUSB_PW2 USB Wake Up Event Setup USB или PS/2 JUSB_PW1 USB и PS/2 на 1 JUSB_PW2 (для USB 1 1 1 112 - MSI H81M | User Guide - Page 113
PCI_E1~2: PCIe Слот PCIe PCIe. PCIe 3.0 x16 Слот PCIe 2.0 x1 Слот 113 - MSI H81M | User Guide - Page 114
. BIOS POST (Power On Self Test DEL Press DEL key to enter Setup Menu, F11 to enter Boot Menu DEL F11 RESET Ctrl>++. MSI BIOS GO2BIOS MSI Fast Boot GO2BIOS BIOS GO2BIOS MSI Fast Boot". MSI Fast Boot BIOS. 114 - MSI H81M | User Guide - Page 115
BIOS Язык Virtual OC Genie BIOS BIOS Меню OC OC Genie. 115 - MSI H81M | User Guide - Page 116
Mode [Dynamic Mode ▶ Adjust CPU Ratio [Auto] ▶ Adjusted CPU Frequency ▶ EIST [Enabled Enhanced Intel® SpeedStep. ▶ Intel Turbo Boost [Enabled] Intel® Turbo Boost [Enabled] [Disabled] ▶ Enhanced Turbo [Auto] Enhanced Turbo [Auto] BIOS. [Enabled] [Disabled - MSI H81M | User Guide - Page 117
▶ Adjusted GT Frequency ▶ DRAM Frequency [Auto] DRAM ▶ Adjusted DRAM Frequency DRAM ▶ DRAM Timing Mode [Auto] [Auto] DRAM SPD (Serial Presence Detect [Link] DRAM [UnLink] DRAM ▶ Advanced DRAM Configuration Enter Link] или [Unlink DRAM Timing Mode CMOS CMOS - MSI H81M | User Guide - Page 118
Spectrum Spread Spectrum Spread Spectrum ▶ CPU Features Enter ▶ Hyper-Threading Technology [Enabled] Hyper-threading Intel Hyper-Threading [Enable] Intel Hyper-Threading. [Disabled] ▶ Active Processor Cores [All ▶ Limit CPUID Maximum [Disabled] CPUID. [Enabled - MSI H81M | User Guide - Page 119
[Enabled] CPU AES (Advanced Encryption Standard-New Instructions [Enabled] Intel AES. [Disabled] Intel AES. ▶ Intel Adaptive Thermal Monitor [Enabled] [Enabled] [Disabled] ▶ Intel C-State [Auto] C-state ACPI. [Auto] BIOS. [Enabled] [Disabled] 119 - MSI H81M | User Guide - Page 120
▶ C1E Support [Disabled] C1E Intel CState". [Enabled] C1E [Disabled] ▶ Package C State limit [Auto] C-state Intel CState". [Auto] BIOS. [C0~C7s] C7s, C7, C6, C3, C2, C0). [No limit] C-state ▶ LakeTiny Feature [Disabled] Intel Lake Tiny с iRST для SSD Intel C- - MSI H81M | User Guide - Page 121
简体中文 H81M-P33/ H81M-E33/ H87M-P33/ H87M-E33/ B85M-P33/ B85ME33 系列 (MS-7817 v1.X) Micro-ATX 主板。H81M-P33/ H81M-E33/ H87M-P33/ H87M-E33/ B85M-P33/ B85M-E33 Intel H81/ H87/ B85 Intel LGA1150 H81M-P33/ H81M-E33/ H87M-P33/ H87M-E33/ B85M-P33/ B85M-E33 布局 Top : mouse Bottom: keyboard USB2.0 ports - MSI H81M | User Guide - Page 122
主板规格 CPU 存储 USB 音频 LAN ■ 支持 LGA 1150 Intel® Core™ i7 / Core™ i5 / Core™ i3 / Pentium® / Celeron® 处理器 ■ Intel® H81/ H87/ B85 Express 芯片 ■ 2 条 DDR3 16GB ■ 支持 DDR3 1600/ 1333/ 1066 MHz ECC ■ 1 个 PCIe x16 1 个 PCIe 2.0 x1 插槽 ■ 1 个 HDMI 2560x1600@60Hz, 24bpp/ 1920x1080@60Hz, 36bpp ■ 1 个 - MSI H81M | User Guide - Page 123
2.0 1 个 4-pin CPU 1 个 4-pin 1 个 3-pin 1 2 1 1 个 清除 CMOS 跳线 ■ 2 个 USB ■ UEFI AMI BIOS ■ ACPI 5.0, PnP 1.0a, SM BIOS 2.7, DMI 2.0 ■ Micro-ATX 规格 ■ 8.9 in. x 6.8 in. (22.6 公分 x 17.3 公分) 要了解 CPU http://www.msi.com/service/cpu-support/ http://www.msi.com/service/test-report/ 简体中文 123 - MSI H81M | User Guide - Page 124
SATA4 BIOS ROM RAID Small Business Advantage Intel Rapid Start Intel Smart Response Intel Smart Connect H87M-E33 Gen3 HDMI SATA 6Gb/s SATA 6Gb/s 128Mb 支持 支持 H81M-E33 Gen2 HDMI SATA 6Gb/s SATA 3Gb/s 64Mb B85M-P33 Gen3 DVI-D SATA 6Gb/s SATA 3Gb/s 128Mb H87M-P33 Gen3 DVI-D SATA 6Gb/s SATA 6Gb - MSI H81M | User Guide - Page 125
后置面板 H81M-E33/ H87M-E33/ B85M-E33 PS/2 鼠标 USB 2.0 PS/2 键盘 USB 3.0 HDMI VGA LAN Line-In Line-Out Mic USB 2.0 H81M-P33/ H87M-P33/ B85M-P33 PS/2 鼠标 USB 2.0 DVI-D VGA LAN Line-In Line-Out PS/2 键盘 USB 3.0 Mic USB 2.0 LAN LED 指示 LINK/ACT LED SPEED LED LED Link/ Activity LED Speed - MSI H81M | User Guide - Page 126
CPU 当您安装CPU CPU CPU CPU CPU 视频演示 CPU http://v.youku.com/v_show/id_XNDkyOTY1NjQ0.html 1 2 注意 CPU 3. CPU CPU CPU CPU 4 CPU 缺口 对齐点 126 简体中文 - MSI H81M | User Guide - Page 127
5 PnP PnP CPU PnP 6 CPU CPU 过热。 散热膏 7 CPU 8 9 10 11 CPU CPU 注意 CPU CPU CPU CPU CPU 明书。 127 简体中文 - MSI H81M | User Guide - Page 128
http://v.youku.com/v_show/id_XNDkyOTc5OTMy.html 1 2 3 注意 • 由于DDR3内存不与DDR2 DDR3 DDR3内存插入DDR3插槽中。 128 简体中文 - MSI H81M | User Guide - Page 129
.com/v_show/id_XNDkzODU0MDQw.html 1.+2J3.+3.P33.G4VW.3.r+5VoR.5uG6Vn1.r7+do.5uG8Vn.rP9do.Wu51nV0R1d.S1+O1B.1+K2211.V+3213.V+4.133.-5V.113.2G6V1V.rP7o1.SuG81-n.rO9Gdo2.NurG0o2n#.ruR1do2n.eu+2ds2n5.+3dV2.5+4V5.GVround 2.G1.rGouronudnd JPWR2 4.+31.+21V2V 注意 ATX JCOM1 16550A 16 bytes FIFOs - MSI H81M | User Guide - Page 130
SATA1~4: SATA 接口 ATA ATA ATA HDD SSD CD/ DVD/ Blu-Ray)。 视频演示 SATA HDD http://v.youku.com/v_show/id_XNDkzODU5MTky.html 注意 ATA HDD SSD CD / DVD / Blu-Ray HDD,SSD ATA 90 SATA 上。 JCI1 BIOS 2.C1.IGNTroRuUnd 130 简体中文 - MSI H81M | User Guide - Page 131
CPUFAN,SYSFAN1~2 12V CPU CPUFAN/ SYSFAN1 4.3S.pS2e.e+e1n1.dsG2CerVoounntrdol SYSFAN2 3.N2.o+1U1.G2srVeound 注意 CPU CPU Command Center CPU 简体中文 131 - MSI H81M | User Guide - Page 132
JFP1, JFP2 JFP1是和Intel®的前置I/O M M M 视频演示 http://v.youku.com/v_show/id_XNDkyOTg3NjMy.html PowPoewr LeEr DSwi2tc.h+41.0-6..N+8o.-Pin JFP1 1.+3.-5.-7.H+9D.RDReLseEesDrevteSdwitch JFP2 1.S2p.V3eC.aS4kCp.eV5erCakCe5r 注意 M JFP1上。 JUSB1~2: USB 2.0 USB USB - MSI H81M | User Guide - Page 133
JAUD1 Intel I/O连接设计 手册。 2.G4r.oN6uC.Mn8d.1INC0o.DHPeeitnaedctPiohnone Detection 1.M3.IMC5.ILHC7e.RS9a.EdHNPeShaEodn_PeShERoNneDL JTPM1: TPM TPM TPM 2.34V.36S..3tS8aVe.n15Prd0iVaob1.NlwyP2I1o.eRopG4rwoPQ.rwGeionreurornudnd 1.L3P.L5CP.LCC7P. - MSI H81M | User Guide - Page 134
JBAT1: 清除 CMOS 跳线 CMOS RAM CMOS RAM CMOS RAM。 1 1 注意 CMOS RAM CMOS JUSB_PW1, JUSB_PW2: USB BIOS选项"Wake Up Event Setup"的USB及PS/2端口。 JUSB_PW1 USB 端口和 PS/2 端口) JUSB_PW2 (供板载 USB 接口) 1 开启 1 开启 1 1 简体中文 134 - MSI H81M | User Guide - Page 135
PCI_E1~2: PCIe 此 PCIe PCIe PCIe 3.0 x16 插槽 PCIe 2.0 x1 插槽 注意 135 简体中文 - MSI H81M | User Guide - Page 136
BIOS BIOS 进入 BIOS 设置 POST DEL BIOS: Press DEL key to enter Setup Menu, F11 to enter Boot Menu (按 DEL F11 Setup Reset Ctrl>和 - MSI H81M | User Guide - Page 137
概述 进入 CLICK BIOS II BIOS OC 菜单 菜单显示 语言 系统信息 BIOS 简体中文 注意 OC Genie选项。 137 - MSI H81M | User Guide - Page 138
] 固定CPU比率。 [Dynamic Mode] CPU CPU ▶ Adjust CPU Ratio [Auto ▶ Adjusted CPU Frequency CPU ▶ EIST [Enabled Intel® SpeedStep 技术。 ▶ Intel Turbo Boost [Enabled] Intel® Turbo Boost CPU [Enabled] CPU [Disabled] ▶ Enhanced Turbo [Auto] CPU内核 Enhanced Turbo CPU 性能。 [Auto - MSI H81M | User Guide - Page 139
Interference) 问题。 [Disabled] 提高CPU 注意 EMI Disabled EMI Spread Spectrum EMI。 • Spread Spectrum EMI Spread Spectrum EMI规章。 Spread Spectrum ▶ CPU Features 按 - MSI H81M | User Guide - Page 140
[Enabled] CPU AES (Advanced Encryption Standard-New Instructions CPU [Enabled] 开启Intel AES支持。 [Disabled] 关闭Intel AES支持。 ▶ Intel Adaptive Thermal Monitor [Enabled] Intel CPU过热。 [Enabled] 当CPU CPU [Disabled] ▶ Intel C-State [Auto] C-state是一种由ACPI [Auto] 此设置由BIOS - MSI H81M | User Guide - Page 141
▶ C1E Support [Disabled] CPU Intel C-State [Enabled] 开启C1E功能减少CPU [Disabled] ▶ Package C State limit [Auto] CPU C-state Intel C-State [Auto] 此设置由BIOS [C0~C7s] C7s, C7, C6, C3, C2, 然后 C0。 [No limit] 对CPU无C-state限制。 ▶ LakeTiny Feature [Disabled] SSD iRST的Intel Lack - MSI H81M | User Guide - Page 142
142 简体中文 - MSI H81M | User Guide - Page 143
-P33/ H81M-E33/ H87M-P33/ H87M-E33/ B85M-P33/ B85M-E33 系列 (MS-7817 v1.X) Micro-ATX Intel H81/ H87/ B85 Intel LGA1150 H81M-P33/ H81M-E33/ H87M-P33/ H87M-E33/ B85M-P33/ B85M-E33 配置圖 JPWR1 SYSFAN2 Top : mouse Bottom: keyboard USB2.0 ports JPWR2 USB3.0 ports DVI-D port (for H81M-P33/ H87M-P33 - MSI H81M | User Guide - Page 144
規格 儲存 USB ■ 支援 LGA 1150 Intel® Core™ i7 / Core™ i5 / Core™ i3 / Pentium® / Celeron® 處理器 ■ Intel® H81/ H87/ B85 Express 晶片組 ■ 2 條 DDR3 16GB ■ 支援 DDR3 1600/ 1333/ 1066 MHz non-ECC、un-buffered 記憶體 ■ 1 個 PCIe x16 1 個 PCIe 2.0 x1 插槽 ■ 1 個 HDMI 2560x1600@60Hz, 24bpp/ 1920x1080@60Hz, 36bpp ■ 1 - MSI H81M | User Guide - Page 145
USB 2.0 4 個 USB 2.0 1 個 4-pin CPU 1 個 4-pin 1 個 3-pin 1 2 1 1 個清除 CMOS 跳線 ■ 2 個 USB ■ UEFI AMI BIOS ■ ACPI 5.0, PnP 1.0a, SM BIOS 2.7, DMI 2.0 ■ Micro-ATX ■ 8.9 x 6.8 英吋 (22.6 x 17.3 公分) CPU http://www.msi.com/service/cpu-support/ http://www.msi.com/service/test-report/ 繁體中文 145 - MSI H81M | User Guide - Page 146
SATA4 BIOS ROM RAID Small Business Advantage Intel Rapid Start Intel Smart Response Intel Smart Connect H87M-E33 Gen3 HDMI SATA 6Gb/s SATA 6Gb/s 128Mb 支援 支援 H81M-E33 Gen2 HDMI SATA 6Gb/s SATA 3Gb/s 64Mb B85M-P33 Gen3 DVI-D SATA 6Gb/s SATA 3Gb/s 128Mb H87M-P33 Gen3 DVI-D SATA 6Gb/s SATA 6Gb - MSI H81M | User Guide - Page 147
H81M-E33/ H87M-E33/ B85M-E33 PS/2 滑鼠 USB 2.0 連接埠 PS/2 鍵盤 USB 3.0 連接埠 HDMI 連接埠 VGA 連接埠 麥克風 USB 2.0 連接埠 H81M-P33/ H87M-P33/ B85M-P33 PS/2 滑鼠 USB 2.0 連接埠 DVI-D 連接埠 VGA 連接埠 PS/2 鍵盤 USB 3.0 連接埠 麥克風 USB 2.0 連接埠 LINK/ACT LED SPEED LED LED Link/ Activity LED Speed LED - MSI H81M | User Guide - Page 148
安裝 CPU 在安裝 CPU CPU CPU 與 CPU CPU 示範影片 CPU http://youtu.be/bf5La099urI 1 2 注意事項 CPU CPU 底部。 3 CPU CPU 4 CPU 凹槽 對齊點 148 繁體中文 - MSI H81M | User Guide - Page 149
5 PnP CPU PnP CPU PnP 6. 在 CPU CPU 7 CPU 8 位。 9 4 聲。 10 11. 最後將 CPU CPU 注意事項 • 確認 CPU CPU CPU CPU CPU 149 繁體中文 - MSI H81M | User Guide - Page 150
http://youtu.be/76yLtJaKlCQ 1 2 3 注意事項 • DDR3 DDR2 DDR3 DDR3 150 繁體中文 - MSI H81M | User Guide - Page 151
示範影片 http://youtu.be/gkDYyR_83I4 1.+2J3.+3.P33.G4VW.3.r+5VoR.5uG6Vn1.r7+do.5uG8Vn.rP9do.Wu51nV0R1d.S1+O1B.1+K2211.V+3213.V+4.133.-5V.113.2G6V1V.rP7o1.SuG81-n.rO9Gdo2.NurG0o2n#.ruR1do2n.eu+2ds2n5.+3dV2.5+4V5.GVround 2.G1.rGouronudnd JPWR2 4.+31.+21V2V 注意事項 ATX JCOM1 16 位元組 FIFO 的 16550A - MSI H81M | User Guide - Page 152
SATA1~4:SATA 接頭 SATA SATA 裝置。SATA HDD SSD CD/ DVD/ Blu-Ray)。 示範影片 SATA http://youtu.be/RZsMpqxythc 注意事項 • 多數 SATA CD/ DVD/ BluRay SATA SATA SATA 90 SATA JCI1 BIOS 2.C1.IGNTroRuUnd 152 繁體中文 - MSI H81M | User Guide - Page 153
CPUFAN,SYSFAN1~2 12V CPU CPUFAN/ SYSFAN1 4.3S.pS2e.e+e1n1.dsG2CerVoounntrdol SYSFAN2 3.N2.o+1U1.G2srVeound 注意事項 CPU CPU Command Center CPU 繁體中文 153 - MSI H81M | User Guide - Page 154
JFP1, JFP2 LED JFP1 Intel M-Connector M-Connector M-Connector 示範影片 http://youtu.be/DPELIdVNZUI PowPoewr LeEr DSwi2tc.h+41.0-6..N+8o.-Pin JFP1 1.+3.-5.-7.H+9D.RDReLseEesDrevteSdwitch JFP2 1.S2p.V3eC.aS4kCp.eV5erCakCe5r 注意事項 M-Connector JFP1 JUSB1~2:USB 2.0 - MSI H81M | User Guide - Page 155
JAUD1 Intel 2.G4r.oN6uC.Mn8d.1INC0o.DHPeeitnaedctPiohnone Detection 1.M3.IMC5.ILHC7e.RS9a.EdHNPeShaEodn_PeShERoNneDL JTPM1:TPM TPM 2.34V.36S..3tS8aVe.n15Prd0iVaob1.NlwyP2I1o.eRopG4rwoPQ.rwGeionreurornudnd 1.L3P.L5CP.LCC7P.loLRC9cP. - MSI H81M | User Guide - Page 156
JBAT1:清除 CMOS 跳線 CMOS RAM CMOS RAM CMOS RAM。 1 1 注意事項 CMOS RAM CMOS RAM JUSB_PW1, JUSB_PW2: USB BIOS 選單 Wake Up Event Setup 項目的 USB 及PS/2 JUSB_PW1 (背板 USB 及 PS/2 連接埠) 1 支援 JUSB_PW2 1 (內建 USB 接頭) 支援 1 1 繁體中文 156 - MSI H81M | User Guide - Page 157
PCI_E1~2:PCIe PCIe PCIe PCIe 3.0 x16 插槽 PCIe 2.0 x1 插槽 注意事項 157 繁體中文 - MSI H81M | User Guide - Page 158
BIOS 進入 BIOS 設定 POST DEL Press DEL key to enter Setup Menu, F11 to enter Boot Menu (按 DEL F11 DEL BIOS RESET Ctrl>、 及 - MSI H81M | User Guide - Page 159
概觀 進入BIOS OC Genie 鈕 BIOS 選單 語言 系統資訊 BIOS 選單 超頻選單 顯示選單 繁體中文 注意事項 OC Genie 159 - MSI H81M | User Guide - Page 160
CPU 倍頻依 CPU ▶ Adjust CPU Ratio [Auto CPU CPU CPU ▶ Adjusted CPU Frequency CPU ▶ EIST [Enabled Enhanced Intel® SpeedStep 技術。 ▶ Intel Turbo Boost [Enabled] Intel® Turbo Boost CPU [Enabled] CPU [Disabled] ▶ Enhanced Turbo [Auto] CPU Turbo CPU 效能。 [Auto] 本項由 BIOS - MSI H81M | User Guide - Page 161
[Auto] Auto),BIOS ▶ Spread Spectrum [Enabled] [Disabled] 強化 CPU 注意事項 EMI Disabled EMI ▶ CPU Features 按下 - MSI H81M | User Guide - Page 162
[Enabled] CPU MLC Spatial prefetcher)。 [Enabled] [Disabled] ▶ CPU AES Instructions [Enabled] CPU AES CPU [Enabled] 開啟 Intel AES 功能 [Disabled] 關閉 Intel AES 功能 ▶ Intel Adaptive Thermal Monitor [Enabled] Intel CPU 過熱。 [Enabled] CPU CPU [Disabled] 繁體中文 162 - MSI H81M | User Guide - Page 163
C-state 是種由 ACPI [Auto] 本項由 BIOS [Enabled] [Disabled] ▶ C1E Support [Disabled] C1E CPU Intel C-State" 設為 [Enabled [Enabled] 開啟 C1E CPU [Disabled] ▶ Package C State limit [Auto] CPU C-state Intel C-State" 設為 [Enabled [Auto] 本項由 BIOS [[C0~C7s] C7s, C7 - MSI H81M | User Guide - Page 164
164 繁體中文 - MSI H81M | User Guide - Page 165
日本語 この度はH81M-P33/ H81M-E33/ H87M-P33/ H87M-E33/ B85M-P33/ B85M-E33 MS-7817 v1.X) Micro-ATX H81M-P33/ H81M-E33/ H87M-P33/ H87M-E33/ B85M-P33/ B85M-E33 H81/ H87/ B85 Intel LGA1150 Top : mouse Bottom: keyboard USB2.0 ports JPWR2 USB3.0 ports DVI-D port (for H81M-P33/ H87M-P33/ B85M-P33) - MSI H81M | User Guide - Page 166
対応CPU USB LAN ■ LGA 1150 Intel® Core™ i7 / Core™ i5 / Core™ i3 / Pentium® / Celeron H81/ H87/ B85 Express ■ DDR3スロット2 16GB DDR3 1600/ 1333/ 1066 MHz non-ECC、un-buffered ■ PCIe x16 x1 PCIe 2.0 x1 x1 ■ HDMI x1 2560x1600@60Hz, 24bpp/ - MSI H81M | User Guide - Page 167
(4基の追加USB 2.0 4ピンCPU x1 ■ 4 x1 ■ 3 x1 x1 x2 x1 CMOS x1 ■ USB x2 ■ UEFI AMI BIOS ■ ACPI 5.0, PnP 1.0a, SM BIOS 2.7, DMI 2.0 ■ Micro-ATX寸法 ■ 8.9 in. x 6.8 in. (22.6 cm x 17.3 cm) 最新のCPU Web http://www.msi.com/service/cpu-support/ Web http://www.msi.com/service/test-report/ 日本語 167 - MSI H81M | User Guide - Page 168
HDMI SATA1, SATA2 SATA3, SATA4 BIOS ROM RAID Small Business Advantage Intel Rapid Start Intel Smart Response Intel Smart Connect H81M-P33 Gen2 DVI-D SATA 6Gb/s SATA 3Gb/s 64Mb サポート H81M-E33 Gen2 HDMI SATA 6Gb/s SATA 3Gb/s 64Mb サポート H87M-P33 Gen3 DVI-D SATA 6Gb/s SATA 6Gb/s 128Mb - MSI H81M | User Guide - Page 169
I/Oパネル H81M-E33/ H87M-E33/ B85M-E33 PS/2マウス USB 2.0 PS/2 USB 3.0 HDMI VGA LAN Line-In Line-Out Mic USB 2.0 H81M-P33/ H87M-P33/ B85M-P33 PS/2マウス USB 2.0 DVI-D VGA LAN Line-In Line-Out PS/2 USB 3.0 Mic USB 2.0 LAN LED LINK/ACT LED SPEED LED LED Link/ Activity LED LED) - MSI H81M | User Guide - Page 170
CPU CPU CPU CPUとCPU CPU CPU http://youtu.be/bf5La099urI 1 2 注意 CPU 3. CPU CPUをソケッ CPU CPU 4 CPU切り欠き 170 日本語 - MSI H81M | User Guide - Page 171
5 PnP CPU PnP CPU PnP 6 CPU CPU 7 CPU 8 CPU CPU 9. CPU 10 11 CPU 注意 CPU CPU CPU 171 日本語 - MSI H81M | User Guide - Page 172
http://youtu.be/76yLtJaKlCQ 1 2 3 注意 • DDR3 DDR2 DDR3 DDR3 DDR2 172 日本語 - MSI H81M | User Guide - Page 173
http://youtu.be/gkDYyR_83I4 1.+2J3.+3.P33.G4VW.3.r+5VoR.5uG6Vn1.r7+do.5uG8Vn.rP9do.Wu51nV0R1d.S1+O1B.1+K2211.V+3213.V+4.133.-5V.113.2G6V1V.rP7o1.SuG81-n.rO9Gdo2.NurG0o2n#.ruR1do2n.eu+2ds2n5.+3dV2.5+4V5.GVround 2.G1.rGouronudnd JPWR2 4.+31.+21V2V 注意 ATX JCOM1 16550A 16バイトFIFO 2.S4I - MSI H81M | User Guide - Page 174
SATA1~4: SATA SATA SATA SATA HDD SSD CD/ DVD/ Blu-Ray SATA HDD http://youtu.be/RZsMpqxythc 注意 SATA HDD SSD CD/ DVD/ Blu-Ray SATA HDD、SSD SATA • SATA 90 • SATA JCI1 2 BIOS 2.C1.IGNTroRuUnd 174 日本語 - MSI H81M | User Guide - Page 175
CPUFAN,SYSFAN1~2 12V CPU CPUFAN/ SYSFAN1 4.3S.pS2e.e+e1n1.dsG2CerVoounntrdol SYSFAN2 3.N2.o+1U1.G2srVeound 注意 • CPU Command Center CPU 日本語 175 - MSI H81M | User Guide - Page 176
JFP1, JFP2 JFP1 M-Connector M-Connector JFP1 http://youtu.be/DPELIdVNZUI PowPoewr LeEr DSwi2tc.h+41.0-6..N+8o.-Pin JFP1 1.+3.-5.-7.H+9D.RDReLseEesDrevteSdwitch JFP2 1.S2p.V3eC.aS4kCp.eV5erCakCe5r 注意 M-Connector JFP1 JUSB1~2: USB 2.0 USB USB HDD MP3 2.V4C.U6C. - MSI H81M | User Guide - Page 177
JAUD1 2.G4r.oN6uC.Mn8d.1INC0o.DHPeeitnaedctPiohnone Detection 1.M3.IMC5.ILHC7e.RS9a.EdHNPeShaEodn_PeShERoNneDL JTPM1: TPM TPM (Trusted Platform Module TPM 2.34V.36S..3tS8aVe.n15Prd0iVaob1.NlwyP2I1o.eRopG4rwoPQ.rwGeionreurornudnd 1.L3P.L5CP.LCC7P.loLRC9cP.eLka1CsPd1e1ad.CtL3drPea. - MSI H81M | User Guide - Page 178
JBAT1: クリアCMOSジャンパ BIOS CMOS CMOS OS 1 1 注意 CMOS RAM CMOS JUSB_PW1, JUSB_PW2: USB USB またはPS/2 BIOS Wake Up Event Setup JUSB_PW1 (I/OパネルUSB ポート& PS/2 1 JUSB_PW2 USB 1 1 1 日本語 178 - MSI H81M | User Guide - Page 179
PCI_E1~2: PCIe PCIe PCIe PCIe 3.0 x16スロット PCIe 2.0 x1スロット 注意 BIOS 179 日本語 - MSI H81M | User Guide - Page 180
(Power On Self Test DEL BIOS Press DEL key to enter Setup Menu, F11 to enter Boot Menu (、と - MSI H81M | User Guide - Page 181
概要 BIOS 言語 Virtual OC Genieボタン BIOS OCメニュー BIOS 日本語 注意 PC OC Genie 181 - MSI H81M | User Guide - Page 182
Mode] CPU cpu ▶ Adjust CPU Ratio [Auto] CPU CPU CPU ▶ Adjusted CPU Frequency 現在のCPU ▶ EIST [Enabled] Enhanced Intel® SpeedStep ▶ Intel Turbo Boost [Enabled] CPU [Enabled] CPU CPU [Disabled] ▶ Enhanced Turbo [Auto] CPU Enhanced Turbo [Auto] BIOS [Enabled - MSI H81M | User Guide - Page 183
▶ DRAM Timing Mode [Auto] [Auto] SPD (Serial Presence Detect DRAM [Link] DRAM [UnLink] DRAM ▶ Advanced DRAM Configuration - MSI H81M | User Guide - Page 184
[Enabled] 拡張のCPUID OS BIOSがCPUID [Disabled] CPUID ▶ Execute Disable Bit [Enabled] [Enabled] NO-Execution [Disabled] ▶ Intel Virtualization Tech [Enabled] [Enabled] OS [Disabled] ▶ Hardware Prefetcher [Enabled] MLC [Enabled] CPU L2 [Disabled - MSI H81M | User Guide - Page 185
Standard-New Instructions CPU [Enabled] インテルAES [Disabled] インテルAES ▶ Intel Adaptive Thermal Monitor [Enabled] CPU [Enabled] CPU CPU [Disabled] ▶ Intel C-State [Auto] C-stateはACPI [Auto] BIOS [Enabled] CPU [Disabled] ▶ C1E Support [Disabled] Halt - MSI H81M | User Guide - Page 186
注意: "Intel Turbo Boost Long Duration Power Limit (W) [Auto TDP Long Duration Maintained (s) [Auto] "Long duration power Limit(W Short Duration Power Limit (W) [Auto CPU TDP CPU Current limit (A) [Auto CPU CPU 1/2/3/4-Core Ratio Limit [Auto CPU CPU 186 日本語
-
 1
1 -
 2
2 -
 3
3 -
 4
4 -
 5
5 -
 6
6 -
 7
7 -
8
-
9
-
10
-
11
-
12
-
13
-
14
-
15
-
16
-
17
-
18
-
19
-
20
-
21
-
22
-
23
-
24
-
25
-
26
-
27
-
28
-
29
-
30
-
31
-
32
-
33
-
34
-
35
-
36
-
37
-
38
-
39
-
40
-
41
-
42
-
43
-
44
-
45
-
46
-
47
-
48
-
49
-
50
-
51
-
52
-
53
-
54
-
55
-
56
-
57
-
58
-
59
-
60
-
61
-
62
-
63
-
64
-
65
-
66
-
67
-
68
-
69
-
70
-
71
-
72
-
73
-
74
-
75
-
76
-
77
-
78
-
79
-
80
-
81
-
82
-
83
-
84
-
85
-
86
-
87
-
88
-
89
-
90
-
91
-
92
-
93
-
94
-
95
-
96
-
97
-
98
-
99
-
100
-
101
-
102
-
103
-
104
-
105
-
106
-
107
-
108
-
109
-
110
-
111
-
112
-
113
-
114
-
115
-
116
-
117
-
118
-
119
-
120
-
121
-
122
-
123
-
124
-
125
-
126
-
127
-
128
-
129
-
130
-
131
-
132
-
133
-
134
-
135
-
136
-
137
-
138
-
139
-
140
-
141
-
142
-
143
-
144
-
145
-
146
-
147
-
148
-
149
-
150
-
151
-
152
-
153
-
154
-
155
-
156
-
157
-
158
-
159
-
160
-
161
-
162
-
163
-
164
-
165
-
166
-
167
-
168
-
169
-
170
-
171
-
172
-
173
-
174
-
175
-
176
-
177
-
178
-
179
-
180
-
181
-
182
-
183
-
184
-
185
-
186
 |
 |
Preface
±
Copyright Notice
The material in this document is the intellectual property of
MICRO-STAR
INTERNATIONAL. We take every care in the preparation of this document, but no
guarantee is given as to the correctness of its contents. Our products are under
continual improvement and we reserve the right to make changes without notice.
Trademarks
All trademarks in this manual are properties of their respective owners.
MSI
®
is registered trademark of Micro-Star Int’l Co.,Ltd.
NVIDIA
®
is registered trademark of NVIDIA Corporation.
ATI
®
is registered trademark of AMD Corporation.
AMD
®
is registered trademarks of AMD Corporation.
Intel
®
is registered trademarks of Intel Corporation.
Windows
®
is registered trademarks of Microsoft Corporation.
AMI
®
is registered trademark of American Megatrends Inc.
Award
®
is a registered trademark of Phoenix Technologies Ltd.
Sound Blaster
®
is registered trademark of Creative Technology Ltd.
Realtek
®
is registered trademark of Realtek Semiconductor Corporation.
JMicron
®
is registered trademark of JMicron Technology Corporation.
Netware
®
is registered trademark of Novell, Inc.
Lucid
®
is trademark of LucidLogix Technologies, Ltd.
VIA
®
is registered trademark of VIA Technologies, Inc.
ASMedia
®
is registered trademark of ASMedia Technology Inc.
iPad, iPhone, and iPod are trademarks of Apple Inc.
Qualcomm Atheros and Killer are trademarks of Qualcomm Atheros Inc.
Revision
History
Revision
Revision
History
Date
V±.0
First release
20±3/07
■
■
■
■
■
■
■
■
■
■
■
■
■
■
■
■
■
G52-78±7±X±