Mackie CFX20 Owner's Manual - Page 5
Quick Start - cfx 20 mixer
 |
View all Mackie CFX20 manuals
Add to My Manuals
Save this manual to your list of manuals |
Page 5 highlights
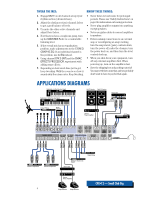
QUICK START We know you can't wait to get the show on the road. Who has time to read a booooring manual? That's fine - the CFX Mixer is designed to set up quickly and operate intuitively - but please, READ THIS PAGE! ZERO THE CONSOLE: 1. Turn everything off, including the mixer's POWER switch and PHANTOM POWER switch. 2. Channel strip TRIM, AUX, EFX, and Fader down. 3. STEREO GRAPHIC EQ sliders centered. 4. MASTER AUX and EFX SENDS, and EFX RETURNS down. 5. Channel strip EQ and PAN controls centered. 6. Channel strip ASSIGN 1-2 and MUTE switches down. 7. Channel strip LOW CUT, PRE FADER, and ASSIGN 3-4 switches up. 8. SUB 1 ASSIGN LEFT, SUB 2 ASSIGN RIGHT down; all other SUB ASSIGN switches up. 9. MAIN MIX and SUB Faders down. OO OO OO U 1 MIC GAIN ZERO 6 +50 LEVEL -15dB +30dB TRIM LOW CUT 100 Hz MASTER SEND 15 15 U AUX 10 U AUX 10 5 5 1 1 0 0 OO OO OO OO OO OO OO +15 +15 5 5 U U 10 10 2 2 15 15 +15 PRE FADER U +15 U EFX 1 (EXT) EFX 2 (INT) +15 U EQ +15 U +15 EFX 1 (EXT) 63 125 250 500 1K 2K 4K 8K 16K STEREO GRAPHIC EQ CFX 12 MIXER 12 CHANNEL COMPACT INTEGRATED LIVE SOUND MIXER CUSTOM 32-BIT PRECISION DIGITAL STEREO EFFECTS PROCESSOR CLIP EFX 2 (INT) RETURN MASTERS U U U U PHANTOM POWER 48v U POWER STATUS HI 12k -15 +15 U MID -15 +15 600 150 1.5k FREQ 100 8k U -15 +15 LOW 80Hz PAN LR OO +15 EFX 2 SEND OO +15 TO MAIN MIX OO +15 +15 OO AUX 1 AUX 2 EFFECTS TO MONITOR REVERSE GATED CATHEDRAL LG. HALL MD. HALL LG. PLATE MD. PLATE SM. ROOM DELAY 1 DELAY 2 DELAY 3 DELAY 4 CHORUS FLANGE PHASER SPRING NORMAL EFX NORMAL 0 10 TIME RATE WIDE BYPASS REVERBS DELAYS CHORUS/FLANGE/PHASER 0 10 DAMPING DEPTH OO OO +20 EFX 1 RETURN U LEFT RIGHT 22 CLIP 10 7 4 +20 TAPE LEVEL 2 BREAK SWITCH (MUTES ALL CHANNELS) ZERO LEVEL SET MAX PHONES LEVEL U 0 2 4 7 10 20 30 0dB = 0dBu OO OO +10 UTILITY OUT LEVEL RUDE SOLO 1 ASSIGN dB 10 1 SUB ASSIGN SUB ASSIGN MUTE DOWN DOWN dB dB 1-2 10 LEFT 10 2 SUB ASSIGN UP dB LEFT 10 3 SUB ASSIGN UP dB LEFT 10 4 UP LEFT STEREO MAIN MIX dB 10 5 3-4 UP 5 5 RIGHT 5 RIGHT 5 RIGHT 5 RIGHT U U UP U DOWNU UP U UP U 5 5 5 5 5 5 10 10 10 10 10 10 20 20 20 20 20 20 30 30 30 30 30 30 40 SOLO 40 40 40 40 40 50 PFL 50 50 50 50 50 60 60 60 60 60 60 OO OO OO MAKE THE CONNECTIONS: 1. Connect your amp's outputs to your speaker inputs (unless, of course, you have powered monitors). 2. Plug all the sound system components into suitable AC outlets, properly grounded and capable of delivering adequate current. 3. Using XLR or TRS cables, make connections from your mixer's MAIN OUT to your amplification system's line inputs. 4. Make connections from your microphones and instruments to the mixer: Connect balanced microphones to the mono channel MIC jacks. (For condenser microphones, engage the PHANTOM POWER switch, located just above the meters.) Connect line-level instruments (synthesizers, guitar effects, direct boxes) to the mono or stereo channel LINE IN TRS jacks. 5. Turn all the power switches on, leaving the amplifier's switch for last. 6. Turn up the MAIN MIX Fader to the "-30" label, for now. We'll crank it up later on. 7. Turn up SUB Faders 1 and 2 to unity gain ("U" label). SET THE LEVELS: 1. Choose one of the microphones or instruments you connected. Make some noise. If it's a microphone, sing at your normal singing volume. If it's a synthesizer, play it at its normal output level. 2. While making noise, turn up that channel's TRIM until the adjacent ZERO LEVEL starts blinking. 3. Disengage (up) that channel's MUTE. 4. Raise that channel's fader to unity gain ("U" label). You should be hearing your noise now. 5. If necessary, apply channel EQ changes. (You may need to compensate for level changes with the channel fader.) 6. Repeat steps 1 through 5 for the remaining active channels. 7. Stop making noise. Everyone: start making music. 5
-
 1
1 -
 2
2 -
 3
3 -
 4
4 -
 5
5 -
 6
6 -
 7
7 -
 8
8 -
 9
9 -
 10
10 -
 11
11 -
12
-
13
-
14
-
15
-
16
-
17
-
18
-
19
-
20
-
21
-
22
-
23
-
24
 |
 |
