Mackie DLM12 Owner's Manual - Page 5
Hookup Diagrams - 2000w
 |
View all Mackie DLM12 manuals
Add to My Manuals
Save this manual to your list of manuals |
Page 5 highlights
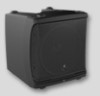
Owner's Manual Hookup Diagrams 2000W Digital Loudspeaker AUX LEVEL BASS +2 TREBLE +2 1 2 SYS MEM XLR Line Mic TRS = Line 1 POWER TRS = R L 2 100 - 240V 50 - 60Hz 250W Ch 1 Mix THRU THIS DEVICE COMPLIES WITH PART 15 OF THE FCC RULES FOR THE U.S. AND ICES-003, FOR CANADA. OPERATION IS SUBJECT TO THE FOLLOWING TWO CONDITIONS: (1) THIS DEVICE MAY NOT CAUSE HARMFUL INTERFERENCE, AND (2) THIS DEVICE MUST ACCEPT ANY INTERFERENCE RECEIVED, INCLUDING INTERFERENCE THAT MAY CAUSE UNDESIRED OPERATION. WARNING: TO REDUCE THE RISK OF FIRE OR ELECTRIC SHOCK, DO NOT EXPOSE THIS EQUIPMENT TO RAIN OR MOISTURE. DO NOT REMOVE COVER. NO USER SERVICEABLE RISK OF ELECTRIC SHOCK DO NOT OPEN PARTS INSIDE. REFER SERVICING TO QUALIFIED PERSONNEL. AVIS: N'OUVREZ PAS LA COUVERTURE. N'EXPOSEZ AVIS: RISQUE DE CHOC ELECTRIQUE - NE PAS OUVRIR PAS CET ÉQUIPEMENT À LA PLUIE OU À L'HUMIDITÉ. SERIAL NUMBER REVISION 2000W Digital Loudspeaker AUX LEVEL BASS +2 TREBLE +2 1 2 SYS MEM XLR Line Mic TRS = Line 1 POWER TRS = R L 2 100 - 240V 50 - 60Hz 250W Ch 1 Mix THRU THIS DEVICE COMPLIES WITH PART 15 OF THE FCC RULES FOR THE U.S. AND ICES-003, FOR CANADA. OPERATION IS SUBJECT TO THE FOLLOWING TWO CONDITIONS: (1) THIS DEVICE MAY NOT CAUSE HARMFUL INTERFERENCE, AND (2) THIS DEVICE MUST ACCEPT ANY INTERFERENCE RECEIVED, INCLUDING INTERFERENCE THAT MAY CAUSE UNDESIRED OPERATION. WARNING: TO REDUCE THE RISK OF FIRE OR ELECTRIC SHOCK, DO NOT EXPOSE THIS EQUIPMENT TO RAIN OR MOISTURE. DO NOT REMOVE COVER. NO USER SERVICEABLE RISK OF ELECTRIC SHOCK DO NOT OPEN PARTS INSIDE. REFER SERVICING TO QUALIFIED PERSONNEL. AVIS: N'OUVREZ PAS LA COUVERTURE. N'EXPOSEZ AVIS: RISQUE DE CHOC ELECTRIQUE - NE PAS OUVRIR PAS CET ÉQUIPEMENT À LA PLUIE OU À L'HUMIDITÉ. SERIAL NUMBER REVISION DLM loudspeakers are the perfect tool for singer-songwriters touring the local coffee shops. Bring your favorite axe and mic, DLM loudspeakers and cables and power cords. Compact and portable perfection. In this example, a dynamic microphone is connected to the channel 1 input of a DLM12 loudspeaker. Be sure that the mic/line switch is down in order to get an extra 30 dB boost for the mic. Be sure the switch is OUT if anything other than a microphone is attached to the channel 1 input. Adjust the level and EQ, as described on page 12. Now grab your axe and plug it directly into the channel 2 input. Or if you use effects, connect the guitar to the effects input and another cable from the effects output to the channel 2 input. Adjust the level and EQ for the guitar now. An additional DLM8 or DLM12 loudspeaker is great for monitoring. Simply connect a cable from the main DLM loudspeaker's THRU jack to the monitor loudspeaker's channel 1 input [mic/line switch OUT!]. Also, make sure the Ch 1/Mix switch is down on the main DLM, as well, so a mix of the vocals and guitar is relayed to the monitor. Release the kickstand for a perfect angle For the output, you will want to set a speaker mode, described in detail on page 13. For this type of setup, PA works well for the main DLM12. However, don't count out the soloist mode! It has a nice low cut and a brilliant high end. Select the monitor mode for the DLM12 monitor. Lastly, you can ring out before you play, utilizing the DLM's feedback destroyer [page 13] or just let it kill the feedback while playing. Small Coffee Shop Owner's Manual 5
-
 1
1 -
 2
2 -
 3
3 -
 4
4 -
 5
5 -
 6
6 -
 7
7 -
 8
8 -
 9
9 -
 10
10 -
 11
11 -
12
-
13
-
14
-
15
-
16
-
17
-
18
-
19
-
20
-
21
-
22
-
23
-
24
-
25
-
26
-
27
-
28
-
29
 |
 |
