Mackie DLM12S Owner's Manual - Page 9
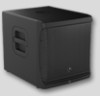
DLM12S Subwoofer: Rear Panel Features, 1. Power Connection, 2. Power Switch, 3. Fan Vents, 4. XLR - 12 powered subwoofer
 |
View all Mackie DLM12S manuals
Add to My Manuals
Save this manual to your list of manuals |
Page 9 highlights
Owner's Manual DLM12S Subwoofer: Rear Panel Features 17 2000W 2W 5 NORMAL INVERT A B 2000W Digital Subwoofer AUX LEVEL BASS +2 TREBLE +2 9 12 15 VOL XVR DLY MEM 10 11 13 14 16 8 STEREO MONO A 467 B POWER 2 INPUTS 100 - 240V 50 - 60Hz 250W 1 HIGH PASS 3 FULL RANGE THIS DEVICE COMPLIES WITH PART 15 OF THE FCC RULES FOR THE U.S. AND ICES-003, FOR CANADA. OPERATION IS SUBJECT TO THE FOLLOWING TWO CONDITIONS: (1) THIS DEVICE MAY NOT CAUSE HARMFUL INTERFERENCE, AND (2) THIS DEVICE MUST ACCEPT ANY INTERFERENCE RECEIVED, INCLUDING INTERFERENCE THAT MAY CAUSE UNDESIRED OPERATION. WARNING: TO REDUCE THE RISK OF FIRE OR ELECTRIC SHOCK, DO NOT EXPOSE THIS EQUIPMENT TO RAIN OR MOISTURE. DO NOT REMOVE COVER. NO USER SERVICEABLE RISK OF ELECTRIC SHOCK DO NOT OPEN PARTS INSIDE. REFER SERVICING TO QUALIFIED PERSONNEL. AVIS: N'OUVREZ PAS LA COUVERTURE. N'EXPOSEZ AVIS: RISQUE DE CHOC ELECTRIQUE - NE PAS OUVRIR PAS CET ÉQUIPEMENT À LA PLUIE OU À L'HUMIDITÉ. SERIAL NUMBER REVISION 1.Power Connection This is a standard 3-prong IEC power connector. Connect the detachable power cord (included in the packaging with the subwoofer) to the power receptacle, and plug the other end of the power cord into an AC outlet. 3.Fan Vents Do not obstruct the ventilation openings of the subwoofer. Fans move air over the heatsinks to cool down the power transistors. If these vents are restricted, then the subwoofer may overheat and shut down. Make sure that the AC power is matched to the AC power indicated on the rear panel (to the left of the IEC receptacle). Disconnecting the plug's ground pin is dangerous. Don't do it! 4.XLR Inputs Balanced XLR female connectors are provided for the left and right inputs. Connect the full-range line-level 2.Power Switch signal from the mixer (or other signal source) to these input jacks. Press the top of this rocker switch inwards to turn on the subwoofer. The front panel power LED will glow with happiness...or at least it will if the subwoofer is plugged into a suitable live AC mains supply. If you are connecting a single subwoofer output, or LFE (low-frequency effects) output to the subwoofer, you may use either the A or B input connector. Press the bottom of this rocker switch inwards to turn off the subwoofer. NEVER connect the output of an amplifier directly to the input of the subwoofer. This could damage the input circuitry of the As a general guide, the mixer (or other signal active subwoofer. source) should be turned on first, DLM12S subwoofers next, and loudspeakers last. As such, the loudspeakers should also be turned off first, followed by the subwoofers, then the mixer. This will reduce the possibility of any turn-on or turn-off thumps and other noises generated by any upstream equipment from coming out of the speakers. Owner's Manual 9
-
 1
1 -
2
-
3
-
 4
4 -
 5
5 -
 6
6 -
 7
7 -
 8
8 -
 9
9 -
 10
10 -
 11
11 -
 12
12 -
 13
13 -
 14
14 -
15
-
16
-
17
-
18
-
19
-
20
-
21
-
22
 |
 |
