Mackie HDA Owners Manual - Page 15
On Led, Ac Mains, Ac Loop, Ac Loop Circuit Breaker - powered speaker reviews
 |
View all Mackie HDA manuals
Add to My Manuals
Save this manual to your list of manuals |
Page 15 highlights
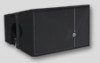
Owner's Manual 7 ON 8 10 AC MAINS AC LOOP AC LOOP CIRCUIT BREAKER PUSH TO RESET 9 Ensure that the AC power supply has a properly grounded safety ground. Failure to follow this warning could cause equipment damage, serious personal injury, or even death. The supplied 9.5 foot (2,896 mm) AC mains plug may not be appropriate for local AC mains receptacles. If not, have a qualified electrician remove the existing AC mains plug and install a plug appropriate for the AC mains supply receptacle and following all local codes. HDA = 27KG / 59LB HDA RIGGING WORKING LOAD LIMIT (WLL): FOUR (4) HDA IN SUCCESSION, 108KG / 236LB If an extension cord is used for the AC mains, use only a cord with the appropriate wire size and current rating for the required current draw and extension cord length. AVIS: RISQUE DE CHOC ELECTRIQUE - NE PAS OUVRIR WARNING: TO REDUCE THE RISK OF FIRE OR ELECTRIC SHOCK, DO NOT EXPOSE THIS EQUIPMENT TO RAIN OR MOISTURE. DO NOT REMOVE COVER. NO USER SERVICEABLE PARTS INSIDE. REFER SERVICING TO QUALIFIED PERSONNEL. SERIAL NUMBER As a general guide, powered speakers should be powered up last, after the mixer and other sources. They should also be the first things turned off. This will reduce the possibility of any turn-on, or turn-off thumps in the loudspeakers. 9. AC LOOP REVISION The Neutrik PowerCon® AC MAINS and AC LOOP connectors are wired in parallel to provide an AC MAINS inlet and outlet on each HDA. 7. ON LED This LED will illuminate when the HDA is connected to a live AC mains outlet. The front panel LED will also turn on, but only if the POWER LIGHT ON switch [4] is engaged. 8. AC MAINS There is no power switch on the HDA. When connected to the AC mains, the loudspeaker will be fully operational, with the output level controlled by the signal source feeding it. Connect the supplied AC mains cord to the AC MAINS Neutrik PowerCon® jack on the rear of the HDA. The PowerCon® system utilizes a locking connector. To lock, twist 1/4 turn clockwise after fully inserting it into the AC MAINS receptacle. Then connect the other end of the cable to the AC mains supply receptacle. The ON LED [7] will light when powered up. The front panel LED will also illuminate, but only if the POWER LIGHT ON switch [4] is engaged. Ensure that the AC mains voltage matches the voltage rating listed on the HDA below the AC MAINS connector. Do not apply 230V mains power if the voltage rating on the loudspeaker is 115V. Immediate and catastrophic damage to the HDA will result and may cause a fire hazard, serious personal injury, or even death. A 1.5 foot (457 mm) AC LOOP cable is included with the HDA. The white connector mates with the AC LOOP outlet, while the blue connector mates with the AC MAINS inlet. Therefore, to loop the AC MAINS from enclosure to enclosure, connect the included AC MAINS jumper cable from the AC LOOP output of one HDA to the AC MAINS input of the next HDA as shown on page 6. Up to four HDAs may be looped in this fashion from a single 20A service. The maximum, continuous load from the first HDA Loop output must not exceed 6A at 100-120V and 3A at 220-240V. 10. AC LOOP CIRCUIT BREAKER The AC LOOP circuit breaker protects the AC LOOP outlet. If the continuous load connected to the AC LOOP outlet exceeds the rated load, the circuit breaker will trip. For this situation, reduce the connected load and then manually reset the circuit breaker. As is the case with the AC LOOP, the maximum, continuous load from the first HDA Loop output must not exceed 6A at 100-120V and 3A at 220-240V. Yes, there are quite a few 'Very Important' hand symbol remarks on this page. Please review them carefully, because they are indeed 'Very Important'! Ok, let's move on to the bottom surface features. Owner's Manual 15
-
 1
1 -
2
-
3
-
4
-
5
-
6
-
7
-
8
-
9
-
 10
10 -
 11
11 -
 12
12 -
 13
13 -
 14
14 -
 15
15 -
 16
16 -
 17
17 -
 18
18 -
 19
19 -
 20
20 -
21
-
22
-
23
-
24
-
25
-
26
-
27
-
28
-
29
-
30
 |
 |
