Magellan Triton 400 Triton User Manual Addendum - English, French, Spanish - Page 2
User Defined Map Datum., Set Custom Position., ENTER, Selecting Next Destination Waypoint in - maps
 |
UPC - 763357117769
View all Magellan Triton 400 manuals
Add to My Manuals
Save this manual to your list of manuals |
Page 2 highlights
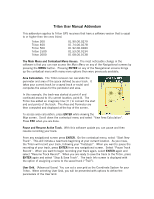
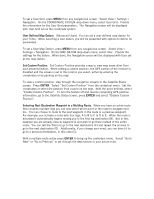
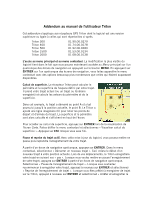
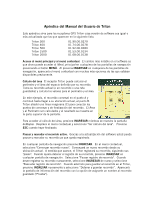
To set a User Grid, press MENU from any navigational screen. Select View > Settings > Navigation. On the COORDINATE SYSTEM drop-down menu, select User Grid. Provide the information for the User Grid parameters. The Navigation screen will be displayed with User Grid set as the coordinate system. User Defined Map Datum. (Advanced Users) You can set a user-defined map datum for your Triton. When selecting a user datum, you will be presented with options to define its parameters. To set a User Map Datum, press MENU from any navigational screen. Select View > Settings > Navigation. On the MAP DATUM drop-down menu, select User. Provide the settings for the datum. When done, the Navigation screen will be displayed with User set as the map datum. Set Custom Position. Set Custom Position provides a way to view map areas other then your present position. When setting a custom position, the GPS portion of the receiver is disabled and the screen is set to the location you select, either by entering the coordinates or by panning on the map. To view a custom position, step through the navigation screens to the Satellite Status screen. Press ENTER. Select "Set Custom Position" from the contextual menu. Set the coordinates or select the position from a point on the map. With the point defined, select "Enable Custom Position". To turn the feature off and resume computing GPS position information, go to the Satellite Status screen, press ENTER and select "Disable Custom Position". Selecting Next Destination Waypoint in a Multileg Route. When you have an active route that contains mulitple legs you can now select which point in the route to navigate next too. You can choose to route to the next waypoint in the route or a previous waypoint. For example, you activate a route with four legs, A to B to C to D to E. When the route is activated it automatically begins routing you to the first leg destination (B). But in this example you are already close to waypoint D and wish to go there instead of the entire route. You can tell the Triton to go to the next destination (C) and repeat the process to go to the next destination (D). Additionally, if you change your mind, you can direct it to go to a previous destination, in this case (C). With a multiple route active press ENTER to bring up the contextual menu. Select "Go to Next" or "Go to Previous" to set through the destinations in your active route.
-
 1
1 -
 2
2 -
 3
3 -
 4
4 -
 5
5 -
 6
6 -
 7
7 -
 8
8
 |
 |