Magic Chef MCBR445B1 User Manual - Page 9
Changing The Reversible Doors - electricity uses
 |
View all Magic Chef MCBR445B1 manuals
Add to My Manuals
Save this manual to your list of manuals |
Page 9 highlights
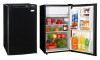
CHANGING THE REVERSIBLE DOORS CAUTION: To avoid personal injury to yourself and/or property, we recommend someone assist you during the door reversal process. This refrigerator has been built with the door hinges on the right. If you wish to change the opening direction, follow the instruction below: z Unplug the refrigerator from its electrical outlet. z Empty everything in the refrigerator, including shelves, food, etc. 1. Remove the hinge cover on the right top of the cabinet. 2. Remove the two screws (using a ratchet tool with a 7/16" socket) that hold the top hinge to the cabinet. Keep these screws for later use. 3. Lift the top hinge straight up to free the pin from the socket on the top of the door. 4. Lift the door and place it on a padded surface to prevent scratching it. 5. Remove the plug buttons from the upper left holes as illustrated and transfer them to the uncovered holes at the right side. Be sure to press the plug buttons firmly into the holes. 6. Lay the cabinet on its side down on the floor. Remove the three screws that hold the bottom hinge to the cabinet using a 7/16" socket. Keep these screws and washer for later use. 8
-
 1
1 -
2
-
3
-
 4
4 -
 5
5 -
 6
6 -
 7
7 -
 8
8 -
 9
9 -
 10
10 -
 11
11
 |
 |
