Magnavox MRD2003799 User manual, English (US) - Page 9
First Time Setup
 |
View all Magnavox MRD2003799 manuals
Add to My Manuals
Save this manual to your list of manuals |
Page 9 highlights
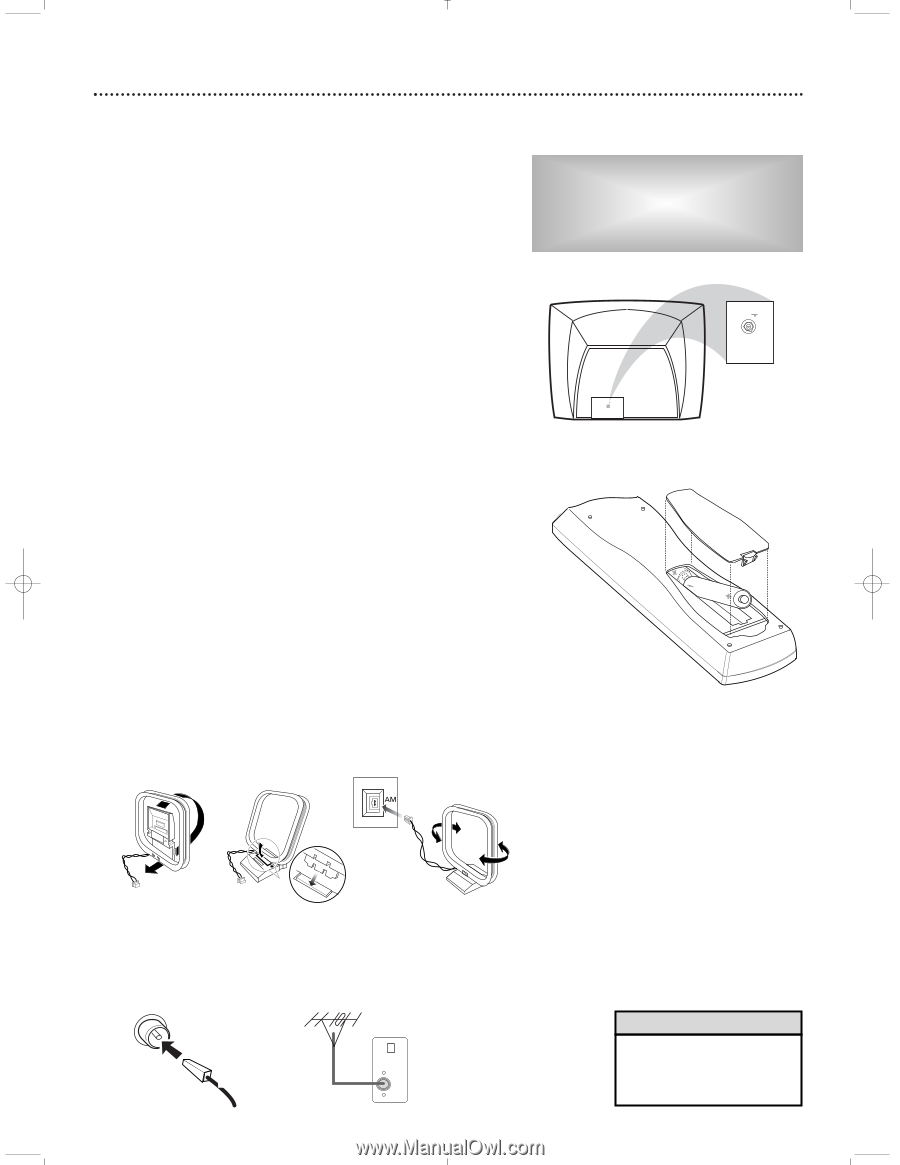
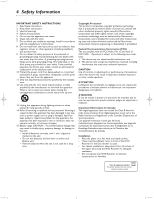
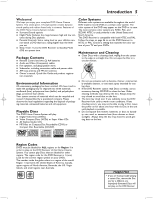
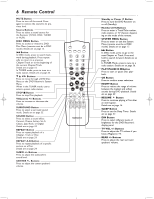
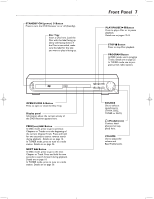
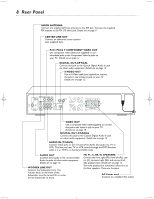
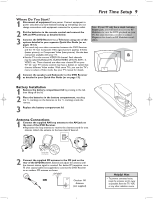
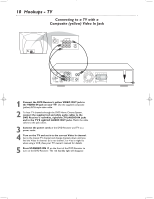
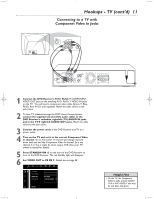
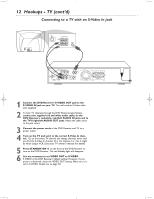
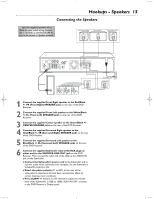
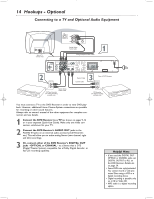
First Time Setup 9 Where Do You Start? 1 Disconnect all equipment from power. Connect equipment to power only after you have finished hooking up everything. Do not change connections with equipment connected to a power outlet. 2 Put the batteries in the remote control and connect the AM and FM antennas as detailed below. 3 Connect the DVD Receiver to a Television using one of the options detailed in your separate Quick-Use Guide (or on pages 10-12). G You need only one video connection between the DVD Receiver and the TV. Use Composite Video (good picture quality), S-Video (better picture), or Component Video (best picture). Use the best connection available with your TV. G Set the TV to the correct VIDEO IN channel. Such channels may be called AUX(iliary) IN, AUDIO/VIDEO (A/V) IN, EXT1, SVIDEO, etc. These channels are often near channel 00 on your TV. Or, your TV remote control may have a button or switch that chooses different Video modes. With some TVs, you use the TV's menu to select a Video mode. See your TV manual for details. 4 Connect the speakers and Subwoofer to the DVD Receiver as detailed in your Quick-Use Guide (or on page 13). Note: If your TV only has a single Antenna In(put) jack, you will need an accessory RF Modulator to view the DVD playback on your TV. See your electronics retailer or contact Magnavox for details on RF Modulator availability. 75 ⍀ Rear of TV 75 ⍀ Battery Installation 1 Remove the battery compartment lid by pressing in the tab, then lifting off the lid. 2 Place the batteries in the battery compartment, matching the +/- markings on the batteries to the +/- markings inside the remote. 3 Replace the battery compartment lid. Antenna Connections 1 Connect the supplied AM loop antenna to the AM jack on the rear of the DVD Receiver. G Reposition the loop antenna to receive the clearest sound for area stations. Attach the antenna to the base stand if desired. Put the claw into the slot. 2 Connect the supplied FM antenna to the FM jack on the rear of the DVD Receiver. Extend and adjust the antenna until the clearest station signal is received. For better FM reception, use a 75 ohm coaxial cable (not supplied) to connect the DVD Receiver to an outdoor FM antenna as shown. OR AM Outdoor FM Antenna FM (75Ω) (not supplied) Helpful Hint • To prevent unwanted noise, keep the antenna as far away as possible from the TV, VCR, or any other radiation source.
-
 1
1 -
2
-
3
-
 4
4 -
 5
5 -
 6
6 -
 7
7 -
 8
8 -
 9
9 -
 10
10 -
 11
11 -
 12
12 -
 13
13 -
 14
14 -
15
-
16
-
17
-
18
-
19
-
20
-
21
-
22
-
23
-
24
-
25
-
26
-
27
-
28
-
29
-
30
-
31
-
32
-
33
-
34
-
35
-
36
-
37
-
38
-
39
-
40
-
41
-
42
-
43
-
44
 |
 |