Magnavox P-09NPE Portable AC owners manual - Page 7
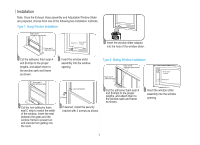
Step Three: Preparing the Adjustable Window Slider
 |
View all Magnavox P-09NPE manuals
Add to My Manuals
Save this manual to your list of manuals |
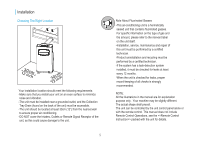
Page 7 highlights
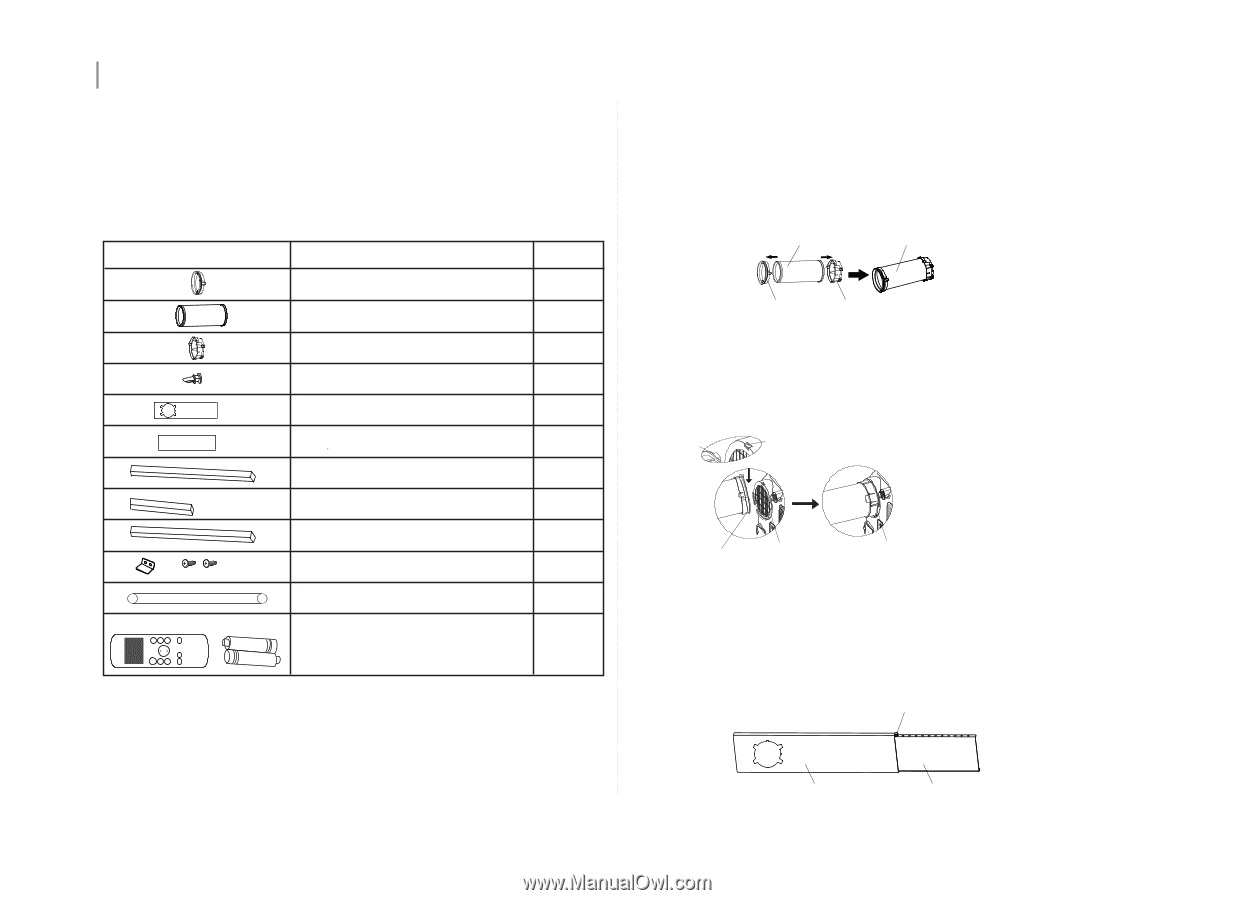
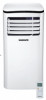
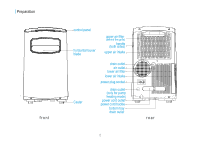
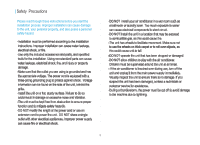
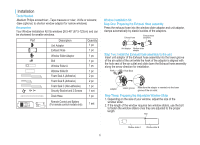
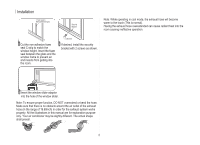
ON/OFF MODE FAN SLEEP SWING Installation Tools Needed -Medium Philips screwdriver; -Tape measure or ruler; -Knife or scissors; -Saw (optional, to shorten window adaptor for narrow windows) Accessories Your Window Installation Kit fits windows 26.5-48" (67.5-123cm) and can be shortened for smaller windows. Part Description Quantity Unit Adaptor 1 pc Exhaust Hose 1 pc Window Slider Adaptor 1 pc Bolt 1 pc Window Slider A 1 pc Window Slider B 1 pc Foam Seal A (Adhesive) 2 pc Foam Seal B (Adhesive) 2 pc Foam Seal C (Non-adhesive) 1 pc Security Bracket and 2 Screws 1 set Drain Hose 1 pc LED SHORT CUT TIMER ON TIMER OFF Remote Control and Battery (For remote control models only) 1 set TEMP Window Installation Kit Step One: Preparing the Exhaust Hose assembly Press the exhaust hose into the window slider adaptor and unit adaptor, clamps automatically by elastic buckles of the adaptors. Exhaust hose Exhaust hose assembly Unit adaptor Window slider adaptor Step Two: Install the Exhaust hose assembly to the unit Insert unit adaptor of the Exhaust hose assembly into the lower groove of the air outlet of the unit while the hook of the adaptor is aligned with the hole seat of the air outlet and slide down the Exhaust hose assembly along the arrow direction for installation. Hook Hole Seat adaptor Lower groove Make sure the adaptor is inserted into the lower groove of the air outlet. Step Three: Preparing the Adjustable Window Slider 1. Depending on the size of your window, adjust the size of the window slider. 2. If the length of the window requires two window sliders, use the bolt to fasten the window sliders once they are adjusted to the proper length. Bolt Window slider A Window slider B 6
-
 1
1 -
 2
2 -
 3
3 -
 4
4 -
 5
5 -
 6
6 -
 7
7 -
 8
8 -
 9
9 -
 10
10 -
 11
11 -
 12
12 -
13
-
14
-
15
-
16
 |
 |