Makita 9032 Owners Manual - Page 6
Functional, Description - arm
 |
View all Makita 9032 manuals
Add to My Manuals
Save this manual to your list of manuals |
Page 6 highlights
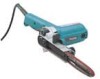
FUNCTIONAL DESCRIPTION CAUTION: • Always be sure that the tool is switched off and unplugged before adjusting or checking function on the tool. 1 1. Lock lever 2. Arm 001215 2 "A" range Adjusting arm inclination The arm can be pivoted and fixed at any desired angle within the "A" range according to the operating position or the figure of the workpiece. Loosen the lock lever by raising it. Pivot the arm to the desired position, and secure the lock lever to fix the arm firmly. 001216 Replacing arm 1 2 By replacing the standard-equipped arm by optional one, 6 mm (1/4") or 13 mm (1/2") width belt can be used. Remove the arm by loosening the screw that secures the arm. Insert the arm that fits the belt to be used, and tighten the screw firmly. 1. Screw 2. Arm 1 2 Switch action CAUTION: • Before plugging in the tool, always check to see that the switch trigger actuates properly and returns to the "OFF" position when released. 001217 To start the tool, simply pull the switch trigger. Release the switch trigger to stop. For continuous operation, pull the switch trigger and then push in the lock button. To stop the tool from the locked position, pull the switch trigger fully, then release it. 1. Lock button 2. Switch trigger 6
-
 1
1 -
 2
2 -
 3
3 -
 4
4 -
 5
5 -
 6
6 -
 7
7 -
 8
8 -
 9
9 -
 10
10 -
 11
11 -
 12
12 -
13
-
14
-
15
-
16
 |
 |
