Makita BMR100W Owners Manual - Page 6
Using Supplied AC power adaptor - manual
 |
View all Makita BMR100W manuals
Add to My Manuals
Save this manual to your list of manuals |
Page 6 highlights
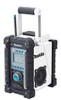
Battery Installation Note: Keeping back up batteries inside the compartment prevent stored data in preset memories from being lost. 1. Pull out the battery compartment locker to release battery compartment. There are main battery pack compartment and back up battery compartment. (Fig.1 & 2) 2. Remove back up battery compartment cover and insert 2 fresh UM-3 (AA sizes). Make sure the batteries are with correct polarity as shown inside the compartment. Replace the battery cover. 3. After back up batteries are inserted, insert the main battery pack to power radio. The suitable battery packs for this radio listed as below. Cluster Battery: 9.6V: 9135 | 9134 | 9122 | PA09 | 9120 12V: 1235 | 1234 | 1222 | PA12 | 1220 14.4V: 1435 | 1434 | 1422 | PA14 | 1420 18V: 1835 | 1834 | 1822 | PA18 Slide Battery: 9.6V: BH9033 | BH9033A | BH9020 | BH9020A 12V: BH1233 | BH1233C | BH1220C 14.4V: BH1433 | BH1420 | BL1430 18V: BL1830 24V: BH2433 | BH2420 The following tables indicate the operating time on a single charge. Battery Capacity 1.3 Ah 2.0 Ah 2.6 Ah 3.0 Ah 3.3 Ah Battery Cartridge•Voltage 9.6V 12V 14.4V 18V PA09 PA12 PA14 PA18 9120 1220 1420 9122 1222 1422 BH9020 1822 BH1220C BH1420 BH9020A 9134 1234 1434 1834 1435 1835 9135 1235 BL1430 BL1830 BH9033 BH1233 BH1433 - BH9033A BH1233C Operating time* 24V (At Max. Volume) - Approx. 7 hour BH2420 Approx. 11 hour - Approx. 13 hour - Approx. 16 hour BH2433 Approx. 17 hour * Operating time may differ by the type of battery, charging or operating conditions. 3-1. Installing or removing Slide battery cartridge (Fig. 3) • To insert the battery cartridge, align the tongue on the battery cartridge with the groove in the housing and slip it into place. Always insert it all the way until it locks in place with a little click. • Do not use force when inserting the battery cartridge. If the cartridge does not slide in easily, it is not being inserted correctly. • To remove the battery cartridge, withdraw it from the tool while sliding the button on the front of the cartridge or pressing the buttons on both sides of the cartridge. 3-2. Installing or removing Cluster battery cartridge (Fig.4) • To insert the battery cartridge, align the tongue on the battery cartridge with the groove in the housing and slip it into place. • Do not use force when inserting the battery cartridge. If the cartridge does not slide in easily, it is not being inserted correctly. • To remove the battery cartridge, withdraw it from the Job site radio. 4. Replace battery compartment locker. 5. Reduced power, distortion and a "stuttering sound "or low battery sign that appears on the display are all the signs that the main battery pack needs to replace. Note: The battery pack can't be charged via the supplied AC power adaptor. 6. When low battery sign appears and an "E" keeps on flashing is the time to replace the back up batteries. Installing the Soft bended rod antenna (Fig.5) Install the Soft bended rod antenna as show in the figure. Using Supplied AC power adaptor (Fig.6) Remove the rubber protector and insert the adaptor plug into the DC socket on the front side of the radio. Plug the adaptor into a standard mains socket outlet. Whenever the adaptor is used, the battery pack are automatically disconnected. The AC adaptor should be disconnected from the main supply when not in use. Setting the clock 1. Clock can be set either when the radio is power on or off. 2. Display will show "-: - -" when the back up batteries are installed. 3. Long press the time set button for more than 2 seconds, display will flash time set symbol and also the hour digit, followed by a beep. 4. Rotate Tuning control to set the required hour. 5. Press button to confirm hour setting, the minute digit will flash. 6. Rotate Tuning control to set the required minute. 7. Press the button again to complete clock setting. Operating the radio This radio equips with three tuning methods - Scan tuning, Manual tuning and Memory presets recall. Scan Tuning 1. Press the Power button to turn on the radio. 6
-
 1
1 -
 2
2 -
 3
3 -
 4
4 -
 5
5 -
 6
6 -
 7
7 -
 8
8 -
 9
9 -
 10
10 -
 11
11 -
 12
12 -
13
-
14
-
15
-
16
-
17
-
18
-
19
-
20
 |
 |
