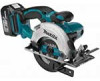
Makita BSS501 Owners Manual - Page 9
Operation - dust nozzle
 |
View all Makita BSS501 manuals
Add to My Manuals
Save this manual to your list of manuals |
Page 9 highlights
Hex wrench storage 1. Hex wrench overheating the motor and dangerous kickback, possibly causing severe injury. • If the tool is operated continuously until the battery cartridge has discharged, allow the tool to rest for 15 minutes before proceeding with a fresh battery. 1 007976 When not in use, store the hex wrench as shown in the figure to keep it from being lost. Connecting a vacuum cleaner (Optional accessory) 1 2 1. Dust nozzle 2. Screw 007977 2 007978 1 1. Dust nozzle 2. Hose 3. Vacuum cleaner 3 007979 Hold the tool firmly. The tool is provided with both a front grip and rear handle. Use both to best grasp the tool. If both hands are holding saw, they cannot be cut by the blade. Set the base on the workpiece to be cut without the blade making any contact. Then turn the tool on and wait until the blade attains full speed. Now simply move the tool forward over the workpiece surface, keeping it flat and advancing smoothly until the sawing is completed. To get clean cuts, keep your sawing line straight and your speed of advance uniform. If the cut fails to properly follow your intended cut line, do not attempt to turn or force the tool back to the cut line. Doing so may bind the blade and lead to dangerous kickback and possible serious injury. Release switch, wait for blade to stop and then withdraw tool. Realign tool on new cut line, and start cut again. Attempt to avoid positioning which exposes operator to chips and wood dust being ejected from saw. Use eye protection to help avoid injury. Rip fence (guide rule) (Accessory) When you wish to perform clean cutting operation, connect a Makita vacuum cleaner to your tool. Install the dust nozzle on the tool using the screw. Then connect a hose of the vacuum cleaner to the dust nozzle as shown in the figure. OPERATION CAUTION: • Always insert the battery cartridge all the way until it locks in place. If you can see the red part on the upper side of the button, it is not locked completely. Insert it fully until the red part cannot be seen. If not, it may accidentally fall out of the tool, causing injury to you or someone around you. • Be sure to move the tool forward in a straight line gently. Forcing or twisting the tool will result in 007980 The handy rip fence allows you to do extra-accurate straight cuts. Simply slide the rip fence up snugly against the side of the workpiece and secure it in position with the screw on the front of the base. It also makes repeated cuts of uniform width possible. 9
-
 1
1 -
2
-
3
-
 4
4 -
 5
5 -
 6
6 -
 7
7 -
 8
8 -
 9
9 -
 10
10 -
 11
11 -
 12
12 -
 13
13 -
 14
14 -
15
-
16
-
17
-
18
-
19
-
20
-
21
-
22
-
23
-
24
-
25
-
26
-
27
-
28
-
29
-
30
-
31
-
32
-
33
-
34
-
35
-
36
 |
 |
