Makita BSS501Z Owners Manual - Page 7
Functional Description - parts
 |
View all Makita BSS501Z manuals
Add to My Manuals
Save this manual to your list of manuals |
Page 7 highlights
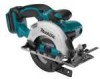
Overcharging shortens the battery service life. 3. Charge the battery cartridge with room temperature at 10 ゚ C - 40 ゚ C (50 ゚ F - 104 ゚ F). Let a hot battery cartridge cool down before charging it. FUNCTIONAL DESCRIPTION CAUTION: • Always be sure that the tool is switched off and the battery cartridge is removed before adjusting or checking function on the tool. Installing or removing battery cartridge 1 2 1. Red part 2. Button 3. Battery cartridge CAUTION: • After adjusting the depth of cut, always tighten the lever securely. Loosen the lever on the side of the rear handle and move the base up or down. At the desired depth of cut, secure the base by tightening the lever. For cleaner, safer cuts, set cut depth so that no more than one blade tooth projects below workpiece. Using proper cut depth helps to reduce potential for dangerous KICKBACKS which can cause personal injury. Bevel cutting 1. Lever 1 3 007971 007969 • Always switch off the tool before insertion or removal of the battery cartridge. • To remove the battery cartridge, withdraw it from the tool while sliding the button on the side of the cartridge. • To insert the battery cartridge, align the tongue on the battery cartridge with the groove in the housing and slip it into place. Always insert it all the way until it locks in place with a little click. If you can see the red part on the upper side of the button, it is not locked completely. Insert it fully until the red part cannot be seen. If not, it may accidentally fall out of the tool, causing injury to you or someone around you. • Do not use force when inserting the battery cartridge. If the cartridge does not slide in easily, it is not being inserted correctly. Adjusting depth of cut 1. Lever Loosen the lever on the bebel scale plate on the front base. Set for the desired angle (0° - 50°) by tilting accordingly, then tighten the lever securely. Sighting 1. Base 2. Cutting line 1 A 2 B 007972 For straight cuts, align the A position on the front of the base with your cutting line. For 45° bevel cuts, align the B position with it. Switch action 1 2 1. Lock-off lever 2. Switch trigger 1 007970 008050 7
-
 1
1 -
 2
2 -
 3
3 -
 4
4 -
 5
5 -
 6
6 -
 7
7 -
 8
8 -
 9
9 -
 10
10 -
 11
11 -
 12
12 -
13
-
14
-
15
-
16
-
17
-
18
-
19
-
20
-
21
-
22
-
23
-
24
-
25
-
26
-
27
-
28
-
29
-
30
-
31
-
32
-
33
-
34
-
35
-
36
 |
 |
