Makita EA4300F40B Instruction Manual - Page 16
Only for models with quick tensioner, on sprocket guard, CAUTION
 |
View all Makita EA4300F40B manuals
Add to My Manuals
Save this manual to your list of manuals |
Page 16 highlights
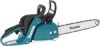
Only for models with quick tensioner on sprocket guard CAUTION: Before doing any work on the guide bar or chain, always switch off the engine and pull the plug cap off the spark plug (see „Replacing the spark plug"). Always wear protective gloves! CAUTION: Start the chain saw only after having assembled it completely and inspected. Mounting the guide bar and saw chain Place the saw on a stable surface and perform the following work steps in order to install the guide bar and saw chain: Release the chain brake by pulling the hand guard (1) in direc- tion of arrow. Fold up the sprocket guard quick tensioner (2) (see also the illustration on tensioning the saw chain). 1 Push the sprocket guard quick tensioner in forcefully against the spring tension and slowly turn counter-clockwise, until you feel it engage. Keep pushing, and turn as far as possible 2 counter-clockwise. Release the sprocket guard quick tensioner again and turn 3 clockwise to bring it back to its original position. Repeat this procedure until the sprocket guard (4) is unscrewed. 4 Remove the sprocket guard (4). Put the guide bar (5) on and push it against the sprocket (6). 6 5 8 7 9 16 Lift the chain (8) over the sprocket (7). CAUTION: Do not insert the chain between the chain sprocket and the disc. Guide the chain from above about halfway into the groove (9) on the guide bar. CAUTION: Note that the cutting edges along the top of the chain must point in the direction of the arrow!
-
 1
1 -
2
-
3
-
4
-
5
-
6
-
7
-
8
-
9
-
10
-
 11
11 -
 12
12 -
 13
13 -
 14
14 -
 15
15 -
 16
16 -
 17
17 -
 18
18 -
 19
19 -
 20
20 -
 21
21 -
22
-
23
-
24
-
25
-
26
-
27
-
28
-
29
-
30
-
31
-
32
-
33
-
34
-
35
-
36
-
37
-
38
-
39
-
40
 |
 |
