Makita HK1810 Owners Manual - Page 6
Functional, Description, Assembly - bits
 |
View all Makita HK1810 manuals
Add to My Manuals
Save this manual to your list of manuals |
Page 6 highlights
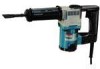
FUNCTIONAL DESCRIPTION CAUTION: • Always be sure that the tool is switched off and unplugged before adjusting or checking function on the tool. 1 2 1. Speed control screw 2. Switch trigger 3. Higher 4. Lower 002886 Switch action CAUTION: • Before plugging in the tool, always check to see that the switch trigger actuates properly and returns to the "OFF" position when released. To start the tool, simply pull the switch trigger. Tool speed is increased by increasing pressure on the switch trigger. Release the switch trigger to stop. A speed control screw is provided so that maximum tool speed can be limited (variable). Turn the speed control screw clockwise for higher speed, and counterclockwise for lower speed. ASSEMBLY CAUTION: • Always be sure that the tool is switched off and unplugged before carrying out any work on the tool. 002912 Installing or removing the bit 1 To install the bit, first attach the dust cover provided to the bit as shown in the figure. 1. Dust cover 1 1. Tool retainer 6 002913 Then turn the tool retainer in the direction of the arrow and insert the bit into the tool barrel as far as it will go. Now turn the tool retainer in the opposite direction to secure the bit. To remove the bit, follow the installation procedure in reverse.
-
 1
1 -
 2
2 -
 3
3 -
 4
4 -
 5
5 -
 6
6 -
 7
7 -
 8
8 -
 9
9 -
 10
10 -
 11
11 -
 12
12 -
13
-
14
-
15
-
16
 |
 |
