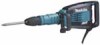
Makita HM1214C Owners Manual - Page 5
Assembly - vibration
 |
View all Makita HM1214C manuals
Add to My Manuals
Save this manual to your list of manuals |
Page 5 highlights
NOTE: • Blows at no load per minute becomes smaller than those on load in order to reduce vibration under no load, but this does not show trouble. Once operation starts with a bit against concrete, blows per minute increase and get to the numbers as shown in the table. When temperature is low and there is less fluidity in grease, the tool may not have this function even with the motor rotating. CAUTION: • The speed adjusting dial can be turned only as far as 5 and back to 1. Do not force it past 5 or 1, or the speed adjusting function may no longer work. Indicator lamp 1. Power-ON 1 indicator lamp (green) 2. Service indicator lamp (red) 2 1. Side handle 2. Clamp nut Side handle (auxiliary handle) 1. Side handle 1 2. Clamp nut 2 009977 The side handle can be swung 360° on the vertical and secured at any desired position. It also secures at eight different positions back and forth on the horizontal. Just loosen the clamp nut to swing the side handle to a desired position. Then tighten the clamp nut securely. Installing or removing the bit 1. Bit shank 2. Bit grease 1 2 009981 The green power-ON indicator lamp lights up when the tool is plugged. If the indicator lamp does not light up, the mains cord or the controller may be malfunction. The indicator lamp is lit but the tool does not start even if the tool is switched on, the carbon brushes may be worn out, or the controller, the motor or the ON/OFF switch may be malfunction. The red service indicator lamp flickers up when the carbon brushes are nearly worn out to indicate that the tool needs servicing. After approx. 8 hours of use, the motor will automatically be shut off. ASSEMBLY CAUTION: • Always be sure that the tool is switched off and unplugged before carrying out any work on the tool. 009664 Clean the bit shank and apply bit grease before installing the bit. Insert the bit into the tool. Turn the bit and push it in until it engages. 1. Releasing cover 1 2. Bit 2 009973 If the bit cannot be pushed in, remove the bit. Pull the releasing cover down a couple of times. Then insert the bit again. Turn the bit and push it in until it engages. 5
-
 1
1 -
 2
2 -
 3
3 -
 4
4 -
 5
5 -
 6
6 -
 7
7 -
 8
8 -
 9
9 -
 10
10 -
 11
11 -
12
-
13
-
14
-
15
-
16
-
17
-
18
-
19
-
20
-
21
-
22
-
23
-
24
 |
 |
