Makita HP1640 Owners Manual - Page 5
Assembly - chuck key
 |
View all Makita HP1640 manuals
Add to My Manuals
Save this manual to your list of manuals |
Page 5 highlights
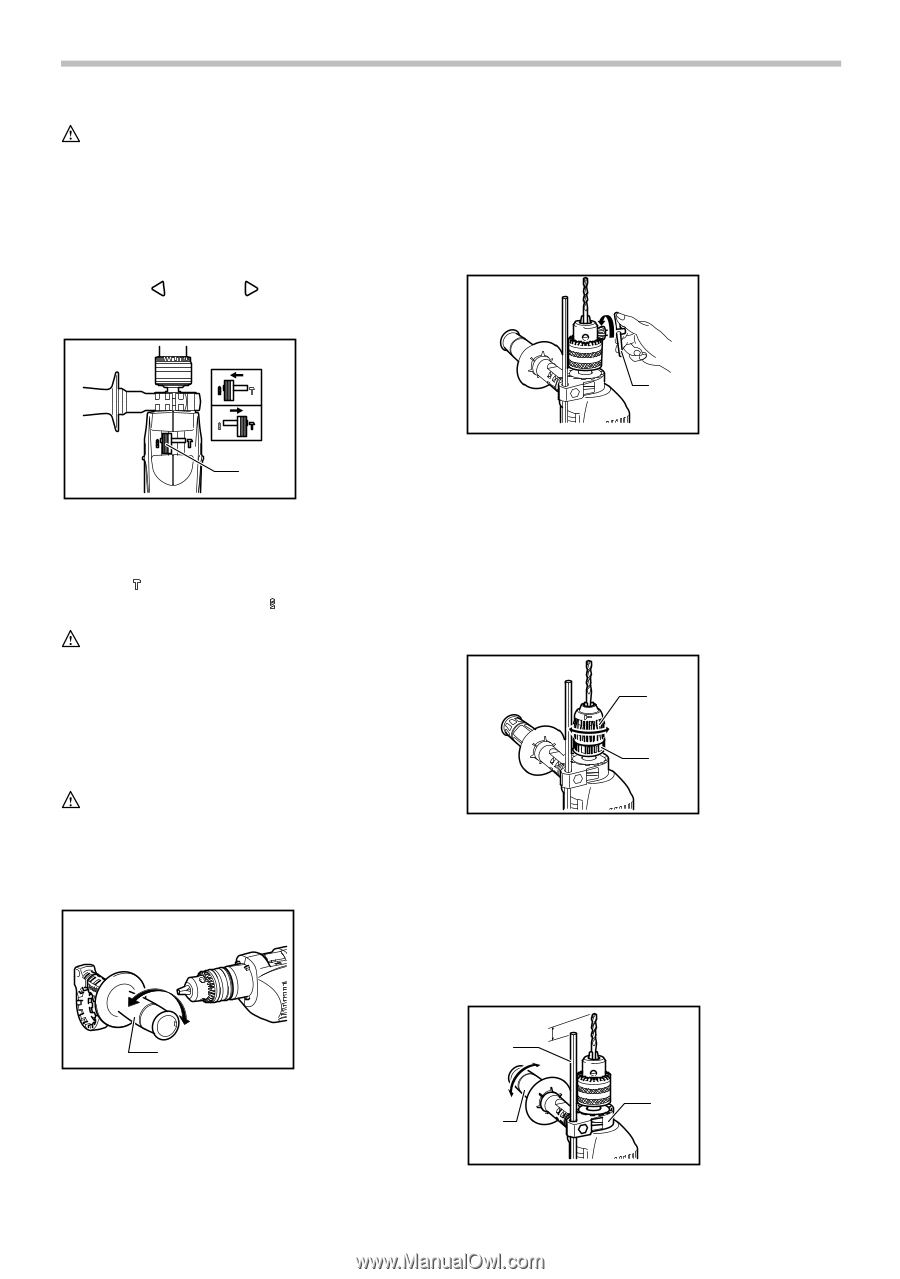
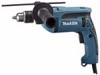
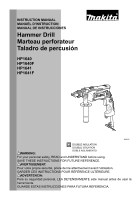
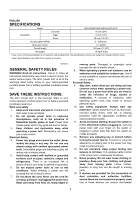
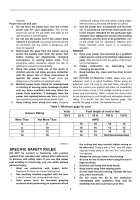
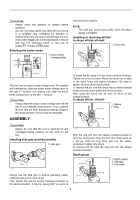
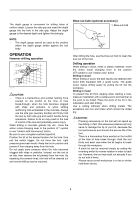
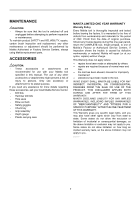
CAUTION: • Always check the direction of rotation before operation. • Use the reversing switch only after the tool comes to a complete stop. Changing the direction of rotation before the tool stops may damage the tool. • If the switch trigger can not be depressed, check to see that the reversing switch is fully set to position (A side) or (B side). Selecting the action mode 1. Action mode changing lever secured at any position. NOTE: • The side grip cannot swing 360° when the depth gauge is installed. Installing or removing drill bit For Model HP1640, HP1640F 1. Chuck key 1 1 009240 This tool has an action mode change lever. For rotation with hammering, slide the action mode change lever to the right ( symbol). For rotation only, slide the action mode change lever to the left ( symbol). CAUTION: • Always slide the action mode change lever all the way to your desired mode position. If you operate the tool with the lever positioned halfway between the mode symbols, the tool may be damaged. ASSEMBLY 009242 To install the bit, place it in the chuck as far as it will go. Tighten the chuck by hand. Place the chuck key in each of the three holes and tighten clockwise. Be sure to tighten all three chuck holes evenly. To remove the bit, turn the chuck key counterclockwise in just one hole, then loosen the chuck by hand. After using the chuck key, be sure to return to the original position. For Model HP1641, HP1641F 1. Sleeve 2. Ring 1 2 CAUTION: • Always be sure that the tool is switched off and unplugged before carrying out any work on the tool. Installing side grip (auxiliary handle) 1. Side grip 1 009241 Always use the side grip to ensure operating safety. Install the side grip on tool barrel. Then tighten the grip by turning clockwise securely at the desired position. It may be swung 360° so as to be 009246 Hold the ring and turn the sleeve counterclockwise to open the chuck jaws. Place the bit in the chuck as far as it will go. Hold the ring firmly and turn the sleeve clockwise to tighten the chuck. To remove the bit, hold the ring and turn the sleeve counterclockwise. Depth gauge 1. Depth gauge 2. Side grip 1 3. Grip base 3 2 009243 5
-
 1
1 -
 2
2 -
 3
3 -
 4
4 -
 5
5 -
 6
6 -
 7
7 -
 8
8 -
 9
9 -
 10
10 -
 11
11 -
12
-
13
-
14
-
15
-
16
-
17
-
18
-
19
-
20
-
21
-
22
-
23
-
24
 |
 |