Makita HP2050 Owners Manual - Page 5
Assembly
 |
View all Makita HP2050 manuals
Add to My Manuals
Save this manual to your list of manuals |
Page 5 highlights
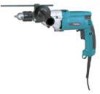
To turn on the lamp, pull the trigger. Release the trigger to turn it off. NOTE: • Use a dry cloth to wipe the dirt off the lens of lamp. Be careful not to scratch the lens of lamp, or it may lower the illumination. Reversing switch action 1. Reversing switch lever A CAUTION: • Use the speed change knob only after the tool comes to a complete stop. Changing the tool speed before the tool stops may damage the tool. • Always set the speed change knob to the correct position. If you operate the tool with the speed change knob positioned halfway between the "I" and "II" position, the tool may be damaged. Selecting the action mode 1 1. Action mode changing lever B 1 002991 This tool has a reversing switch to change the direction of rotation. Move the reversing switch lever to the position (A side) for clockwise rotation or the position (B side) for counterclockwise rotation. CAUTION: • Always check the direction of rotation before operation. • Use the reversing switch only after the tool comes to a complete stop. Changing the direction of rotation before the tool stops may damage the tool. Speed change 1 1. Arrow 2. Speed change knob 2 002691 Two speed ranges can be preselected with the speed change knob. To change the speed, turn the speed change knob so that the arrow on the tool body points toward the "I" position on the knob for low speed or "II" position for high speed. If it is hard to turn the knob, first turn the chuck slightly in either direction and then turn the knob again. 002692 This tool has an action mode change lever. For rotation with hammering, slide the action mode change lever to the right ( symbol). For rotation only, slide the action mode change lever to the left ( symbol). CAUTION: • Always slide the action mode change lever all the way to your desired mode position. If you operate the tool with the lever positioned halfway between the mode symbols, the tool may be damaged. ASSEMBLY CAUTION: • Always be sure that the tool is switched off and unplugged before carrying out any work on the tool. Installing side grip (auxiliary handle) 1 3 2 4 1. Grip base 2. Side grip (auxiliary handle) 3. Teeth 4. Protrusions 002693 5
-
 1
1 -
 2
2 -
 3
3 -
 4
4 -
 5
5 -
 6
6 -
 7
7 -
 8
8 -
 9
9 -
 10
10 -
 11
11 -
12
-
13
-
14
-
15
-
16
-
17
-
18
-
19
-
20
-
21
-
22
-
23
-
24
-
25
-
26
-
27
-
28
 |
 |
