Makita HP2050 Technical Reference - Page 4
Repair - parts
 |
View all Makita HP2050 manuals
Add to My Manuals
Save this manual to your list of manuals |
Page 4 highlights
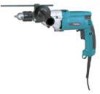
Repair P 4 / 17 < 1 > Lubrication Apply MAKITA grease N No.1 to the following portions marked with black triangle to protect parts and machine from unusual abrasion. See Fig. 1. Gear housing Spindle Cam Apply 25g of MAKITA grease N No.1 to the inner part of gear housing. Gear housing Spur gear 29-37 Fig. 1 Change lever B < 2 >Assembling and disassembling ( 1 ) Disassembling drill chuck See Fig. 2. 1. Hold the flat portion of spindle with No.1R139 "drill chuck extractor" which is fixed with vise. 2. Insert No.1R298 "hex wrench" into drill chuck and grip it firmly with drill chuck. 3. Turn No.1R298 "hex wrench" anti-clockwise, with No.1R223 "torque wrench" to which No.1R224 "ratchet head" is attached. Then, drill chuck can be disassembled from spindle. In case of broken drill chuck, it may be impossible to grip hex wrench with drill chuck. If so, firmly grip drill chuck with pipe wrench. And turn the pipe wrench anti-clockwise. So, the drill chuck can be disassembled. ( 2) Assembling drill chuck See Fig. 2. 1. Preset the torque level of No.1R223 "torque wrench" to 35.7N.m - 45.9N.m (350kgf.cm - 450kgf.cm). 2. Hold the flat portion of spindle with No.1R139 "drill chuck extractor" which is fixed with vise 3. Insert No.1R298 "hex wrench" into drill chuck and grip it firmly with drill chuck. 4. Turn No.1R298 "hex wrench" clockwise, with No.1R223 "torque wrench" to which No.1R224 "ratchet head" is attached. Then, drill chuck can be assembled to spindle. No.1R298 Hex wrench Fastening No.1R139 Drill chuck extractor No.1R223 Torque wrench No.1R224 Ratchet head Loosening Fig. 2
-
 1
1 -
 2
2 -
 3
3 -
 4
4 -
 5
5 -
 6
6 -
 7
7 -
 8
8 -
 9
9 -
 10
10 -
11
-
12
-
13
-
14
-
15
-
16
-
17
 |
 |
