Makita HR4041C Owners Manual - Page 4
Functional Description, Assembly - bits
 |
View all Makita HR4041C manuals
Add to My Manuals
Save this manual to your list of manuals |
Page 4 highlights
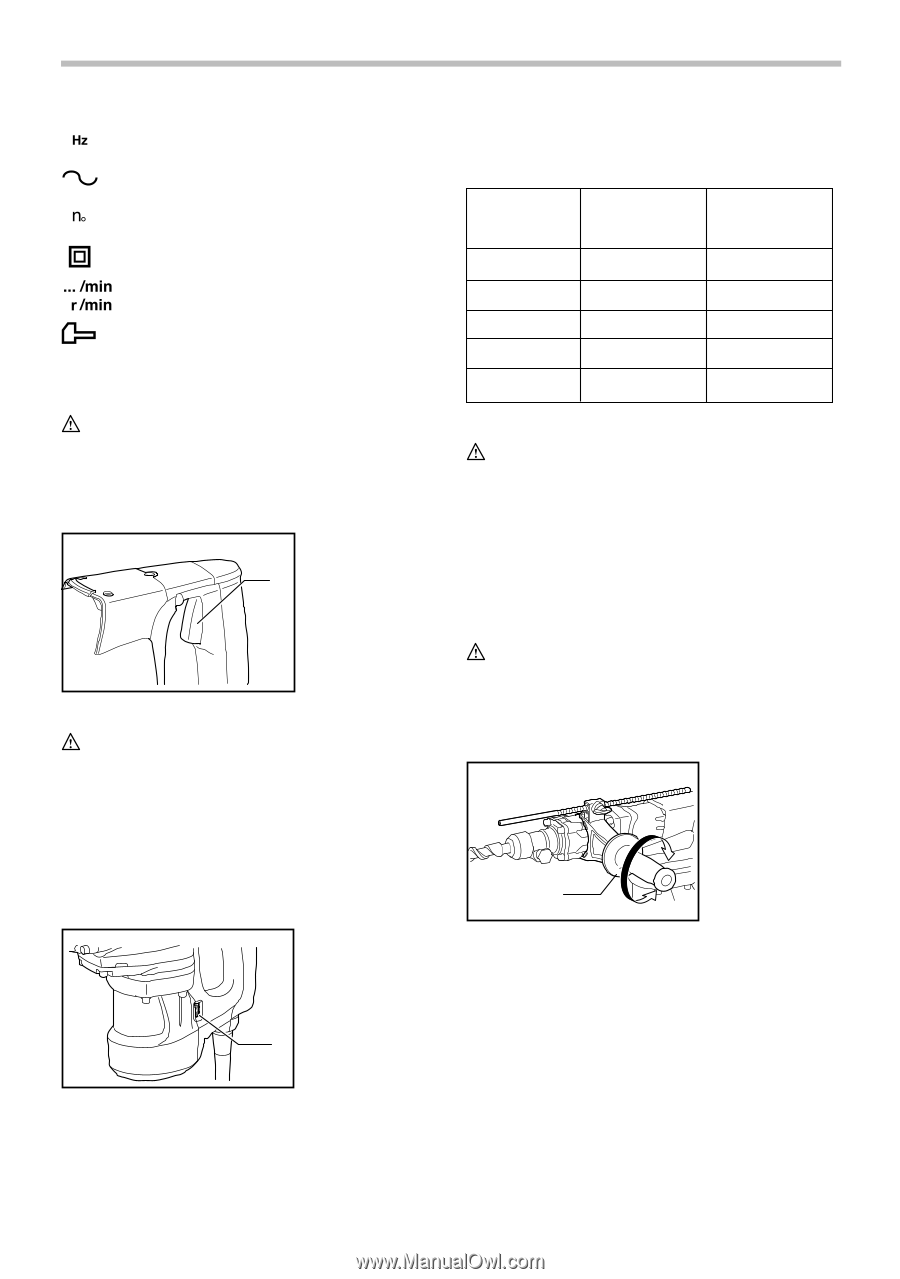
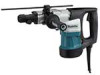
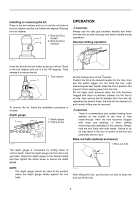
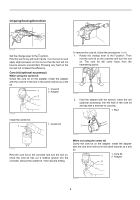
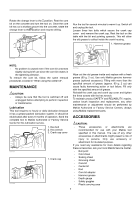
・ hertz ・ alternating current ・ no load speed ・ Class II Construction ・ revolutions or reciprocation per minute ・ number of blow FUNCTIONAL DESCRIPTION CAUTION: • Always be sure that the tool is switched off and unplugged before adjusting or checking function on the tool. Switch action 1. Switch trigger 1 Refer to the table below for the relationship between the number settings on the adjusting dial and the revolutions/blows per minute. Number on adjusting dial Revolutions per minute Blows per minute 5 460 2,600 4 420 2,400 3 350 2,000 2 270 1,500 1 230 1,300 007885 CAUTION: • If the tool is operated continuously at low speeds for a long time, the motor will get overloaded, resulting in tool malfunction. • The speed adjusting dial can be turned only as far as 5 and back to 1. Do not force it past 5 or 1, or the speed adjusting function may no longer work. ASSEMBLY 007781 CAUTION: • Before plugging in the tool, always check to see that the switch trigger actuates properly and returns to the "OFF" position when released. • Do not tape, tie or otherwise secure the trigger in the "ON" position. To start the tool, simply pull the switch trigger. Release the switch trigger to stop. Speed change 1. Adjusting dial 1 007785 The revolutions and blows per minute can be adjusted just by turning the adjusting dial. The dial is marked 1 (lowest speed) to 5 (full speed). CAUTION: • Always be sure that the tool is switched off and unplugged before carrying out any work on the tool. Side grip (auxiliary handle) 1. Side grip 1 007796 For maximum control and safer operation, always use the side grip with this tool. The side grip swings around to either side, allowing easy handling of the tool in any position. Loosen the side grip by turning it counterclockwise, swing it to the desired position and then tighten it by turning clockwise. Bit grease (optional accessory) Coat the bit shank head beforehand with a small amount of bit grease (about 0.5 -1 g; 0.02 - 0.04 oz.). This chuck lubrication assures smooth action and longer service life. 4
-
 1
1 -
 2
2 -
 3
3 -
 4
4 -
 5
5 -
 6
6 -
 7
7 -
 8
8 -
 9
9 -
 10
10 -
11
-
12
-
13
-
14
-
15
-
16
-
17
-
18
-
19
-
20
-
21
-
22
-
23
-
24
-
25
-
26
-
27
-
28
 |
 |