Makita JR3050T Owners Manual - Page 4
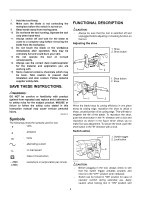
Save These Instructions., Symbols, Functional Description - blade
 |
View all Makita JR3050T manuals
Add to My Manuals
Save this manual to your list of manuals |
Page 4 highlights
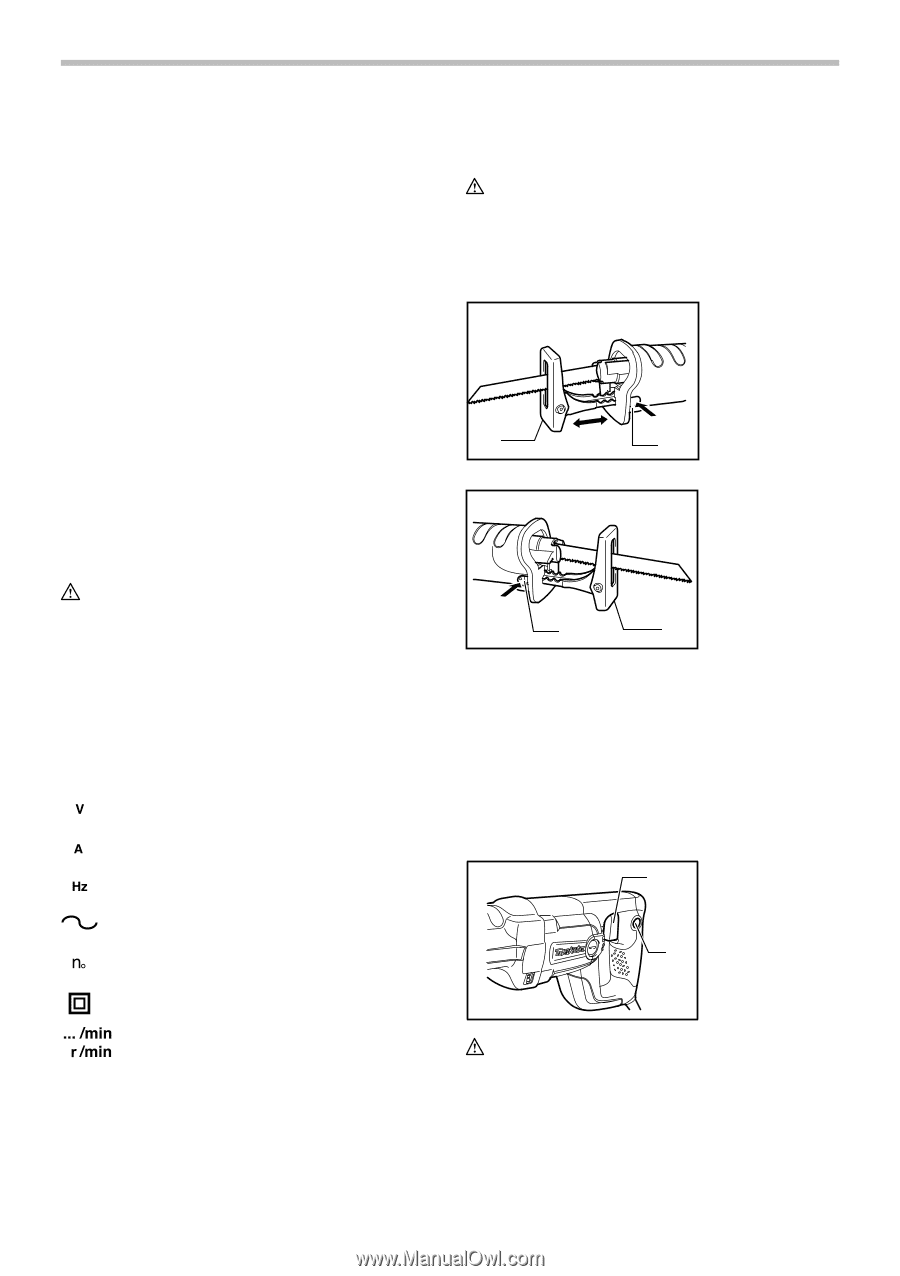
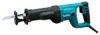
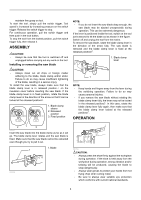
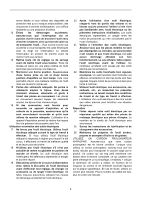
7. Hold the tool firmly. 8. Make sure the blade is not contacting the workpiece before the switch is turned on. 9. Keep hands away from moving parts. 10. Do not leave the tool running. Operate the tool only when hand-held. 11. Always switch off and wait for the blade to come to a complete stop before removing the blade from the workpiece. 12. Do not touch the blade or the workpiece immediately after operation; they may be extremely hot and could burn your skin. 13. Do not operate the tool at no-load unnecessarily. 14. Always use the correct dust mask/respirator for the material and application you are working with. 15. Some material contains chemicals which may be toxic. Take caution to prevent dust inhalation and skin contact. Follow material supplier safety data. SAVE THESE INSTRUCTIONS. FUNCTIONAL DESCRIPTION CAUTION: • Always be sure that the tool is switched off and unplugged before adjusting or checking function on the tool. Adjusting the shoe 1. Shoe 2. Shoe button 1 005784 A 2 1. Shoe button 2. Shoe WARNING: DO NOT let comfort or familiarity with product (gained from repeated use) replace strict adherence to safety rules for the subject product. MISUSE or failure to follow the safety rules stated in this instruction manual may cause serious personal injury. USD201-2 Symbols The followings show the symbols used for tool. ・ volts ・ amperes ・ hertz ・ alternating current ・ no load speed ・ Class II Construction ・ revolutions or reciprocation per minute B 1 2 005785 When the blade loses its cutting efficiency in one place along its cutting edge, reposition the shoe to utilize a sharp, unused portion of its cutting edge. This will help to lengthen the life of the blade. To reposition the shoe, push the shoe button in the "A" direction with a click and reposition as shown in the figure which allows you to make five-way adjustment. To secure the shoe, push the shoe button in the "B" direction with a click. Switch action 1 1. Switch trigger 2. Lock button 2 005786 CAUTION: • Before plugging in the tool, always check to see that the switch trigger actuates properly and returns to the "OFF" position when released. • Switch can be locked in "ON" position for ease of operator comfort during extended use. Apply caution when locking tool in "ON" position and 4
-
 1
1 -
 2
2 -
 3
3 -
 4
4 -
 5
5 -
 6
6 -
 7
7 -
 8
8 -
 9
9 -
 10
10 -
11
-
12
-
13
-
14
-
15
-
16
-
17
-
18
-
19
-
20
 |
 |