Makita LXSF01 Owners Manual - Page 6
Assembly, Operation
 |
View all Makita LXSF01 manuals
Add to My Manuals
Save this manual to your list of manuals |
Page 6 highlights
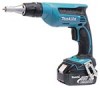
• Use the reversing switch only after the tool comes to a complete stop. Changing the direction of rotation before the tool stops may damage the tool. When not operating the tool, always set the reversing switch lever to the neutral position. Depth adjustment A 1 1. Locator To remove the bit, pull the locator. Then grasp the bit with a pair of pliers and pull the bit out of the magnetic bit holder. Sometimes, it helps to wiggle the bit with the pliers as you pull. 1. Locator 2. Bit 1 3. Magnetic bit 2 holder 3 B 011813 The depth can be adjusted by turning the locator. Turn it in "B" direction for less depth and in "A" direction for more depth. One full turn of the locator equals 2 mm (1/16") change in depth. 3 mm (1/8") 1. Locator 011820 To install the bit, push it firmly into the magnetic bit holder. Then install the locator by pushing it firmly back. Hook 1. Groove 2. Hook 3. Screw 1 011827 Adjust the locator so that the distance between the tip of the locator and the screw head is approximately 3 mm (1/8") as shown in the figures. Drive a trial screw into your material or a piece of duplicate material. If the depth is still not suitable for the screw, continue adjusting until you obtain the proper depth setting. ASSEMBLY 1 2 3 011821 The hook is convenient for temporarily hanging the tool. This can be installed on either side of the tool. To install the hook, insert it into a groove in the tool housing on either side and then secure it with a screw. To remove, loosen the screw and then take it out. OPERATION Screwdriving operation CAUTION: • Always be sure that the tool is switched off and the battery cartridge is removed before carrying out any work on the tool. Installing or removing the bit 1. Locator 1 011819 011822 Fit the screw on the point of the bit and place the point of the screw on the surface of the workpiece to be fastened. Apply pressure to the tool and start it. Withdraw the tool as soon as the clutch cuts in. Then release the switch trigger. CAUTION: • When fitting the screw onto the point of the bit, be careful not to push in on the screw. If the screw is 6
-
 1
1 -
 2
2 -
 3
3 -
 4
4 -
 5
5 -
 6
6 -
 7
7 -
 8
8 -
 9
9 -
 10
10 -
 11
11 -
 12
12 -
13
-
14
-
15
-
16
-
17
-
18
-
19
-
20
-
21
-
22
-
23
-
24
 |
 |
