Makita XAG04Z Makita XAG04Z Instruction Manual - Page 7
Functional Description
 |
View all Makita XAG04Z manuals
Add to My Manuals
Save this manual to your list of manuals |
Page 7 highlights
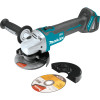
FUNCTIONAL DESCRIPTION CAUTION: • Always be sure that the tool is switched off and the battery cartridge is removed before adjusting or checking function on the tool. Installing or removing battery cartridge 1 2 1. Button 2. Red indicator 3. Battery cartridge 3 015079 CAUTION: • Always switch off the tool before installing or removing of the battery cartridge. • Hold the tool and the battery cartridge firmly when installing or removing battery cartridge. Failure to hold the tool and the battery cartridge firmly may cause them to slip off your hands and result in damage to the tool and battery cartridge and a personal injury. To remove the battery cartridge, slide it from the tool while sliding the button on the front of the cartridge. To install the battery cartridge, align the tongue on the battery cartridge with the groove in the housing and slip it into place. Insert it all the way until it locks in place with a little click. If you can see the red indicator on the upper side of the button, it is not locked completely. CAUTION: • Always install the battery cartridge fully until the red indicator cannot be seen. If not, it may accidentally fall out of the tool, causing injury to you or someone around you. • Do not install the battery cartridge forcibly. If the cartridge does not slide in easily, it is not being inserted correctly. Indicating the remaining battery capacity (Only for battery cartridges with "B" at the end of the model number.) 1. Indicator lamps 1 2. CHECK button 2 015676 Press the check button on the battery cartridge to indicate the remaining battery capacity. The indicator lamps light up for few seconds. Indicator lamps Lighted Off Blinking Remaining capacity 75% to 100% 50% to 75% 25% to 50% 0% to 25% Charge the battery. The battery may have malfunctioned. 015658 NOTE: • Depending on the conditions of use and the ambient temperature, the indication may differ slightly from the actual capacity. Switch action CAUTION: • Before installing the battery cartridge into the tool, always check to see that the slide switch actuates properly and returns to the "OFF" position when the rear of the slide switch is depressed. • Switch can be locked in "ON" position for ease of operator comfort during extended use. Apply caution when locking tool in "ON" position and maintain firm grasp on tool. 7
-
 1
1 -
 2
2 -
 3
3 -
 4
4 -
 5
5 -
 6
6 -
 7
7 -
 8
8 -
 9
9 -
 10
10 -
 11
11 -
 12
12 -
13
-
14
-
15
-
16
-
17
-
18
-
19
-
20
-
21
-
22
-
23
-
24
-
25
-
26
-
27
-
28
-
29
-
30
-
31
-
32
 |
 |
