Makita XT1500 XSF01 Instruction Manual - Page 5
Switch action, Electric brake, Lighting up the front lamp, Reversing switch action
 |
View all Makita XT1500 manuals
Add to My Manuals
Save this manual to your list of manuals |
Page 5 highlights
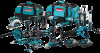
The battery cartridge with a star mark is equipped with the protection system, which automatically cuts off the output power for its long service life. The tool stops during operation when the tool and/or battery are placed under the following situation. This is caused by the activation of protection system and does not show the tool trouble. • When the tool is overloaded: At this time, release the switch trigger, remove the battery cartridge and remove causes of overload and then pull the switch trigger again to restart. • When battery cells get hot: If any operation of the switch trigger, the motor will remain stopped. At this time, stop use of the tool and cool or charge the battery cartridge after removing it from the tool. • When the remaining battery capacity gets low: If any operation of the switch trigger, the motor will remain stopped. At this time, remove the battery cartridge from the tool and charge it . Switch action 1. Switch trigger 1 011816 CAUTION: • Before inserting the battery cartridge into the tool, always check to see that the switch trigger actuates properly and returns to the "OFF" position when released. To start the tool, simply pull the switch trigger. Tool speed is increased by increasing pressure on the switch trigger. Release the switch trigger to stop. NOTE: • Even with the switch on and motor running, the bit will not rotate until you fit the point of the bit in the screw head and apply forward pressure to engage the clutch. Electric brake This tool is equipped with an electric brake. If the tool consistently fails to quickly stop after switch trigger release, have tool serviced at a Makita service center. Lighting up the front lamp 1 1. Lamp 014015 CAUTION: • Do not look in the light or see the source of light directly. Pull the switch trigger to light up the lamp. The lamp keeps on lighting while the switch trigger is being pulled. The lamp goes out 10 -15 seconds after releasing the trigger. NOTE: • Use a dry cloth to wipe the dirt off the lens of lamp. Be careful not to scratch the lens of lamp, or it may lower the illumination. Reversing switch action 1. Reversing switch lever A B 1 014016 This tool has a reversing switch to change the direction of rotation. Depress the reversing switch lever from the A side for clockwise rotation or from the B side for counterclockwise rotation. When the reversing switch lever is in the neutral position, the switch trigger cannot be pulled. CAUTION: • Always check the direction of rotation before operation. • Use the reversing switch only after the tool comes to a complete stop. Changing the direction of rotation before the tool stops may damage the tool. When not operating the tool, always set the reversing switch lever to the neutral position. 5
-
 1
1 -
 2
2 -
 3
3 -
 4
4 -
 5
5 -
 6
6 -
 7
7 -
 8
8 -
 9
9 -
 10
10 -
 11
11 -
12
-
13
-
14
-
15
-
16
-
17
-
18
-
19
-
20
-
21
-
22
-
23
-
24
 |
 |
