Marantz SR4300 User Guide - Page 23
Enter The Desired Menu Item Of The, Setup Menu, Input Setup Assignable Digital Input
 |
View all Marantz SR4300 manuals
Add to My Manuals
Save this manual to your list of manuals |
Page 23 highlights
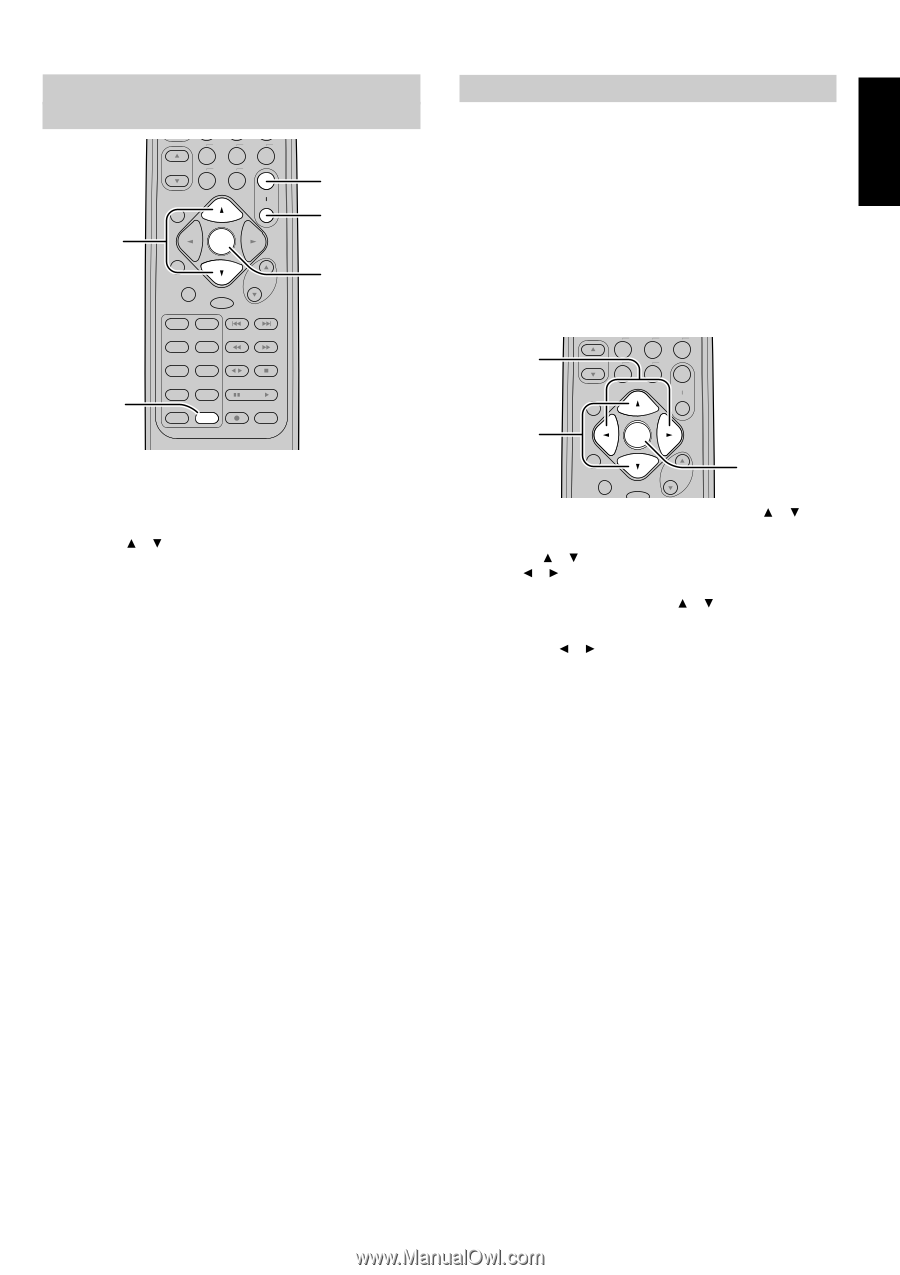
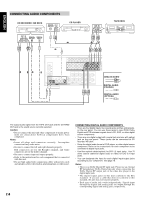
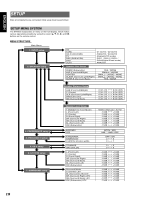
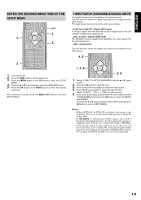
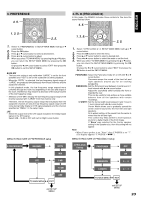
ENGLISH ENTER THE DESIRED MENU ITEM OF THE SETUP MENU 4. 2. BASS SETUP/T.TONE M-CH ST 7 2CH 8 F.DIRECT A/D 0 6.1CH -IN 9 OFF MENU S-DIRECT OK MUTE NIGHT VOLUME TV CDR CHANNEL/SKIP DVD MD TUNE/SEARCH MODE PTY VCR1 TAPE VCR2 DSS DISP./RDS P.SCAN CD TUNER AMP ATT. SYSTEM REMOTE CONTROLLER RC4300SR EXIT 3. 5. 1. Turn on this unit. 2. Press the AMP button to set the amp mode. 3. Press the MENU button or the OK button to enter the SETUP MENU. 4. Press the or cursor button to select the MAIN MENU item. 5. Press the OK button or the MENU button to enter the desired menu item. After finishing all setup, press the MENU OFF button to exit the SETUP MENU. 1. INPUT SETUP (ASSIGNABLE DIGITAL INPUT) Four digital inputs can be assigned as the desired source. Use this menu to select the digital input jack to be assigned to the input source. The Input Setup consists of 9 items, which are as below. • D1AUTO to D4AUTO : Digital AUTO mode If the input signal from the selected source is digital signal, this unit chooses a digital input automatically. • DIG.1 to DIG.4 : Digital FIXED mode The SR4300 chooses a digital input regardless of a input signal from the selected source. • ANA : Analog mode Use this menu to select the digital input jack to be assigned to the input source. 4. 5. BASS M-CH ST 7 2CH 8 F.DIRECT A/D 0 6.1CH -IN 9 SETUP/T.TONE OFF MENU 1. 3. 5. S-DIRECT OK MUTE NIGHT VOLUME 2. 5. 1. Select "1.INPUT" in SETUP MAIN MENU with the or cursor button. 2. Press the OK button to enter the menu. 3. Press the or cursor button to select the input source. 4. Press or cursor button to select the input function. Select "DxAUTO", "DIG.x" or "ANA" for input sources. 5. If you finish these setup, press the or cursor button to select "TO MAIN MENU" then press the OK button to return the SETUP MAIN MENU. Or press the or cursor button to select "EXIT" then press the OK button to exit the SETUP MENU. Notes: • When a DTS-LD or DTS-CD is playing, this setup is not available. This is to avoid noise being generated from the analog input. • If "Dx-AUTO" is selected and a DVD, compact disc or LD is fast forwarded during playback, decoded signals may produce a skipping sound. In such cases, change the setting to DIGITAL. • Same digital input function cannot be set. In this case, the previous setting is set to ANALOG. Same digital input number cannot be set in Digital AUTO mode and Digital Fixed mode. For example, D1AUTO and DIG.1 are not set at same time. 19
-
 1
1 -
2
-
3
-
4
-
5
-
6
-
7
-
8
-
9
-
10
-
11
-
12
-
13
-
14
-
15
-
16
-
17
-
 18
18 -
 19
19 -
 20
20 -
 21
21 -
 22
22 -
 23
23 -
 24
24 -
 25
25 -
 26
26 -
 27
27 -
 28
28 -
29
-
30
-
31
-
32
-
33
-
34
-
35
-
36
-
37
-
38
-
39
-
40
-
41
-
42
-
43
-
44
-
45
 |
 |