Maytag MCB2256HEB Use and Care Manual - Page 10
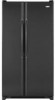
Freezer Features
 |
View all Maytag MCB2256HEB manuals
Add to My Manuals
Save this manual to your list of manuals |
Page 10 highlights
Freezer Features Shelves and Baskets Fixed Freezer Shelf To Remove Clip-mounted Shelves: • Lift shelf from wall mounting clips and pull left side of shelf out of wall mounting holes. To Install Clip-mounted Shelves: • Place left side of shelf in mounting holes and press down into wall mounting clips. Shelves Shelves can be removed to meet individual storage needs. To Remove Shelf: • Snap right side of shelf up from cabinet railing and slide to right. To Install Shelf: • Replace shelf in left side cabinet railing. Snap shelf into right side cabinet railing. Baskets Baskets (style may vary) slide out for easy access to items in back. To Remove: • Pull out to its full extension. Lift up front of basket and remove. To Install: • Slide basket into cabinet railing. Lift up front of basket, and slide to the back of refrigerator. Ice Storage Bin The Ice Storage Bin is located below the automatic ice maker. To Remove: • Raise ice maker arm to deactivate ice maker. Lift front of bin and pull out to its full extension. Lift up front of bin and remove. To Install: • Slide bin into railing below ice maker until bin locks into place. Drop ice maker arm to activate ice maker. IMPORTANT: Ice bin must be locked in place for proper ice dispensing. Turn auger driver behind bin counterclockwise (as shown) to properly align ice bin with auger driver. Door Storage Adjustable Door Buckets Door Buckets can be moved to meet individual storage needs. To Remove: • Lift the door bucket up until it clears the retainers on the door liner, then pull the door bucket straight out. To Install: • Slide bucket in above desired door liner retainer and push down until bucket stops. Fixed Door Bucket (non-dispenser models) The Fixed Door Bucket is located in the upper section of the freezer door. IMPORTANT: Fixed door bucket is not adjustable. If bucket is removed, freezer light will not deactivate when door is closed. 9
-
 1
1 -
2
-
3
-
4
-
 5
5 -
 6
6 -
 7
7 -
 8
8 -
 9
9 -
 10
10 -
 11
11 -
 12
12 -
 13
13 -
 14
14 -
 15
15 -
16
-
17
-
18
-
19
-
20
-
21
-
22
-
23
-
24
-
25
-
26
-
27
-
28
-
29
-
30
-
31
-
32
-
33
-
34
-
35
-
36
-
37
-
38
-
39
-
40
-
41
-
42
-
43
-
44
-
45
-
46
-
47
-
48
-
49
-
50
-
51
-
52
-
53
-
54
-
55
-
56
-
57
-
58
-
59
-
60
-
61
-
62
-
63
-
64
-
65
-
66
-
67
-
68
-
69
-
70
-
71
-
72
-
73
-
74
-
75
-
76
-
77
-
78
-
79
-
80
-
81
-
82
-
83
-
84
-
85
-
86
-
87
-
88
-
89
-
90
-
91
-
92
-
93
-
94
-
95
-
96
 |
 |
