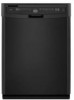
Maytag MDB7809AWB Installation Instructions
Maytag MDB7809AWB - Jetclean Plus 24 in. Dishwasher Manual
 |
UPC - 883049154411
View all Maytag MDB7809AWB manuals
Add to My Manuals
Save this manual to your list of manuals |
Maytag MDB7809AWB manual content summary:
- Maytag MDB7809AWB | Installation Instructions - Page 1
INSTALLATION INSTRUCTIONS UNDERCOUNTER DISHWASHER STAINLESS STEEL GIANT TUB MODELS INSTRUCTIONS D'INSTALLATION LAVE-VAISSELLE SOUS PLAN DE TRAVAIL MODÈLES GÉANTS DE CUVE D'ACIER INOXYDABLE Table of Contents 2 Table des matières 23 W10199707A - Maytag MDB7809AWB | Installation Instructions - Page 2
Line 8 Install Drain Hose 9 Install Moisture Barrier (on some models 10 Prepare Dishwasher 11 Installation Instructions (cont.) Install this dishwasher as specified in these instructions. • Installation should be performed by a qualified service technician. The dishwasher must be installed - Maytag MDB7809AWB | Installation Instructions - Page 3
Parts Gather the recommended tools and parts before starting installation. Read and follow the instructions provided with any tools listed here. All Installations 7/8" (2.2 cm) Part Number 4317824 hole marked for use with dishwasher Additional parts supplied with certain models only: Bottom sound - Maytag MDB7809AWB | Installation Instructions - Page 4
by the warranty. A side panel kit is available from your dealer for installing your dishwasher at the end of your cabinetry. A moisture barrier accessory (Part Number 4396277) is available from your dealer for installing underneath the countertop. Call 1-800-688-9900 to order. Check location where - Maytag MDB7809AWB | Installation Instructions - Page 5
Opening Dimensions ((26265442..-1211/c/c42mm"" )) (2630.67/c8m" ) w(8ri36teh3mcmw7o/hv)8eem"edilns. (1.39/4c"m)* *Insulation may be compressed (not used on all models) (532.31"cm) (621 4c"m) (612c4m" )** Check that all surfaces have no protrusions that would prohibit dishwasher installation - Maytag MDB7809AWB | Installation Instructions - Page 6
fittings. • If required, the air gap should be installed in accordance with the air gap installation instructions. When you are connecting the air gap a rubber If connecting dishwasher with a power supply cord: • Use UL listed power supply cord kit (Part No. 4317824) marked for use with dishwasher. • - Maytag MDB7809AWB | Installation Instructions - Page 7
power at the fuse box or circuit breaker box before installing dishwasher. 2 3 Do you already have utility hookups? Yes -Follow instructions in the "Prepare Cabinet Opening-Existing Utilities" section. No -Follow instructions in the "Prepare Cabinet Opening-New Utilities" section. Existing utility - Maytag MDB7809AWB | Installation Instructions - Page 8
right-hand cabinet side or rear. See product and cabinet opening dimensions. 2 Direct Wire-Prepare hole (15.2 6" cm) Route cable hole until smooth. Metal cabinet: Cover hole with grommet (Part Number 302797 - not provided). 8 Hot water line Measure dishwasher should have a manual shutoff valve. - Maytag MDB7809AWB | Installation Instructions - Page 9
of the disposer or a waste tee must be made before the drain trap and at least 20" (50.8 cm) above the floor where the dishwasher will be installed. Helpful Tip: To reduce vibration of the hose, keep the hose away from the floor. Option A, Waste disposer - no air gap Waste disposer - no - Maytag MDB7809AWB | Installation Instructions - Page 10
(not provided). 3 3. Use a rubber hose (not provided) with screw-type clamps (not provided) to connect from waste tee to air gap. Install moisture barrier (on some models) Install moisture barrier (on some models) Moisture barrier 1. Make sure the area under the cabinet is clean and dry for - Maytag MDB7809AWB | Installation Instructions - Page 11
around coarse threads two to four times to prohibit leaks. 4 Connect 90° elbow fitting to water inlet valve Helpful Tip: Place cardboard under dishwasher until installed in cabinet opening to avoid damaging floor covering. Do not use door panel as a work table without first covering with a towel to - Maytag MDB7809AWB | Installation Instructions - Page 12
lower part of dishwasher tub. Pull cord through strain relief in terminal bow. Take notice when installing or removing the dishwasher in order to reduce the chance of damaging the power supply cord. Select UL listed or CSA approved twist-on wire connectors (included with power supply cord kit) rated - Maytag MDB7809AWB | Installation Instructions - Page 13
. Visit www.maytag.com under FAQ tab. 4 Tighten strain relief screws to secure cord. 5 Power Cord-Reinstall terminal box cover Determine Cabinet Opening 1 Measure cabinet opening Measure height of cabinet opening from underside of countertop to floor where dishwasher will be installed (you will - Maytag MDB7809AWB | Installation Instructions - Page 14
install dishwasher. Failure to do so can result in back or other injury. 1 Stand dishwasher upright Install the Door Handle (on some models) Install two or more people, stand dishwasher upright. NOTE: Do not install kickplate until instructed. 2 Move dishwasher close to cabinet opening Drain hose - Maytag MDB7809AWB | Installation Instructions - Page 15
To adjust the door spring tension, unhook the spring from the rear leg of dishwasher. Using a 5/16" nut driver or hex socket, remove the screw from the can be put into one of three holes , , in the front leg of dishwasher. If the door closes by itself, move the tensioner to a higher number hole - Maytag MDB7809AWB | Installation Instructions - Page 16
to back in the opening. If needed, adjust leveling leg until dishwasher is plumb. Repeat for other side of dishwasher. Helpful Tip: Push up on front of dishwasher to raise dishwasher off the ground to adjust front legs. With some installations, it may be easier to adjust the front leg using the - Maytag MDB7809AWB | Installation Instructions - Page 17
of this step. Visit www.maytag.com/drain under FAQ tab. Connect maytag.com/drain under FAQ tab. Make Direct Wire Electrical Connection NOTE: If the power supply cord was connected earlier proceed to "Secure Dishwasher does not touch dishwasher motor or lower part of dishwasher tub. Pull cable - Maytag MDB7809AWB | Installation Instructions - Page 18
WARNING Electrical Shock Hazard Electrically ground dishwasher. Connect ground wire to green ground connector in terminal box. Do not use an extension cord. Failure to follow these instructions can result in death, fire, or electrical shock. 2 Direct Wire-Connect ground wire Wiring configuration - Maytag MDB7809AWB | Installation Instructions - Page 19
4 Check door clearance Check that dishwasher is still level front to back and side to side in cabinet opening. IMPORTANT: If you have solid countertops such as corrian, granite, etc., you must use side mounting kit (Part Number 8212560). Follow kit instructions. (Brackets are included with kit - Maytag MDB7809AWB | Installation Instructions - Page 20
website for animated representation of this step. Visit www.maytag.com/anchoring under FAQ tab. Complete Installation 1 Reinstall access panels Insulation (on some models) Hold the two panels together and place them against dishwasher leg. Using a Phillips or 1/4" screwdriver, reinstall the screws - Maytag MDB7809AWB | Installation Instructions - Page 21
Power 1 Reconnect power Reconnect electrical power at the fuse box or circuit breaker box. Check Operation ❏ Read the Dishwasher User Instructions that came with your dishwasher. ❏ Check that all parts have been installed and no steps were skipped. Check that you have all tools used. ❏ Start - Maytag MDB7809AWB | Installation Instructions - Page 22
Notes 22 - Maytag MDB7809AWB | Installation Instructions - Page 23
ces 24 Exigences d'emplacement 25 Exigences d'évacuation 27 Spécifications de l'alimentation en eau 27 Spécifications électriques 27 Instructions d'installation 28 Préparation de l'ouverture d'encastrement du placard - Moyens de raccordement préexistants . . . . . 28 Préparation de l'ouverture - Maytag MDB7809AWB | Installation Instructions - Page 24
installation. Lire et observer les instructions fournies avec chacun des outils de la liste ci-dessous. Toutes les installations raccordements électriques par un électricien qualifié agréé. D'autre part, pour les premières installations Outillage nécessaire : Perceuse électrique avec mèches de scie - Maytag MDB7809AWB | Installation Instructions - Page 25
niveau sur le plancher entre l'avant et l'arrière de l'emplacement d'installation, il pourrait être nécessaire d'utiliser des cales pour établir l'aplomb de l'appareil). Conseil utile : Veiller à mesurer correctement les dimensions et s'assurer que le lave-vaisselle est d'aplomb si le plancher dans - Maytag MDB7809AWB | Installation Instructions - Page 26
Dimensions du produit et de l'ouverture d'encastrement du placard ((26265442,,1211//cc42mm"")) ( " )** Vérifier que toutes les surfaces sont libres de toute protrusion qui pourrait empêcher l'installation du lave-vaisselle. (8m63,44in"c*m) REMARQUE : La zone grisée des parois du placard indique - Maytag MDB7809AWB | Installation Instructions - Page 27
de diamètre intérieur minimal de 1/2" pour le conduit d'évacuation. • Si nécessaire, le dispositif de brise-siphon doit être installé conformément aux instructions d'installation de ce dernier. Lors du raccordement du dispositif de brisesiphon à la canalisation d'égout en T ou au raccord de broyeur - Maytag MDB7809AWB | Installation Instructions - Page 28
emplacements indiqués, passer à la section "Installation du tuyau d'évacuation". S'ils ne sont pas assez longs, suivre les instructions dans la section "Préparation de l' la paroi latérale ou arrière du placard. 28 Voir les dimensions du produit et de l'ouverture d'encastrement du placard. - Maytag MDB7809AWB | Installation Instructions - Page 29
éafétirfés 1/2" (1,3 cm) Percer un trou de 3/4" (1,9 cm) dans le côté droit de la paroi latérale ou arrière du placard. Voir les dimensions du produit et de l'ouverture d'encastrement du placard. 2 Raccordement direct - Préparation du trou Percer un trou de 1/2" (1,3 cm) dans la paroi latérale - Maytag MDB7809AWB | Installation Instructions - Page 30
à déchets doit être réalisé en amont du siphon du circuit d'évacuation et à au moins 20" (50,8 cm) au-dessus du plancher de l'espace d'installation du lave-vaisselle. Conseil utile : Afin de minimiser les vibrations du tuyau, le tenir à distance du plancher. Option A - broyeur à déchets - sans brise - Maytag MDB7809AWB | Installation Instructions - Page 31
ère antihumidité (sur certains modèles) Barrière anti-humidité 1. Veiller à ce que la zone se trouvant sous le placard soit propre et sèche avant d'installer la barrière antihumidité. 2. Ôter l'endos de la barrière anti-humidité et appliquer la barrière sur le dessous du plan de travail, le - Maytag MDB7809AWB | Installation Instructions - Page 32
des blessures graves ou des coupures. AVERTISSEMENT Risque du poids excessif Utiliser deux personnes ou plus pour déplacer et installer le lave-vaisselle. Le non-respect de cette instruction peut causer une blessure au dos ou d'autre blessure. 1 Placer le lave-vaisselle sur le dos 3 Application de - Maytag MDB7809AWB | Installation Instructions - Page 33
la borne. Ne pas utiliser un câble de rallonge. Le non-respect de ces instructions peut causer un décès, un incendie ou un choc électrique. 2 Cordon d'alimentation é . REMARQUE : Ne pas pré-torsader les brins de conducteurs. Installer le connecteur de fils en le faisant pivoter. Tirer doucement sur - Maytag MDB7809AWB | Installation Instructions - Page 34
vidéo de cette étape. Visiter www.maytag.com sous l'onglet FAQ. 4 Cordon d'alimentation un dégagement supplémentaire. On pourra ainsi installer le lave-vaisselle dans une ouverture d'encastrement du Ne pas brancher dans une prise avant que les instructions ne le spécifient. 34 1 2 3 Roulette - Maytag MDB7809AWB | Installation Instructions - Page 35
l'ouverture d'encastrement du placard AVERTISSEMENT Risque du poids excessif Utiliser deux personnes ou plus pour déplacer et installer le lave-vaisselle. Le non-respect de cette instruction peut causer une blessure au dos ou d'autre blessure. 1 Mise en position verticale du lave-vaisselle À l'aide - Maytag MDB7809AWB | Installation Instructions - Page 36
3 Vérification de la position de la canalisation d'eau et du tuyau d'évacuation REMARQUE : Les tendeurs des deux côtés du lavevaisselle doivent être fixés aux mêmes trous. 6 La porte s'ouvre et retombe Augmentation de la tension du ressort Vérifier que la canalisation d'eau se trouve sur le côté - Maytag MDB7809AWB | Installation Instructions - Page 37
l'autre côté du lave-vaisselle. Conseil utile : Pousser contre l'avant lave-vaisselle pour le soulever et pouvoir ajuster les pieds avant. Pour certaines installations, il peut être plus facile de régler le pied avant à l'aide d'une clé à douille hexagonale ou une clé à molette de 3/16". Méthode - Maytag MDB7809AWB | Installation Instructions - Page 38
se produit, répéter l'étape précédente. Au besoin, visiter le site Web pour une représentation vidéo de cette étape. Visiter www.maytag.com/drain sous l'onglet FAQ. 38 Raccordement au circuit d'évacuation 1 Raccordement du tuyau d'évacuation Bride verte Raccord de tuyau d'évacuation noir Tuyau - Maytag MDB7809AWB | Installation Instructions - Page 39
borne. Ne pas utiliser un câble de rallonge. Le non-respect de ces instructions peut causer un décès, un incendie ou un choc électrique. 2 Raccordement direct - 3 Raccordement direct - Raccordement des fils restants REMARQUE : Installer un connecteur de fils (homologation UL ou CSA). Tirer - Maytag MDB7809AWB | Installation Instructions - Page 40
Web pour une représentation vidéo de cette étape. Visiter www.maytag.com/electrical sous l'onglet FAQ. 4 Raccordement direct - Fixation du ). Suivre les instructions de l'ensemble. (Brides comprises dans l'ensemble). 2 Dépose du panier à vaisselle inférieur et installation d'une serviette Placer - Maytag MDB7809AWB | Installation Instructions - Page 41
inférieur. Au besoin, visiter le site Web pour une représentation vidéo de cette étape. Visiter www.maytag.com/anchoring sous l'onglet FAQ. Achever l'installation 1 Réinstallation des panneaux d'accès Isolant (sur certains modèles) Ouvrir la porte et vérifier que la distance entre l'ouverture - Maytag MDB7809AWB | Installation Instructions - Page 42
ensemble et les placer contre les pieds du lave-vaisselle. Réinstaller les vis à travers les trous du panneau d'accès et les un adaptateur. Ne pas utiliser un câble de rallonge. Le non-respect de ces instructions peut causer un décès, un incendie ou un choc électrique. 1 Cordon d'alimentation - Maytag MDB7809AWB | Installation Instructions - Page 43
Contrôle du fonctionnement ❏ Lire les instructions d'utilisation du lave-vaisselle fournies avec le lave-vaisselle. ❏ Vérifier que toutes les pièces ont été installées et qu'aucune étape n'a été omise. Vérifier la présence de tous les outils utilisés. ❏ Mettre le lave-vaisselle en marche et - Maytag MDB7809AWB | Installation Instructions - Page 44
-
 1
1 -
 2
2 -
 3
3 -
 4
4 -
 5
5 -
 6
6 -
 7
7 -
8
-
9
-
10
-
11
-
12
-
13
-
14
-
15
-
16
-
17
-
18
-
19
-
20
-
21
-
22
-
23
-
24
-
25
-
26
-
27
-
28
-
29
-
30
-
31
-
32
-
33
-
34
-
35
-
36
-
37
-
38
-
39
-
40
-
41
-
42
-
43
-
44
 |
 |
INSTALLATION INSTRUCTIONS
UNDERCOUNTER DISHWASHER
STAINLESS STEEL GIANT TUB MODELS
INSTRUCTIONS D'INSTALLATION
LAVE-VAISSELLE SOUS PLAN DE TRAVAIL
MODÈLES GÉANTS DE CUVE D’ACIER INOXYDABLE
Table of Contents . . . . . . . . . . . . . . . . . . . . . . . . . . . . . . . . . . . 2
Table des matières. . . . . . . . . . . . . . . . . . . . . . . . . . . . . . . . . . 23
W10199707A