Maytag MDB8959SKZ Owners Manual - Page 15
Warning
 |
View all Maytag MDB8959SKZ manuals
Add to My Manuals
Save this manual to your list of manuals |
Page 15 highlights
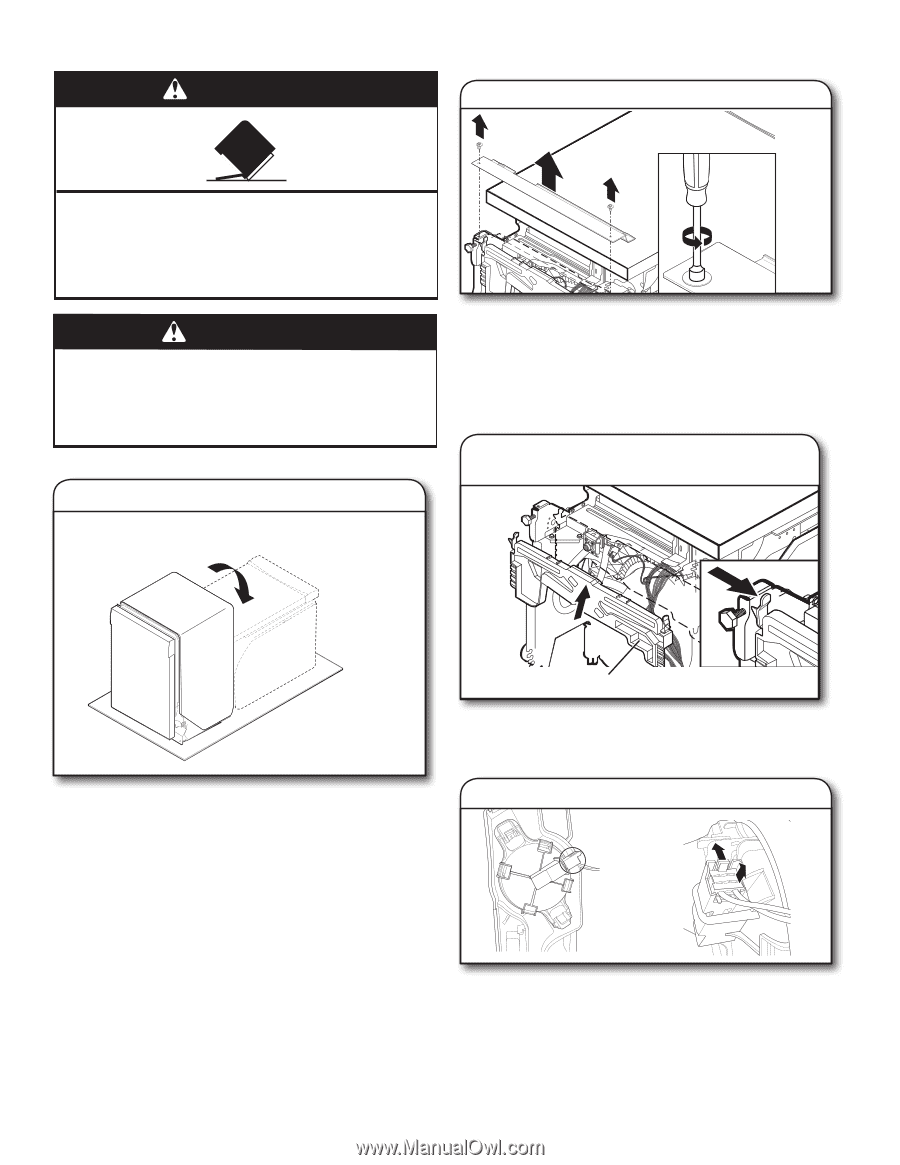
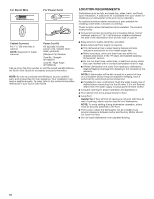
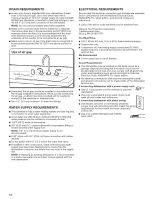
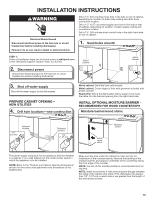
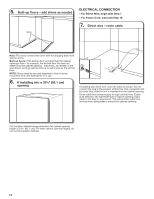
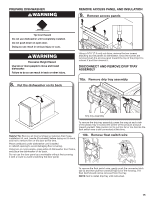
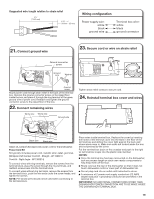
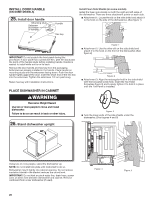
PREPARE DISHWASHER WARNING REMOVE ACCESS PANEL AND INSULATION 9. Remove access panels Tip Over Hazard Do not use dishwasher until completely installed. Do not push down on open door. Doing so can result in serious injury or cuts. WARNING Excessive Weight Hazard Use two or more people to move and install dishwasher. Failure to do so can result in back or other injury. 8. Put the dishwasher on its back Using a 5/16" (7.9 mm) nut driver, remove the two screws attaching access panels to dishwasher. Once the screws are removed push the access panel toward the top of the project to unhook it and then remove it. DISCONNECT AND REMOVE DRIP TRAY ASSEMBLY 10a. Remove drip tray assembly Drip tray assembly To remove the drip tray assembly, press the snap at each side of the plastic tray in toward the center of the product and pull toward yourself. Take caution not to pull too far or too hard as the float switch wire is still connected at this time. Helpful Tip: Remove all internal shipping material, drain hose, installation kit, and handle (if included,) before laying on it's back, and not to remove film on the door at this time. Place cardboard under dishwasher until installed in cabinet opening to avoid damaging floor covering. Using two or more people, grasp sides of dishwasher door frame, and place the dishwasher on its back. Do not use the door panel as a worktable without first covering it with a towel to avoid scratching the door panel. 10b. Remove float switch wire 1 2 To remove the float switch wire, gently push the connector latch tab (1) and then pull the connector (2) out of the housing. The float itself should not be removed from the tray. NOTE: Not to install drip tray until instructed. 15
-
 1
1 -
2
-
3
-
4
-
5
-
6
-
7
-
8
-
9
-
 10
10 -
 11
11 -
 12
12 -
 13
13 -
 14
14 -
 15
15 -
 16
16 -
 17
17 -
 18
18 -
 19
19 -
 20
20 -
21
-
22
-
23
-
24
-
25
-
26
-
27
-
28
-
29
-
30
-
31
-
32
-
33
-
34
-
35
-
36
-
37
-
38
-
39
-
40
-
41
-
42
-
43
-
44
-
45
-
46
-
47
-
48
-
49
-
50
-
51
-
52
-
53
-
54
-
55
-
56
-
57
-
58
-
59
-
60
-
61
-
62
-
63
-
64
-
65
-
66
-
67
-
68
-
69
-
70
-
71
-
72
-
73
-
74
-
75
-
76
-
77
-
78
-
79
-
80
-
81
-
82
-
83
-
84
 |
 |