Maytag MDBH969AWS Owners Manual - Page 7
Dishwasher Features - installation
 |
View all Maytag MDBH969AWS manuals
Add to My Manuals
Save this manual to your list of manuals |
Page 7 highlights
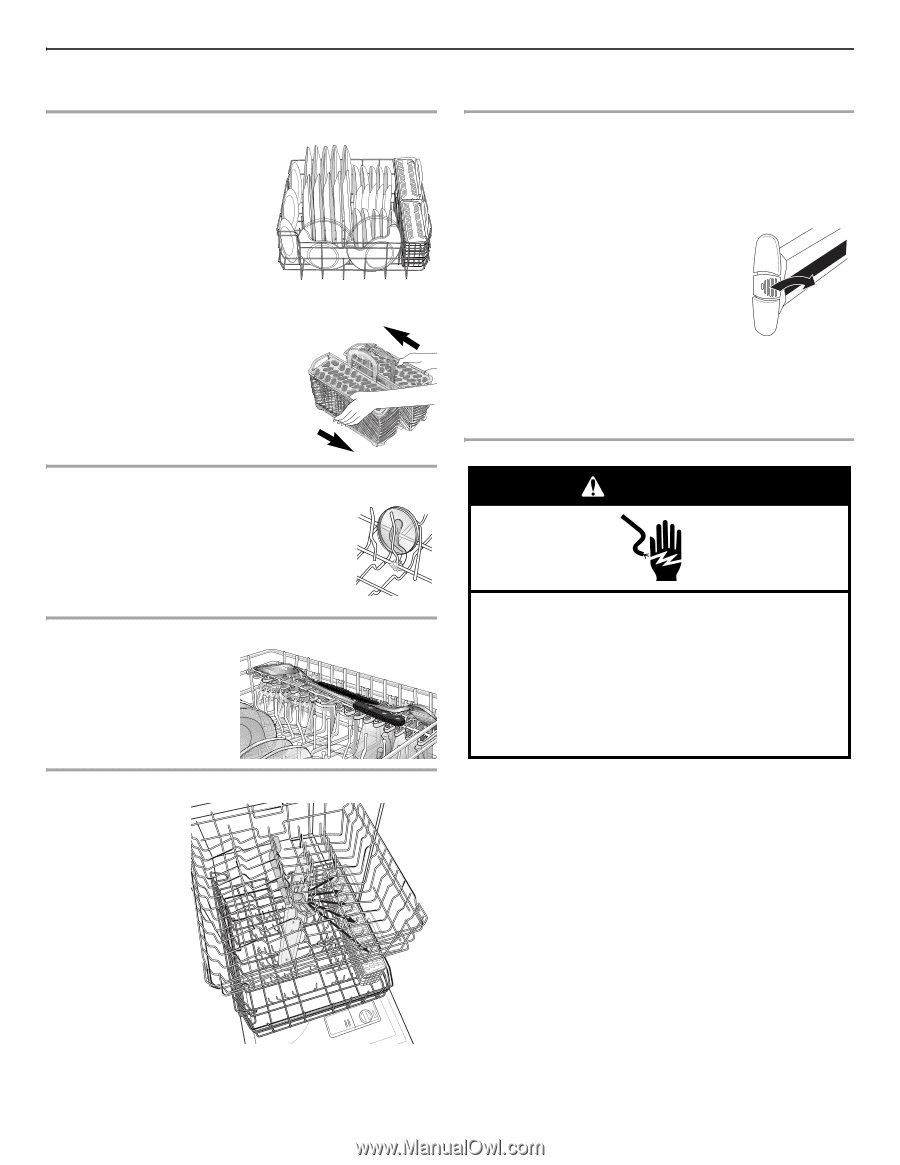
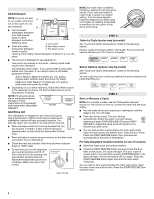
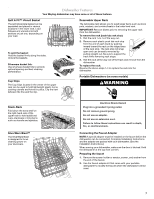
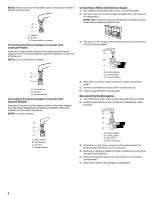
Dishwasher Features Your Maytag dishwasher may have some or all of these features. Split & Fit™ Utensil Basket The split silverware basket can be separated and placed in various locations in the lower rack. Load flatware and utensils into both sections or just one, depending on your load. To split the basket: Hold the basket firmly along the sides. Unlock the baskets. Silverware basket lids: Use silverware basket lids to provide optimal spacing and best cleaning performance. Cup Clips The Cup Clips located in the center of the upper rack can be used to hold lightweight plastic items, cooking utensils and knives in place. Clip the item between the tine and the clip. Removable Upper Rack The removable rack allows you to wash larger items such as stock pots, roasters, and cookie sheets in the lower level rack. IMPORTANT: Remove dishes prior to removing the upper rack from the dishwasher. To remove the rack (push tab rack stop): 1. Roll the rack ¹⁄₃ to ¹⁄₂ of the way out. 2. Remove each plastic push tab rack stop from the end of each track by pushing inward toward the rack on the ridged area of the rack stop. The rack stop will snap open and can be easily removed by pulling straight out. Be sure to support the track while removing rack stops. 3. Roll the rack all the way out of the track and remove from the dishwasher. To replace the rack: Reverse the above steps 1-3 to replace the rack into the dishwasher. Portable Dishwashers (on some models) WARNING Stack-Rack Fold down the extra shelf on the right-hand side of the upper rack to hold additional cups, stemware or long items such as utensils and spatulas. SilverWare Blast™ The SilverWare Blast is designed to focus cleaning power on your silverware. Electrical Shock Hazard Plug into a grounded 3 prong outlet. Do not remove ground prong. Do not use an adapter. Do not use an extension cord. Failure to follow these instructions can result in death, fire, or electrical shock. Connecting the Faucet Adapter NOTE: A special adapter must be installed on the faucet before the dishwasher can be connected. Complete Installation Instructions and the adapter are packed with your dishwasher. (See the Installation Instructions.) When moving your dishwasher, make sure the door is latched. Hold the dishwasher at the top front corners. Preparing the faucet 1. Remove the screen holder or aerator, screen, and washer from the end of the faucet. 2. Use the faucet adapter kit that came with your portable dishwasher to modify the faucet where the dishwasher will be used. 7
-
 1
1 -
 2
2 -
 3
3 -
 4
4 -
 5
5 -
 6
6 -
 7
7 -
 8
8 -
 9
9 -
 10
10 -
 11
11 -
 12
12 -
13
-
14
-
15
-
16
-
17
-
18
-
19
-
20
-
21
-
22
-
23
-
24
 |
 |