Maytag MEC4536WC Owners Manual - Page 5
Coil Elements and Burner Bowls, Home Canning
 |
UPC - 883049185095
View all Maytag MEC4536WC manuals
Add to My Manuals
Save this manual to your list of manuals |
Page 5 highlights
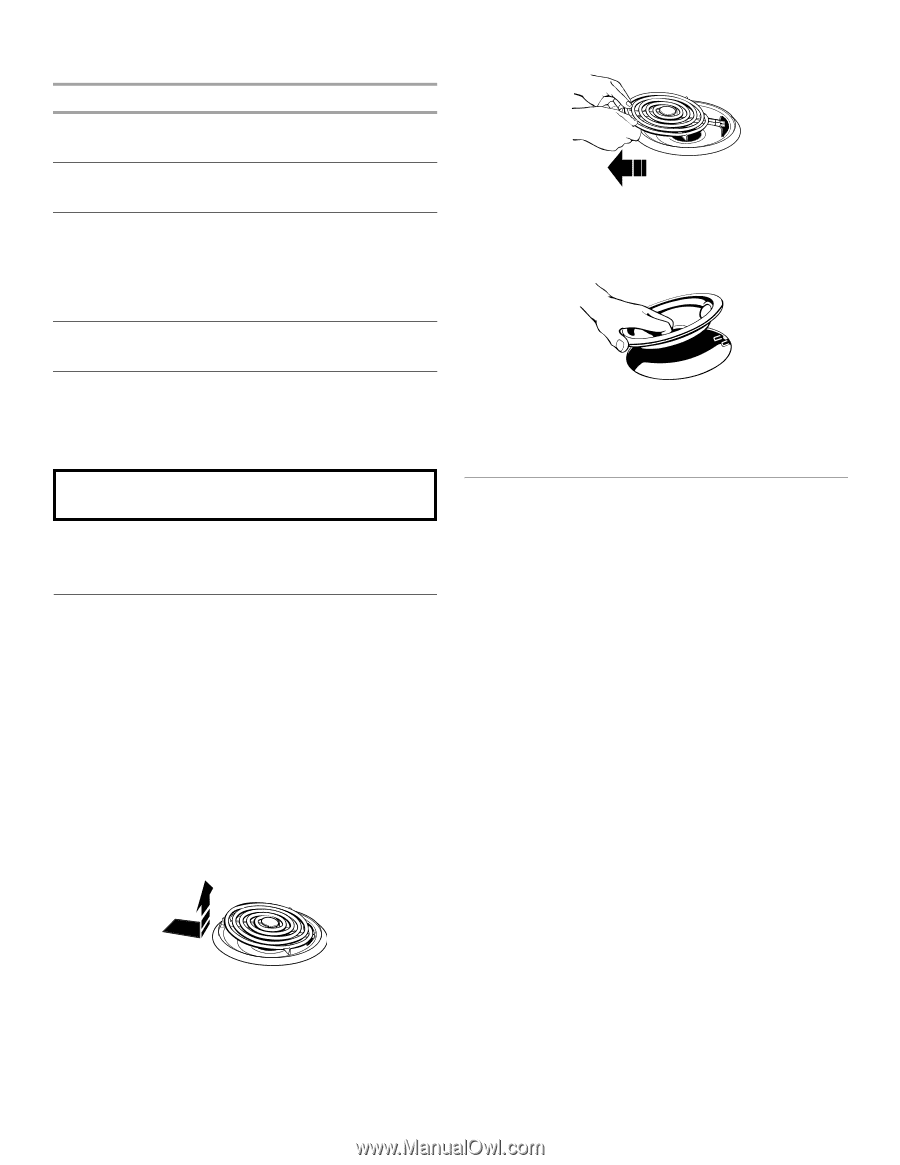
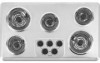
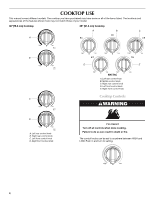
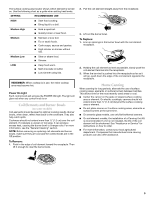
The surface cooking area locator shows which element is turned on. Use the following chart as a guide when setting heat levels. SETTING RECOMMENDED USE HIGH ■ Start food cooking. ■ Bring liquid to a boil. Medium High ■ Hold a rapid boil. ■ Quickly brown or sear food. Medium ■ Maintain a slow boil. ■ Fry or sauté foods. ■ Cook soups, sauces and gravies. ■ High simmer or simmer without lids. Medium Low ■ Stew or steam food. ■ Simmer. LOW ■ Keep food warm. ■ Melt chocolate or butter. ■ Low simmer using lids. REMEMBER: When cooktop is in use, the entire cooktop area may become hot. Power On Light Each control knob will activate the POWER ON light. The light will glow red when any control knob is on Coil Elements and Burner Bowls (on some models) Coil elements should be level for optimal cooking results. Burner bowls, when clean, reflect heat back to the cookware. They also help catch spills. Cookware should not extend more than ½" (1.3 cm) over the coil element. If cookware is uneven or too large, it can produce excess heat, causing the burner bowl to change color. For more information, see the "General Cleaning" section. NOTE: Before removing or replacing coil elements and burner bowls, make sure they are cool and the control knobs are in the Off position. To Remove: 1. Push in the edge of coil element toward the receptacle. Then lift it enough to clear the burner bowl. 2. Pull the coil element straight away from the receptacle. 3. Lift out the burner bowl. To Replace: 1. Line up openings in the burner bowl with the coil element receptacle. 2. Holding the coil element as level as possible, slowly push the coil element terminal into the receptacle. 3. When the terminal is pushed into the receptacle as far as it will go, push down the edge of the coil element opposite the receptacle. Home Canning When canning for long periods, alternate the use of surface cooking areas, elements or surface burners between batches. This allows time for the most recently used areas to cool. ■ Center the canner on the grate or largest surface cooking area or element. On electric cooktops, canners should not extend more than ½" (1.3 cm) beyond the surface cooking area or element. ■ Do not place canner on 2 surface cooking areas, elements or surface burners at the same time. ■ On ceramic glass models, use only flat-bottomed canners. ■ On coil element models, the installation of a Canning Unit Kit is recommended. If a kit is not installed, the life of the coil element will be shortened. See "Assistance or Service" for instructions on how to order. ■ For more information, contact your local agricultural department. Companies that manufacture home canning products can also offer assistance. 5
-
 1
1 -
 2
2 -
 3
3 -
 4
4 -
 5
5 -
 6
6 -
 7
7 -
 8
8 -
 9
9 -
 10
10 -
 11
11 -
12
-
13
-
14
-
15
-
16
 |
 |