Maytag MED4500M Owners Manual - Page 18
Install Vent System, Connect Inlet Hoses, Additional Elbows
 |
View all Maytag MED4500M manuals
Add to My Manuals
Save this manual to your list of manuals |
Page 18 highlights
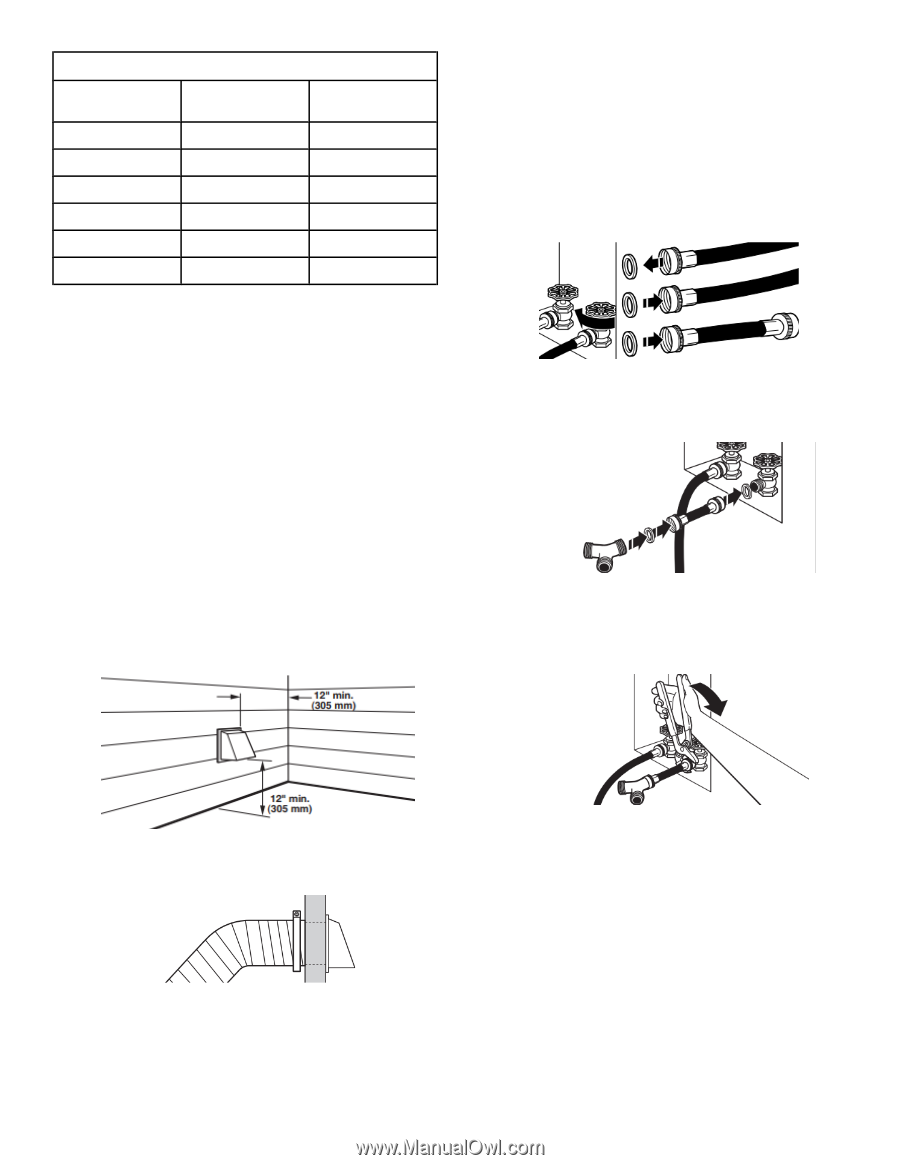
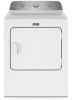
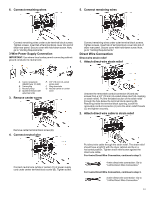
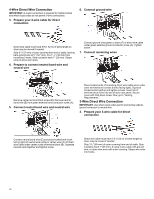
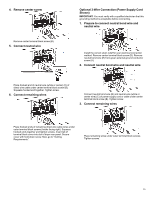
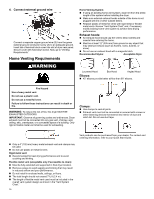
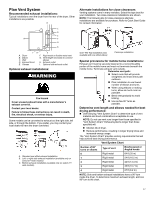
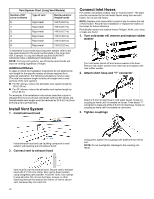
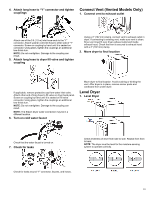
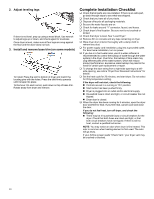
Vent System Chart (Long Vent Models) Number of 90° turns or elbows Type of vent Box/louvered or Angled hoods 0 Rigid metal 160 ft (48.8 m) 1 Rigid metal 150 ft (45.7 m) 2 Rigid metal 140 ft (42.7 m) 3 Rigid metal 130 ft (39.6 m) 4 Rigid metal 120 ft (36.6 m) 5 Rigid metal 110 ft (33.5 m) To determine if your model has a long vent system, refer to the type code located on the serial number plate in the inner door well. Example: A Long Vent Model would be BJAV-NATXXXXXXX-XXX or BWFB-NAT-XXXXXXX-XXX. NOTE: For long vent systems, use of box/louvered hoods will improve venting regardless of length. Additional Elbows In cases in which the Installation Instructions do not address the vent length for the specific number of elbows required for a particular application, the following calculations may be used. (The total vent system length includes all straight and curved portions of the vent system): � For 90° elbows, reduce the allowable vent system length by 10 ft (3.05 m). � For 45° elbows, reduce the allowable vent system length by 6 ft (1.83 m). For example, if the Installation Instructions state that a dryer is allowed 40 ft (12.2 m) of total vent length with two 90° bends, the total allowable vent length would be reduced by 20 ft (6.0 m) (from 40 ft [12.2 m] to 20 ft [6.0m]). Install Vent System 1. Install exhaust hood Connect Inlet Hoses For vented, non-steam models, skip to "Connect Vent." The dryer must be connected to the cold water faucet using the new inlet hoses. Do not use old hoses. NOTE: Replace inlet hoses after 5 years of use to reduce the risk of hose failure. Record hose installation or replacement dates on the hoses for future reference. Periodically inspect and replace hoses if bulges, kinks, cuts, wear, or leaks are found. 1. Turn cold water off, remove and replace rubber washer Turn cold water faucet off and remove washer inlet hose. Remove old rubber washer from inlet hose and replace with new rubber washer. 2. Attach short hose and "Y" connector Attach 2 ft (0.6 m) inlet hose to cold water faucet. Screw on coupling by hand until it is seated on faucet. Then attach "Y" connector to male end of the 2 ft (0.6 m) inlet hose. Screw on coupling by hand until it is seated on connector. 3. Tighten couplings Install exhaust hood and use caulking compound to seal exterior wall opening around exhaust hood. 2. Connect vent to exhaust hood Using pliers, tighten the couplings with additional two-thirds turn. NOTE: Do not overtighten. Damage to the coupling can result. Vent must fit over the exhaust hood. Secure vent to exhaust hood with 4" (102 mm) clamp. Run vent to dryer location using straightest path possible. Avoid 90° turns. Use clamps to seal all joints. Do not use duct tape, screws, or other fastening devices that extend into interior of vent to secure vent, because they can catch lint. 18
-
 1
1 -
2
-
3
-
4
-
5
-
6
-
7
-
8
-
9
-
10
-
11
-
12
-
 13
13 -
 14
14 -
 15
15 -
 16
16 -
 17
17 -
 18
18 -
 19
19 -
 20
20 -
 21
21 -
 22
22 -
 23
23 -
24
-
25
-
26
-
27
-
28
-
29
-
30
-
31
-
32
-
33
-
34
-
35
-
36
-
37
-
38
-
39
-
40
-
41
-
42
 |
 |