Maytag MED8200FW Installation Guide - Page 23
Remove door from dryer, Move the door strike, Reinstall door on dryer, Remove inner door from outer
 |
View all Maytag MED8200FW manuals
Add to My Manuals
Save this manual to your list of manuals |
Page 23 highlights
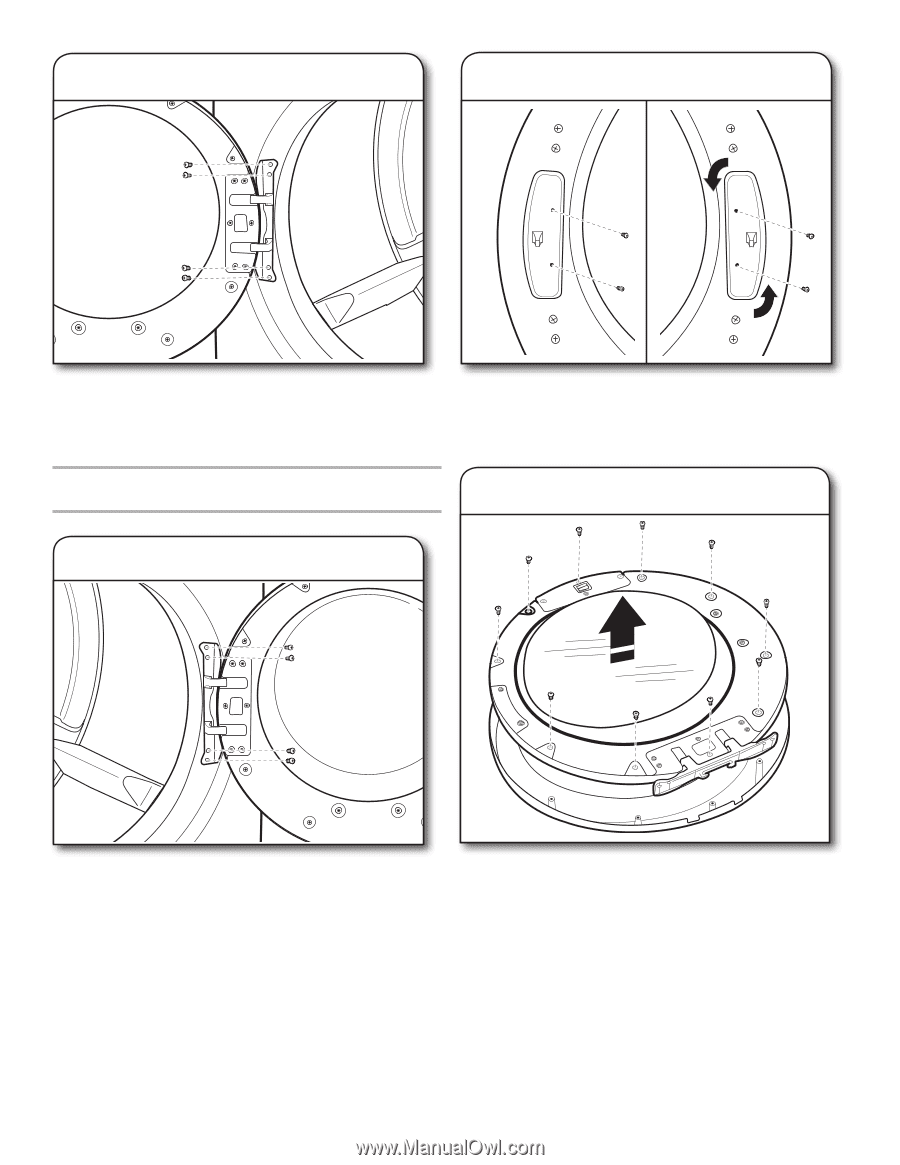
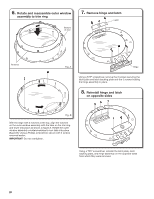
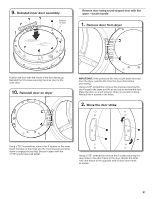
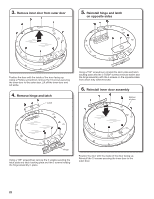
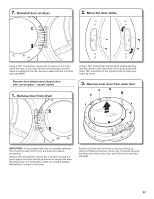
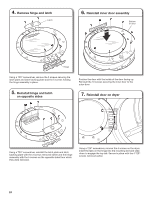
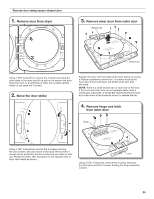
7. Reinstall door on dryer 2. Move the door strike Using a T25® screwdriver, remove the 4 screws on the dryer. Insert the tabs on the hinge into the mounting slot and slide down to engage the top tab. Secure in place with the 4 screws removed earlier. Reverse door swing round-shaped door with curved glass - double handle Using a T25® screwdriver, remove the 2 screws securing the door strike to the door frame of the dryer. Rotate the strike 180° and attach to the opposite side of dryer door frame as shown. 3. Remove inner door from outer door 1. Remove door from dryer IMPORTANT: If the protective film has not yet been removed from the dryer, peel the film from the dryer door before proceeding. Using a T25® screwdriver, remove the 4 screws securing the door hinge to the dryer and lift up and out to remove the door. Place the door on a soft towel or other non-scratch surface. Reinstall the 4 screws in the holes. Position the door with the inside of the door facing up. Using a Phillips screwdriver, remove the 10 screws securing the inner door to the outer door. Lift off the inner door and set aside. 23
-
 1
1 -
2
-
3
-
4
-
5
-
6
-
7
-
8
-
9
-
10
-
11
-
12
-
13
-
14
-
15
-
16
-
17
-
 18
18 -
 19
19 -
 20
20 -
 21
21 -
 22
22 -
 23
23 -
 24
24 -
 25
25 -
 26
26 -
 27
27 -
 28
28
 |
 |