Maytag MES5875BAS Installation Instructions
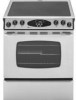
Maytag MES5875BAS - 30 Inch Slide-In Electric Range Manual
 |
UPC - 719881153292
View all Maytag MES5875BAS manuals
Add to My Manuals
Save this manual to your list of manuals |
Maytag MES5875BAS manual content summary:
- Maytag MES5875BAS | Installation Instructions - Page 1
Electric Slide-In Range Cuisinière électrique encastrable/Estufa eléctrica deslizante Installation Instructions/Instructions d'installation/Instrucciones de Instalación. INSTALLER: Leave these instructions with the appliance./INSTALLATEUR : Laissez ces instructions avec l'appareil./ INSTALADOR: - Maytag MES5875BAS | Installation Instructions - Page 2
Electric Slide-In Range INSTALLATION INSTRUCTIONS PLEASE KEEP THIS MANUAL FOR FUTURE REFERENCE This manual is intended to assist in the initial installation and adjustments of the range. • Only qualified personnel should install or service this range. • Read "Safety Instructions" in Use & Care book - Maytag MES5875BAS | Installation Instructions - Page 3
floor by sliding rear leveling leg into the anti-tip bracket. WARNING DISCONNECT ELECTRICAL SUPPLY BEFORE SERVICING THE APPLIANCE. SERVICE-PARTS INFORMATION When your range requires service or replacement parts, contact your dealer or authorized service agency. Please give the complete model and - Maytag MES5875BAS | Installation Instructions - Page 4
Lisez les « Instructions de sécurité » dans le guide d'utilisation et pour permettre la fixation du support ANTIRENVERSEMENT au mur ou au ou conformément aux codes locaux. Au Canada, la cuisinière doit être install doit être installée conformément au National Electrical Code (NEC) ANSI/NFPA nº 70 - - Maytag MES5875BAS | Installation Instructions - Page 5
procedures to remove appliance for servicing: 1. Faites glisser la cuisinière en avant pour la dégager du support antirenversement. 2. Débranchez l'alimentation ères avec un four surélevé ou un micro-ondes. Les instructions d'installation du four surélevé précisent la dimension minimale acceptable - Maytag MES5875BAS | Installation Instructions - Page 6
INSTRUCCIONES DE INSTALACIÓN POR FAVOR GUARDE ESTE MANUAL PARA REFERENCIA FUTURA Este manual está diseñado para asistirlo en la en la placa de información ubicada en la solapa que se encuentra en la parte central trasera del protector trasero. Obtenga la ubicación de la placa de información - Maytag MES5875BAS | Installation Instructions - Page 7
equipada con todas las características que se indican en este manual. IMPORTANTE: Guarde esta información para el inspector local. Adcoermmpabarurieosdtsible se puede instalar sin espacios de despeje contra superficies combustibles en la parte trasera y a los costados de la misma por debajo de la - Maytag MES5875BAS | Installation Instructions - Page 8
sin esmalte, S= inoxidable, W=blanco) a su distribuidor. 120/240 V or 120/208 V Grounded Electrical Outlet in the hatched area. Outlet MUST be flush. Nothing located in hatched area can extend more than 2" from wall or range will not slide all the way back. Prise électrique de mise à la terre de 120 - Maytag MES5875BAS | Installation Instructions - Page 9
D Guide Instructions 5/16" Included./Compris./Se incluye. Not Included./Non inclus./No se incluye. Tools Needed./Outils nécessaires./ Herramientas Necesarias. Identify Electrical Connection/Identifiez le raccordement électrique/Identifique la conexión eléctrica Note: Some models are - Maytag MES5875BAS | Installation Instructions - Page 10
./ Percez des trous de 1/8 po (3 mm). Installez le support ANTIRENVERSEMENT au mur ou au sol avec deux vis./Taladre agujeros hexagonal. 6 If you have electrical connection: Si vous avez un raccordement to / Passez à / Vaya a B Pull service cord through./Passez le cordon électrique ici./Tire del - Maytag MES5875BAS | Installation Instructions - Page 11
- Only a power cord rated at 240 volts minimum. 40 and marked for use with ranges shall be used. REMARQUE : parte o la totalidad de la cinta de conexión a tierra DEBE ser cortada y descartada. B3 2 Remove grounding screw, pull service alambre de tierra. Connect white neutral wire to middle - Maytag MES5875BAS | Installation Instructions - Page 12
Conecte los alambres restantes. NOTE: cord replacement - Only a power cord rated at 240 volts minimum. 40 amperes or 50 amperes power supply cord diameter connection opening, with closed loop terminals and marked for use with ranges shall be used. REMARQUE : Remplacement du cordon - N'utilisez qu'un - Maytag MES5875BAS | Installation Instructions - Page 13
NOTE: The copper ground strap MUST stay connected between middle post and range. REMARQUE : La bande en cuivre de mise à la terre DOIT eléctrico, consulte los pasos de la opción especial a a la g. D1 D2 C Part of copper ground strap MUST be cut out and removed./Une partie de la bande en cuivre - Maytag MES5875BAS | Installation Instructions - Page 14
Rouge/ Rojo Connect white neutral wire to pour conduit/Opción del conducto Note: Strain relief for service cord or conduit MUST be attached to the conduit plate./ range./Retirez les vis du grand panneau situé à l'arrière de la cuisinière./Retire los tornillos del panel trasero grande en la parte - Maytag MES5875BAS | Installation Instructions - Page 15
ÉCWGEIQCTR!EATUURCRRESAICTCEESAOLORD Slide conduit plate on rear of range./Replacez les vis instalar los tornillos del panel trasero grande en la parte trasera de la estufa. Install Strain Relief for trifilar o tetrafilar. Note: Strain relief for service cord or conduit MUST be attached to the - Maytag MES5875BAS | Installation Instructions - Page 16
la altura de la encimera (vea las dimensiones) para permitir que la parte superior de la estufa pase por la misma. Instalador: tenga cuidado de 14 Slide range into position./Repoussez la cuisinière en place/Deslice la estufa a su lugar definitivo. Make sure flexible connector and electrical cord - Maytag MES5875BAS | Installation Instructions - Page 17
15 16 Check leg position in bracket./Vérifiez que le pied est bien sous la bride./ Verifique la posición del tornillo en el soporte. 17 Turn on power source. Ouvrez le courant. Encienda el suministro eléctrico. Replace storage drawer./Remettez le tiroir de rangement./Vuelva a instalar el cajón de
-
 1
1 -
 2
2 -
 3
3 -
 4
4 -
 5
5 -
 6
6 -
 7
7 -
8
-
9
-
10
-
11
-
12
-
13
-
14
-
15
-
16
-
17
 |
 |

Printed in USA
©2005 Maytag Corporation
REV 0-10/05 8101P716-60
INSTALLER: Leave these instructions with the appliance./INSTALLATEUR : Laissez ces instructions avec l’appareil./
INSTALADOR: Deje estas instrucciones con el electrodoméstico.
Electric Slide-In Range
Cuisinière électrique encastrable/Estufa eléctrica deslizante
Installation Instructions/Instructions d’installation/Instrucciones de Instalación
.
8101p716.pdf | Imported from Cleveland on 1/17/2007